Are you looking for the best WordPress local development environment?
If you’re a WordPress developer, you know how important it is to have a reliable testing environment to develop, test, and debug your projects before deploying them to a live server.
Localhost development environments allow you to test your WordPress sites and plugins without affecting your live site.
However, finding a good and free localhost development environment can be a daunting task. That’s why, in this blog post, we have compiled a list of the best WordPress free localhost development testing environments that you can use to create and test your WordPress sites without any hassle.
These tools are easy to use, offer robust features, and, most importantly, won’t cost you a dime!
So, whether you’re a beginner or an experienced WordPress developer, keep reading to discover which of these tools will suit your needs the best.
Stay ahead of the curve with our exclusive insights and analysis on the latest WordPress trends and techniques - subscribe to our newsletter today.
What is localhost?
A localhost development testing environment is a local web server installed on your computer that allows you to create, test, and modify WordPress sites without having to connect to a live server.
This means you can develop WordPress sites and test functionality on your local machine without affecting the live website.
A local host development environment provides developers a secure, controlled environment to test new themes, plugins, and features before deploying them to a live server.
This helps to prevent errors and bugs that may arise during the development process, ultimately improving the overall quality of the finished product.
What is the Importance of Using Localhost for WordPress Development?
Using a localhost for WordPress development provides several important benefits for developers. Here are some of the key reasons why using a localhost is important for WordPress development:
- No risk to live site: When you develop WordPress sites or plugins directly on a live website, there’s always a risk of breaking something, which can be catastrophic for your website’s reputation and visitors. A localhost environment enables you to test and experiment without putting your live site at risk.
- Faster development: Localhost development enables faster development by eliminating the need to upload changes to the live site after each iteration. Developers can work on the project from the comfort of their local machine, making it faster and more efficient to write code, make changes, and test functionality.
- Offline Development: With a localhost, you can work on your WordPress projects even when you’re offline or don’t have an internet connection. This allows you to work on your projects without any disruption from external factors such as a slow or intermittent internet connection.
- Replicate Hosting Environment: Localhost environments are designed to replicate your hosting environment, which makes it easier to identify and fix problems before deploying your site to the live server.
If you want to enhance the functionality of your WordPress editor, check out The Plus Blocks for Gutenberg for 85+ Advanced Blocks.
TLDR: Best WordPress Local Host Tools are
- XAMPP
- Local by Flywheel
- DevKinsta
- Bitnami Local WordPress VM
- WampServer
Each of these environments offers its own advantages, and the best choice for a particular developer will depend on their specific needs and preferences.
1. XAMPP
XAMPP is a free and open-source cross-platform web server solution that allows developers to create a local testing environment for WordPress.
XAMPP includes everything you need to set up a local web server, including Apache, MySQL, PHP, and Perl, making it easy to install WordPress locally and test your site’s functionality before deploying it to a live server.
With XAMPP, you can install and configure WordPress in just a few clicks, making it an ideal choice for developers who want to set up a local WordPress site quickly and easily.
XAMPP also comes with a variety of tools and features that allow you to manage your local server and database, such as phpMyAdmin, which makes it easy to manage your MySQL databases.
It also supports web scripting languages like HTML, JavaScript, PHP, and Perl. XAMPP is an excellent choice for web developers, as it is widely used and well-supported.
Features of using XAMPP
- Easy to Install: XAMPP is an easy-to-install Apache distribution that comes with MariaDB, PHP, and Perl. It is simple to set up and requires minimal configurations.
- Cross-Platform: XAMPP is available for multiple platforms, including Windows, Linux, and MacOS, making it accessible to many users.
- Supports Multiple Languages: XAMPP supports multiple programming languages, including PHP, Perl, and Python, making it suitable for many web development tools projects.
- Local Testing Environment: XAMPP provides a local testing environment for web developers to test their projects before deploying them to a live server.
- Open-Source: XAMPP is open-source software that is free to use and modify.
Step-by-step installation guide for XAMPP
- Download XAMPP from the official website apachefriends.org/index.html
- Run the XAMPP installer file and select the components you want to install. (Apache, MariaDB, PHP, Perl)
- Select the location where you want XAMPP to be installed. The default location is C:\xampp.
- Wait for the installation process to complete. It may take a few minutes.
- After installation, launch the XAMPP control panel.
- Start Apache and MariaDB by clicking the “Start” button next to each module.
- Open your web browser and navigate to “Localhost” to verify that XAMPP works correctly.
- To access the XAMPP dashboard, navigate to “localhost/dashboard” in your web browser.
- If everything is working correctly, you are ready to start using XAMPP to develop your web applications.
Note: For MacOS and Linux, the installation process is similar, but there may be some differences in the steps, so it’s recommended to refer to the XAMPP documentation for specific instructions.
2. Local by Flywheel
Local by Flywheel is one of the best development environment for WordPress that makes creating, running, and managing local WordPress sites easy.
It provides a streamlined workflow for developers, allowing them to get up and running with local WordPress sites quickly.
With its intuitive user interface, developers can easily manage and configure their sites and add, remove, and update plugins and themes. Additionally, Local by Flywheel supports multiple users and makes it easy to collaborate with other developers.
Features of Local by Flywheel
- Cloud Backups: Keep your work area organized and your website files secure by quickly moving them from Local to Google Drive or Dropbox.
- Image Optimizer: The Add-on enhances your website’s mobile experience for faster load times and speeds up the desktop experience, resulting in improved overall website performance. It also scans your local site for images and reduces their file sizes without relying on cloud services.
- One Click Admin: One Click Admin in Local by Flywheel is a feature that allows you to easily access the WordPress dashboard of a website hosted on the Local by Flywheel development environment.
- SSH & CLI: This is a local development environment for WordPress. It allows developers and designers to build and test their websites on their own computers before deploying them to a live server. SSH and CLI are two tools that developers and system administrators commonly use to manage servers and perform advanced administrative tasks.
- Log files: Log files in Local by Flywheel refer to the records of activity and events generated by the local development environment for WordPress.
Step-by-step installation guide for Local by Flywheel
- Download and install Local by Flywheel: Go to the Local by Flywheel website and download the latest version of the software for your operating system. Once the download is complete, double-click the installer file to begin the installation process.
- Launch Local by Flywheel: After the installation, launch the application and sign in or create an account if you don’t already have one.
- Create a new site: Click the “Add Site” button in the Local by Flywheel dashboard to create a new site. Enter a name for your site, select a region, and choose a WordPress version.
- Choose your environment: Next, select the environment you want to use for your sites, such as PHP, Apache, and MySQL. You can also customize these settings if needed.
- Customize your site: Once the environment is set up, you can customize your site by installing plugins, uploading themes, and making any other changes you need.
- Launch your site: When you’re ready, click the “Start Site” button to launch your local development environment. You can now access your site in your web browser and start making changes.
- Manage your sites: You can manage your local development sites from the Local by Flywheel dashboard, including starting and stopping sites, accessing site logs, and making backups.
Looking to host Google fonts on your WordPress site? Here are The 3 Best Ways To Host Google Fonts Locally.
3. DevKinsta
DevKinsta makes it a breeze! You can create a single or Multisite WordPress site with just one click, complete with Nginx, MariaDB, and more. Local database and email management tools make developing themes, plugins, and custom sites on your local device super easy.
It is the best local server for WordPress that helps website developers create and test their WordPress websites on their own computers without needing to publish them online.
This is helpful because it allows developers to experiment with their code and test new features without affecting the live website.
Whenever you’re ready to make your site live, you can push it directly to Kinsta. Time to get started–the possibilities are endless!
Features of using DevKinsta
- Database management: DevKinsta provides easy and seamless management of your WordPress database, allowing you to create, edit, and delete databases and users from within the platform. This feature simplifies the process of managing your database and eliminates the need for third-party database management tools.
- Work with HTTPS locally: DevKinsta supports HTTPS, which is an essential feature for secure communication between your website and users. With DevKinsta, you can test your WordPress site locally with HTTPS enabled, ensuring that your site is secure and compliant with modern web standards.
- Built-in email testing: DevKinsta includes a built-in email testing feature that allows you to test email functionality within your WordPress site. With this feature, you can test email notifications, password resets, and other email-related functionality to ensure that they’re working as expected.
- WordPress error logging: DevKinsta provides built-in error logging that allows you to monitor and debug any errors that may arise within your WordPress site. This feature simplifies the process of identifying and fixing errors, which can help to improve the overall quality and reliability of your site.
- Available in 10 languages: DevKinsta is available in 10 languages, making it a flexible and accessible option for developers around the world. With this feature, developers can work in their preferred language, which can improve productivity and efficiency when working on WordPress projects.
Step-by-step installation guide for DevKinsta:
- First, download the DevKinsta installer by visiting the official website devkinsta.com/
- Run the DevKinsta installer by double-clicking on the downloaded file.
- Please follow the instructions in the installation wizard to finish the installation process.
- Once the installation is complete, launch DevKinsta from the Start menu or the Applications folder (MacOS).
- In DevKinsta, click the “New Site” button to create a new development environment for your WordPress website.
- Fill in the details for your new development environment, such as the site name, PHP version, and database information.
- Click on the “Create Site” button to create your development environment.
- Wait for DevKinsta to set up the development environment, which may take a few minutes.
- Once the development environment is set up, you will be taken to the WordPress dashboard for your new site.
- You can now start developing your WordPress website locally on DevKinsta.
That’s it! You have successfully installed and set up DevKinsta for local WordPress development.
Securing your site is one of the most important tasks. Check the 5 Best WordPress Security Plugins to Protect Your Site.
4. Bitnami Local WordPress VM
Bitnami Local WordPress VM is a virtual machine solution that allows developers to create a self-contained, isolated local testing environment for WordPress. This solution runs on top of a virtualization platform like VirtualBox or VMware, making it easy to set up and use on any operating system.
Features of Bitnami Local WordPress VM
- One-click installation: Bitnami Local WordPress VM can be set up in just one click, making it quick and easy to create a local testing environment for WordPress.
- Self-contained environment: Bitnami Local WordPress VM runs in an isolated environment so that it won’t interfere with any other software or applications running on your computer.
- Pre-configured software stack: Bitnami Local WordPress VM comes with all the necessary software and tools that are required to run WordPress, including Apache, MySQL, PHP, and WordPress itself.
- Automatic updates: Bitnami Local WordPress VM is configured to automatically check for and install updates, ensuring you always have the latest software and security patches installed.
- Multiple VM configurations: Bitnami Local WordPress VM comes with several pre-configured VM configurations, including LAMP, WAMP, and MAMP, making it easy to choose the best configuration for your needs.
Step-by-step installation guide for Bitnami WordPress Stack:
- Download and install a virtualization platform: Before you can use Bitnami Local WordPress VM, you’ll need to download and install a virtualization platform like VirtualBox or VMware on your computer.
- Download the Bitnami Local WordPress VM: Next, you’ll need to download the Bitnami Local WordPress VM from the official Bitnami website.
- Import the Bitnami Virtual Machine: Once the download is complete, you can import the Bitnami Virtual Machine into your virtualization platform. To do this, open your virtualization platform and choose the “Import Appliance” option from the File menu. Then, select the downloaded Bitnami Virtual Machine file and follow the prompts to import it.
- Start the Bitnami Virtual Machine: Once the Bitnami Virtual Machine is imported, you can start it by selecting it in the list of available virtual machines and clicking the “Start” button.
- Access the WordPress installation: Once the virtual machine is up and running, you can access the WordPress installation by opening a web browser and navigating to the IP address assigned to the virtual machine. You can find the IP address by clicking on the Bitnami icon in the virtual machine and selecting “Go to Application”. The IP address will be listed on the page that opens.
- Log in to WordPress: Once you’ve accessed the WordPress installation, you can log in using the default username and password provided in the Bitnami documentation. You can start setting up your WordPress site as you would with any other installation.
Note: This guide provides a general overview of the installation process for Bitnami WordPress Stack. For more detailed information and instructions, please take a look at the Bitnami documentation.
5. WampServer
WampServer is an open-source web development platform for Windows.WAMP is a tool used for Windows that lets you test WordPress on your own computer.
It is considered one of the best localhost server that has different parts, like Apache (which serves web pages), MySQL (which stores a website’s data), and PHP (which lets WordPress communicate with the database).
When you download WAMP, you can try out new features for your website without actually changing your live website. This is really helpful for people who work on websites, like developers, designers, and website owners. You can also use WAMP to see how well your website runs with different codes without paying for hosting.
Features of WampServer
- Supports multiple platforms: WampServer can be installed on Windows operating systems, making it accessible to a wide range of users.
- Includes all necessary components: WampServer comes with all the necessary components for web development, including Apache, PHP, and MySQL, so you don’t need to install each component individually.
- Easy to configure: WampServer provides a simple interface for configuring its components, allowing you to set up your development environment quickly.
- Multiple PHP versions: WampServer supports multiple versions of PHP, which makes it easier for developers to test their code with different versions and ensure compatibility.
- Database management: WampServer includes a user-friendly interface for managing your database details, making it easy to create, edit, and manage your data.
Step-by-step installation guide of WampServer:
- Download the latest version of WampServer from the official website.
- Double-click the downloaded installer to start the installation process.
- You may be prompted to choose a language for the installation. Select your preferred language and click “OK”.
- Read and accept the license agreement, then click “Next”.
- Choose the destination folder where you want to install WampServer, then click “Next”.
- Choose the components you want to install. By default, all components are selected so that you can click “Next”.
- Choose the default browser you want to use with WampServer, then click “Next”.
- Choose whether to create shortcuts for WampServer and its components, then click “Next”.
- Review the installation settings, then click “Install” to begin the installation process.
- The installation process may take a few minutes. Once it’s complete, click “Finish” to exit the installer.
That’s it! You should now have WampServer installed on your computer.
BONUS: InstaWP
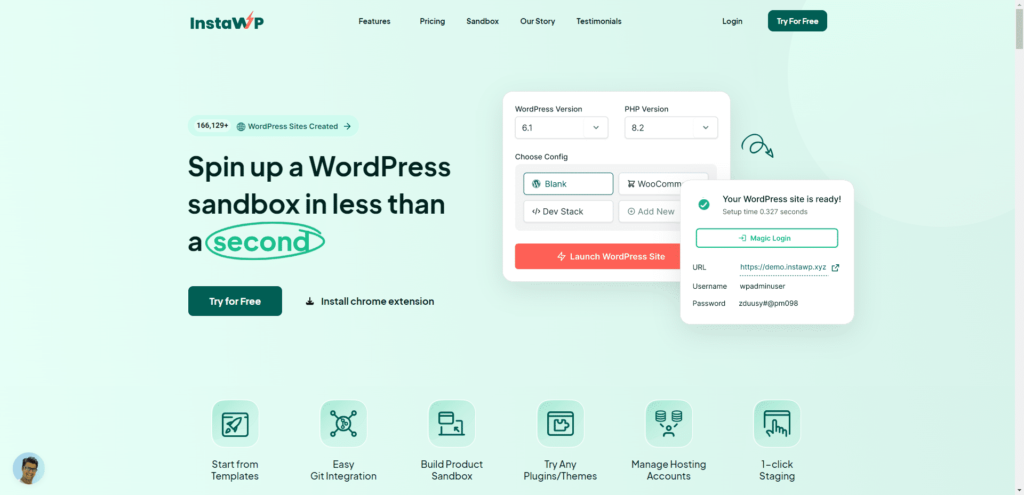
InstaWP is an online WordPress sandbox site creator that allows developers, designers, and agencies to test plugins, make coding changes, and check WordPress environments.
It creates a temporary WordPress site on its secure server for up to 8 hours without login and up to 48 hours with login. The paid plan offers the ability to reserve sites for a longer period.
Features of InstaWP
- Git integration: InstaWP allows Git integration, enabling developers to push and pull their code directly from their GitHub or Bitbucket repositories.
- Try any WordPress theme and plugins: InstaWP allows you to test any WordPress theme and plugin you want without installing it on your live site.
- Chrome extensions: InstaWP offers a Chrome extension that allows users to access and manage their InstaWP sites directly from their browser.
- 1-click staging sites: InstaWP enables developers to create staging sites with just one click, making it easy to test changes before deploying them to a live site.
- Manage multiple hosting accounts: InstaWP allows users to manage multiple hosting accounts from a single dashboard, making it easy to keep track of all their WordPress sites.
- Create pre-built plugin & theme templates & launch: InstaWP provides pre-built templates for popular plugins and themes, making it easy to launch a WordPress site with pre-configured settings and functionality.
Note: No Installation is required for this as this environment is set on the cloud in a few seconds; you can create a testing environment from their site or type ‘wp.new’
Get our best WordPress tips, tricks, and tutorials delivered straight to your inbox - Subscribe to our Monthly Email newsletter Today.
Wrapping Up
That sums up our list of best localhost for WordPress. If you’re a WordPress developer or designer looking for an efficient and secure way to test your WordPress sites, several local development testing environments are available.
XAMPP and WampServer are powerful tools for beginners and experienced developers, providing a stable and reliable platform for WordPress development.
Local by Flywheel offers advanced features like live link sharing and staging environments, making it an ideal choice for teams and agencies.
Bitnami Local WordPress VM provides a lightweight and flexible environment for running WordPress locally, while DevKinsta offers advanced features like HTTPS and email testing. InstaWP is an excellent option for those who want to test plugins and make coding changes in a sandbox environment.
All of these tools have their own unique strengths and features, and the best choice will depend on your specific needs and preferences.
Regardless of which tool you choose, using a local development testing environment will save you time and ensure that your WordPress site is secure and reliable. So go ahead and give them a try, and take your WordPress development to the next level!
Further Read: Once you’re done working on your site locally, it’s time to take it live. Here’s How to Migrate the WordPress Site Local to Live Server Website Domain.
FAQs on WordPress Local Development Environments
What is WordPress localhost development?
WordPress localhost development is the process of building and testing a WordPress website on your own computer before publishing it to the web.
Can I develop WordPress locally?
Yes, you can develop WordPress locally by installing a local server software like XAMPP or WAMP on your computer.
Is WordPress localhost free?
Yes, WordPress localhost is free. You can download and install WordPress on your local server without any cost.
How do I set up WordPress on localhost?
You can set up WordPress on localhost by downloading and installing a local server software like XAMPP or WAMP, creating a database, and installing WordPress on your local server.
What are the benefits of WordPress localhost development?
The benefits of WordPress localhost development include faster development, easier testing, and increased security since your website is not publicly accessible.
How do I access my WordPress localhost site from another computer?
You can access your WordPress localhost site from another computer by configuring your local server to allow remote access and accessing your site using your local IP address.
What are the common issues with WordPress localhost development?
Common issues with WordPress localhost development include compatibility issues with local server software, database connection errors, and file permission issues.
How do I secure my WordPress localhost site?
You can secure your WordPress localhost site by using strong passwords, keeping your local server software and WordPress installation up-to-date, and restricting access to your local server.