In an ideal world, you’d choose a hosting provider so good that you wouldn’t ever have to worry about migrating your website from a local host to a live web server.
But this isn’t an ideal world. If you are a WordPress user who often works remotely, deals with poor connectivity, or is looking to save on higher operating expenses, relying on a local WordPress development environment for your website is your best bet.
For one, it can save you from the headache of crashing your website while troubleshooting or updating it. Not to forget, it can result in a more efficient workflow.
Of course, once site development is complete, you need to move it to a live server to make it accessible online. But migrating a site from localhost to a live server requires a bit of extra work.
In this blog, we’ll walk you through the step-by-step process of WordPress migration from localhost to the server in under 5 minutes in two ways: using the WordPress migration plugin and through the manual process.
Let’s dive right in.
Stay ahead of the curve with our exclusive insights and analysis on the latest WordPress trends and techniques - subscribe to our newsletter today.
Why Should You Build Your WordPress Website on a Localhost?
If you’re a beginner, a WordPress localhost environment is the best way to familiarize yourself with the process of website development and experiment with new ideas, designs, and plugins.
You can also check and rectify how updates will work on your live version for a smooth website experience.
And finally, you can even experiment with different addons like The Plus Addons for Elementor to improve the functionality of your Elementor page builder.
But migrating WordPress from localhost to a server can be a tedious process. So, why should you still do the nitty-gritty of WordPress development on a local server? Here’s why.
- It is faster: What makes working on a localhost, so easy is the ability to work directly with the files you need. You don’t need to push files to a local server, resulting in faster website development.
- It is safer: Building your WordPress website on a local host allows you to easily create and update the website locally and check for incompatibilities. Plus, since you’re not using the internet to create your website, you’ll be safe from hacking attempts.
- You don’t need an internet connection: If you often experience poor network connectivity or slow internet, then WordPress website development on a live host can be challenging. However, with localhost, you’ll be working offline on your device, which makes it perfect for someone who frequently works from remote locations.
- It is cost-effective: Depending on your website, it can take weeks or even months to develop fully. This means you’ll pay for the website hosting package if you build your site on a live server. On the other hand, using a local server can save you thousands of dollars in the development stage since it’s free.
- No Storage Limit: If you own or work on several websites, you are most likely to hit your live server’s storage limit at some point. The hosting package will charge for a capacity upgrade, leading to higher costs. Instead, using a localhost server is more convenient, as you can store unlimited websites without incurring extra storage costs.
In short, developing websites on a local server is one of the easiest, most convenient, and fastest ways to create and test your website before it goes live.
Which Prerequisites Do You Need to Keep in Mind Before Migrating the WordPress Site from Local to Live Server?
Before you learn how to move WordPress from localhost to a live server, there are a few essentials you need to keep in mind. Here’s what.
- Pick a website hosting provider: First, your website needs a home on the web. You require a reliable website hosting service that meets WordPress requirements and ensures website security.
- Purchase a domain name: If you haven’t already, you’ll have to purchase a domain name, which is connected to your website host.
- SFTP details for the hosting account: Next, you require access to the FTP client credentials of your hosting account, which include the live server’s IP address, username, password, and port number. You can find these details in your hosting control panel or contact the support team.
Before you transfer the WordPress site from localhost to a server, make sure the WordPress and PHP versions of your local site and the live server are the same. You’ll also need an SFTP application like FileZilla to transfer files from your localhost to the server.
Now that you know the prerequisites to set up before the WordPress website migration process, let’s understand the two ways to transfer a local WordPress site to the server.
Looking for the best WordPress page developers? Go through our list of the 10 Best WordPress Page Builders.
Migrate Your WordPress Site with Manual Method
The manual method to migrate WordPress site from localhost to server typically involves migrating the WordPress database and website files manually from localhost to the live server.
Here is the step-by-step manual migration process broken down for better understanding.
Step 1: Back Up Your Local Site
The process of uploading a WordPress site from localhost to server can often lead to errors. And if anything goes wrong during the migration process, you might lose access to your website.
So make sure to take a WordPress database backup before you begin the transfer and at every step not to lose anything.
Step 2: Upload Your Files from Localhost to Live Server
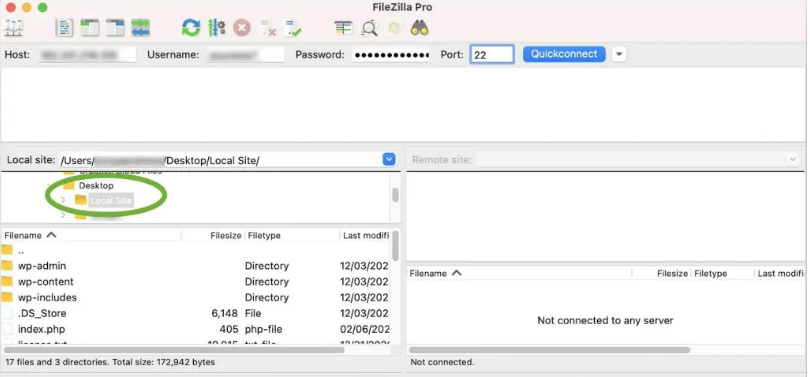
- Log in to your web server with FileZilla by entering the SFTP credentials at the top provided by your host and clicking on ‘Quickconnect‘.

2. Navigate to your local WordPress website files. Most SFTP software offers access to the local files on the left panel while the server files are on the right. If you can see directories like wp-content and wp-admin, you’re at the right place.
3. Next, go to the public directory on your web server in the right pane. You can find this as a root folder, typically named ‘public_html’ or ‘www.’, varying from host to host.
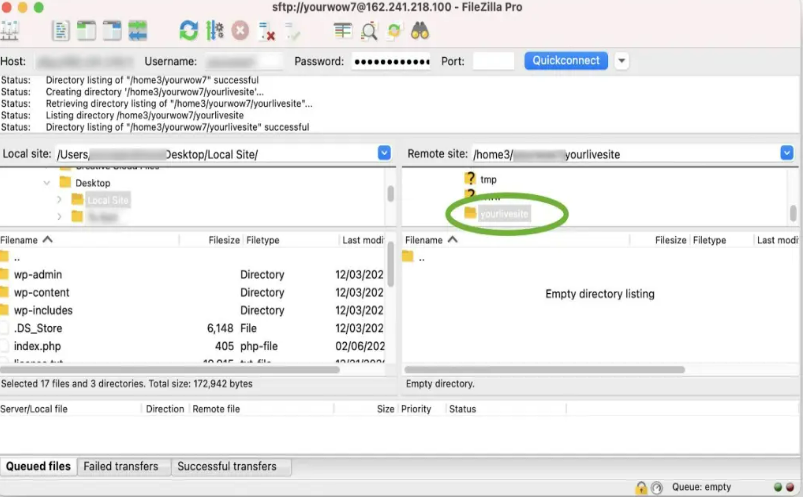
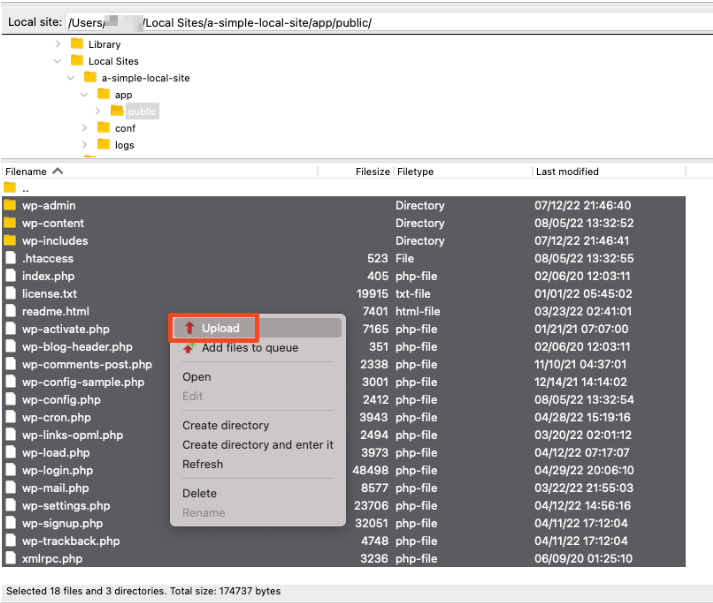
4. Finally, select all the local files in the left panel, right-click, and select “Upload” to copy them to your live server.
One important consideration is the file size of your website. If you have a large website with a lot of media files, it can take a long time to transfer those files to the live server.
In this case, we suggest you use a compression tool like Zip file to compress the files before transferring them. Once they’re on the live server, you can easily unzip the files.
Another tip to make the transfer faster is to use Wget, a command-line tool that can download files from the internet. This tool can be used to transfer large files quickly and efficiently.
Simply use the Wget command to download the files from your local environment to the live server. This can save you much time and make the migration process much smoother.
Step 3: Export the Database Files
Your WordPress database is where all your website data, like content, meta fields, and settings, is stored.
To successfully move WordPress from the local host to the server, the next step is to export this WordPress database to the live server.
You can do this using a database management tool like phpMyAdmin or Adminer.
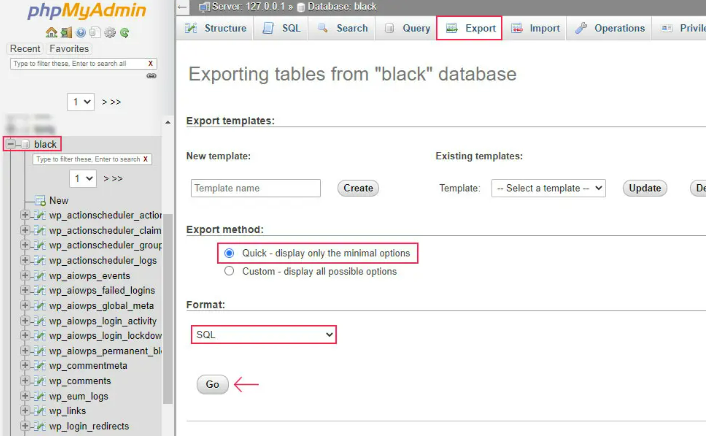
Using PhpMyAdmin:
- Select the database.
- Navigate and click on the ‘Export‘ tab.
- For the export method, select ‘Quick‘ and choose ‘SQL‘ as the file type.
- Click ‘Go‘.
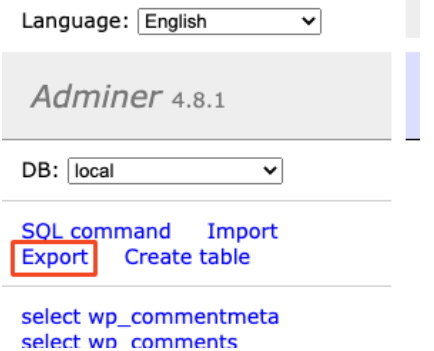
Using Adminer:
- Open the Adminer dashboard for your local website and select your database.
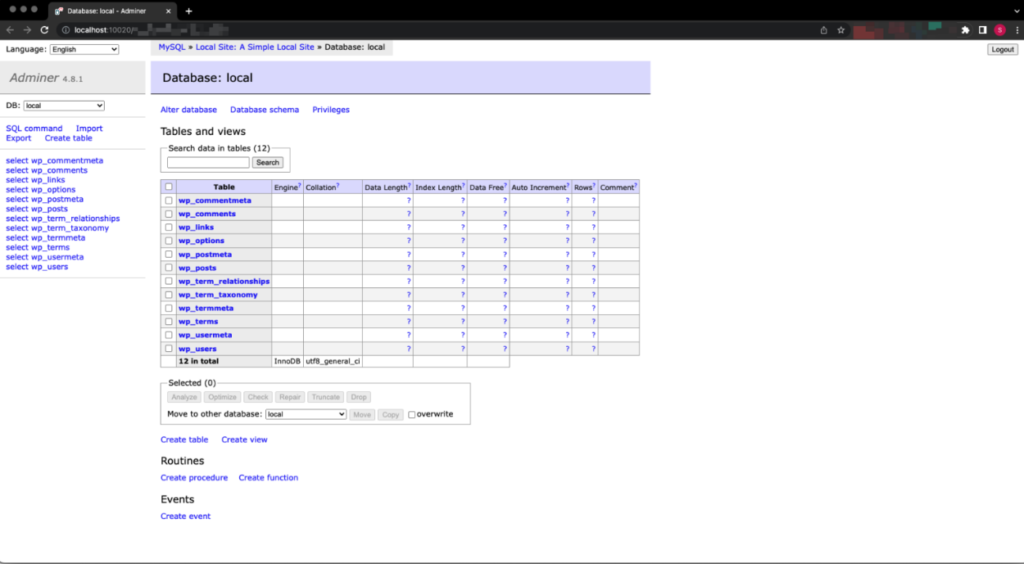
- Click on ‘Export‘ on the left panel.
- Click ‘Save‘ as the output and ‘SQL‘ as the data format.
- Select ‘Export‘.
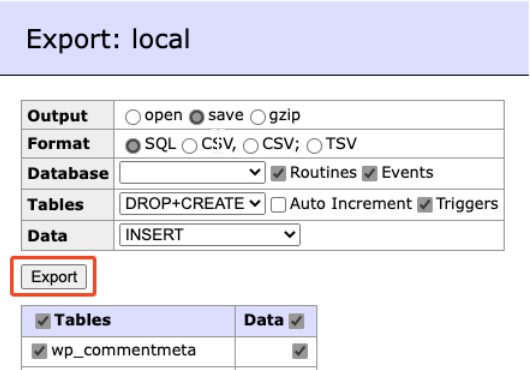
This will download the ‘.sql‘ file on your computer, which you can later import on the web server.
Step 4: Create a New Database on the Live Server
In this step, you need to create a fresh database on the new server, where you’ll import your old database files, which will override the contents of the new one.
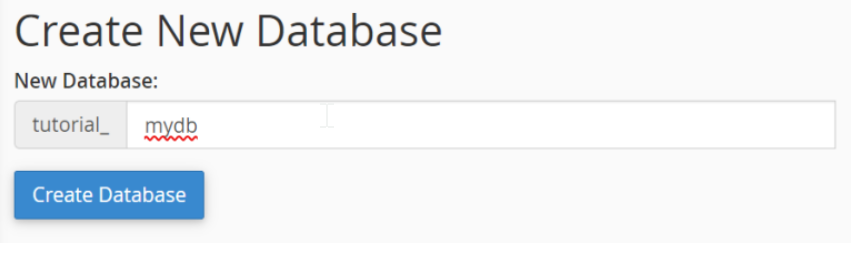
- In your cPanel dashboard, go to ‘MySQL Database Wizard‘ in the ‘Databases‘ section.

2. On the next screen, create a new database and specify its name
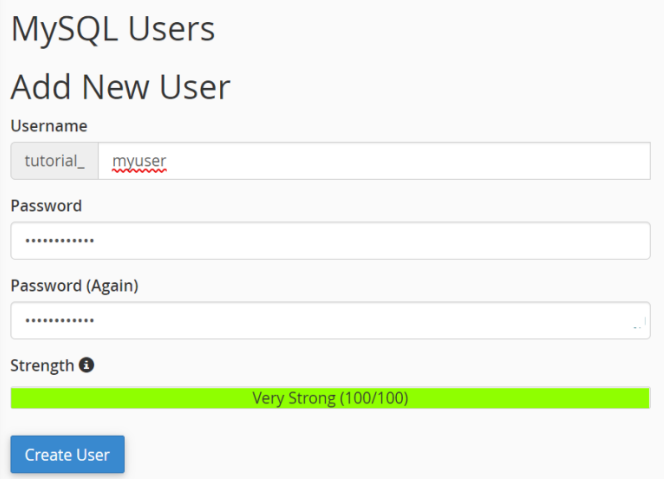
3. Navigate to the MySQL user section and create a new user with a strong username and password
4. To add the database to the new user, scroll down to ‘Add user to database‘, select the user and database, and click ‘Add‘.
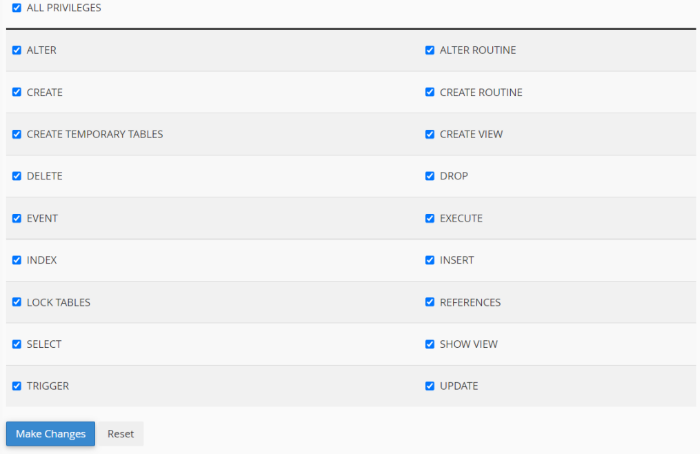
5. Select ‘All Privileges‘ and click ‘Make changes‘.
And done! This creates a blank database where you’ll import your files.
Step 5: Import the Database on Live Site
To import your old database files to the live server, go to your cPanel dashboard.
- Scroll down to find the ‘Databases‘ section and click ‘phpMyAdmin.’
- This will take you to your new database.
- Select this newly created database and click the ‘Import‘ tab.
- On the import page, click ‘Choose File‘ and select the SQL file from your local site exported earlier.
- Click on ‘Go‘ to start the process.
Step 6: Edit Your Website’s wp-config.php File
At this point, your website should show an ‘Error establishing a database connection‘ error. To fix this, you need to configure wp-config.php file to allow your live site to communicate with the database.
- Connect to your website with FTP and open the wp-config.php file.
- You’ll see the following line of codes.
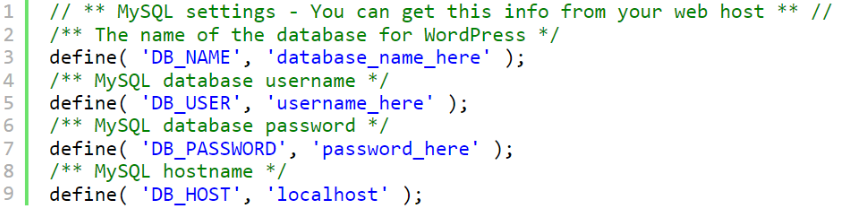
3. Navigate to the MySQL section of the file and replace the local host database details with the new details.
4. Save the file and upload it to your WordPress hosting server.
And that’s it! You’ve now successfully completed WordPress Multisite migration from localhost to server. However, there are still a few steps to take to make your website, which we’ll discuss later in this blog.
Migrate WordPress Site with a Plugin
Uploading your WordPress site from localhost to server using a migration plugin is quicker, safer, and less likely to result in errors.
There are several excellent migration plugins available in the WordPress repository for WordPress migration from localhost to the server, like Duplicator, Migrate Guru, and All-in-One WP Migration plugin.
In this section, we’ll illustrate the process using the Duplicator plugin, but the process should be similar for whichever plugin you use.
Step 1: Create a Package
- In your WordPress dashboard, install and activate the Duplicator plugin.
- Go to ‘Packages‘ in the Duplicator admin menu.
- Click on ‘Create New‘ in the upper-right corner of the page.
- The plugin will scan your website to make sure everything is good to go before taking a backup.
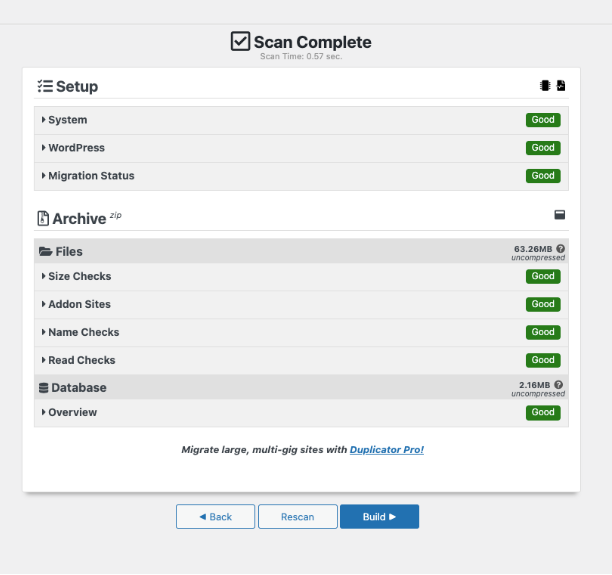
5. You might get a ‘Notice‘ on size checks, which indicates a large website. But you can proceed nonetheless.
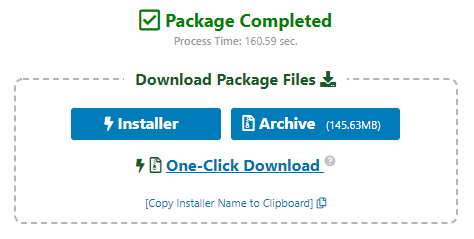
6. Once the test results appear as ‘Good’, click the ‘Build‘ button.
7. Duplicator might take a while to build a package, depending on the size of your website.
8. Download the ‘Installer‘ and ‘Archive‘ files.
Step 2: Create a Database on Live Server
Here, you need to create a new, blank database on the web server
- Go to the ‘Databases‘ section in your cPanel and click ‘MySQL Databases‘.
- Create a new database and specify the name.
- Scroll to the ‘MySQL Users‘ section and create a new user by setting the username and password.
- Navigate to ‘Add User to database‘, select the database and the user, and click ‘Add‘.
- Tick ‘All Privileges‘ and hit the ‘Make Changes‘ button.
Step 3: Upload Your Files from Localhost to Server
In this step, you will have to upload the Duplicator package and installer.php file on the webserver to copy your files from the localhost to the live server. For this, you’ll need an SFTP client and log in details.
- Log in to the web server with your SFTP client, like FileZilla, and click ‘Quickconnect‘.

2. Go to the Duplicator package and installer.php files on your local computer. These files will appear in the left panel.
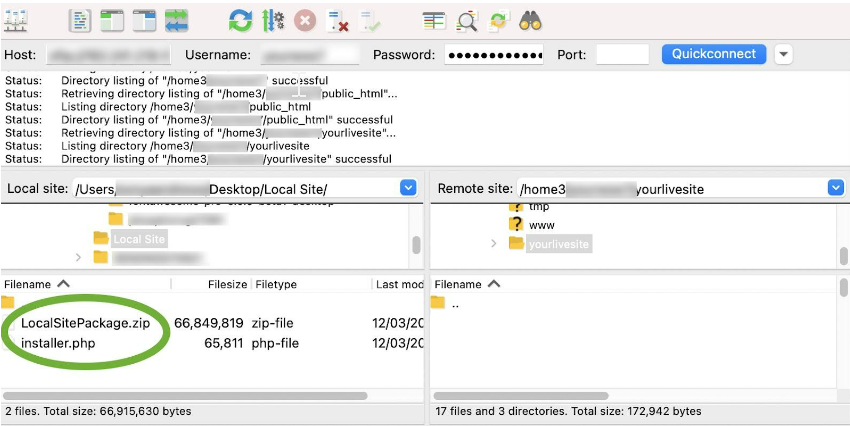
3. Navigate to the root directory on your web server in the right panel. This should be a folder named ‘public_html‘ or ‘www‘.
4. Upload the Duplicator package and the installer.php file to the web server.
Step 4: Install the Duplicator Package
In this last step, you must install the Duplicator Package to move WordPress from localhost to server successfully.
For this, open your browser and go to https://yoururl.com/installer.php (replace everything before ‘installer.php’ with your domain name)
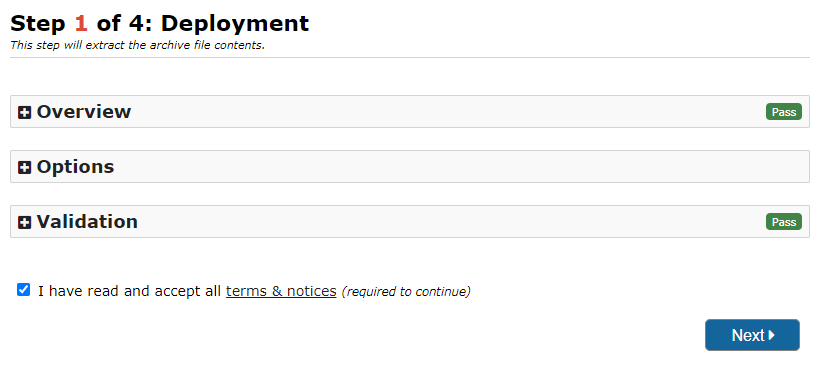
- Step 1 of 4: Deployment
In this step, the Duplicator plugin will perform checks to ensure your hosting is suitable for deploying the Duplicator package. If there is any failure at this stage, contact your web hosting service.
If all checks pass, click ‘Next‘, and the Duplicator package will be extracted.
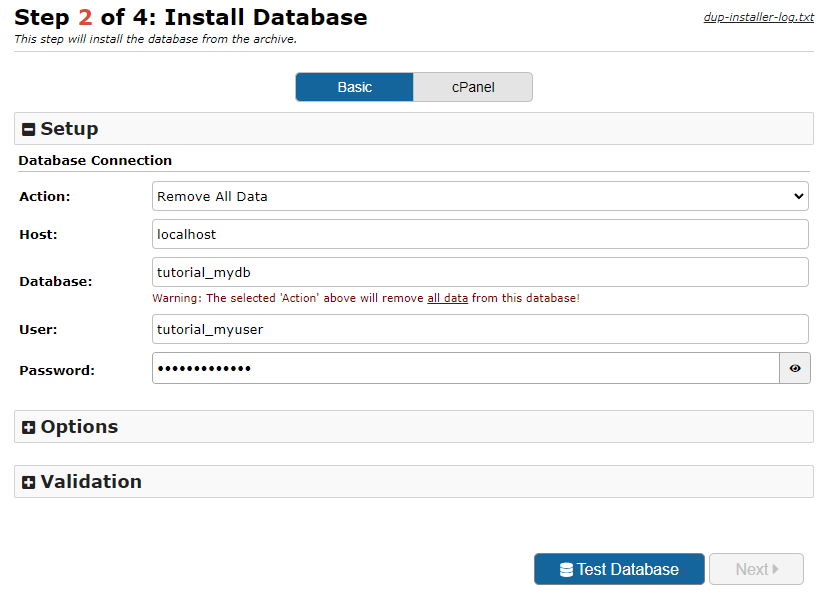
- Step 2 of 4: Install Database
Next, you’ll be asked to enter your Database information. If you have created a blank database, as suggested, then your local site’s database will be imported into this new database.
The default value for the host field remains ‘localhost’ for most cases but can change for certain hosts. So, be sure to contact your provider before proceeding.
After this, click ‘Test Database‘ to check if Duplicator is connected to the database. If everything passes, click ‘Next‘, and your database will be installed.
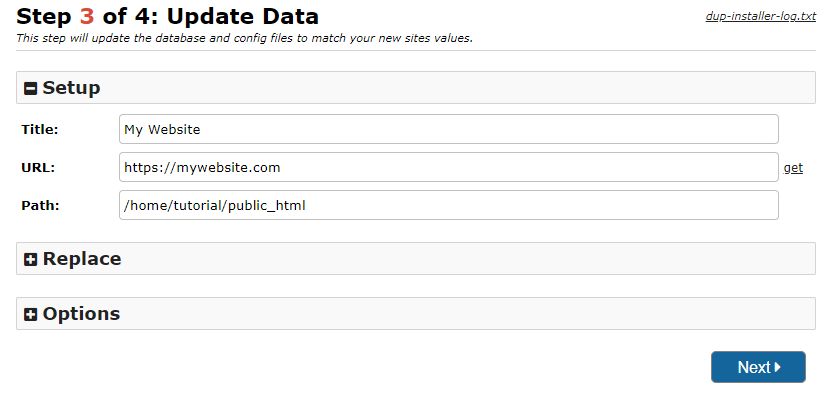
- Step 3 of 4: Update Data
On this page, Duplicator will automatically update your website details, including your website title, URL, and the path where it will be installed on the server. Double-check the details and click ‘Next‘.
- Step 4 of 4: Test Site
Your website should be live now. To check the installation, click on ‘Admin Login‘, and be sure to check ‘Auto delete installer files after login‘.

Once you log in to your WordPress dashboard, the installer files will be automatically deleted.
Now, whether you transfer local WordPress from localhost to the live server through the manual method or using a plugin, make sure to test it.
You can do so with the front end of your website to make sure everything works well.
After Making a Local WordPress Site Live, What are the Next Steps to Take?
Even after you have successfully moved your website from localhost to live server, your work doesn’t end here. There are still a few things you need to do to finish the job.
1. Change the Site URLs
Once you have your database on the new server, you must ensure it connects to the live WordPress site and not to the localhost.
- In phpMyAdmin, look for the wp-options table in your imported database.

2. In the table, you’ll find ‘siteurl’ and ‘home’ under the ‘option_name’ column
3. Go to the ‘option_value’ column and change both the option value to your new URL

2. Flush Your Permalinks
A permalink is a permanent hyperlink to the pages and posts on your website. When you transfer to a new website, these permalinks to your posts might not work unless you flush them first.
For this, follow this simple process:
- Login to your WordPress dashboard.
- Go to Settings → Permalinks.
- Click on ‘Save Changes‘.
3. Run a search-and-replace operation.
When you transfer your localhost website to a live server, your localhost URL may get stored on the live website, resulting in broken links.
To fix this, you need to perform a search-and-replace operation to replace all the instances of localhost URLs with the URLs of your live site.
You can do this using a plugin like the Better Search Replace plugin by following these simple steps:
- Install and activate the Better Search Replace plugin on your live site.
- In your WordPress dashboard, go to “Tools” and “Better Search Replace“.
- Enter your localhost URL in the ‘Search for‘ field and enter the live site’s URL in the ‘Replace with‘ field.
- From the “Select Tables” list, select “wp_posts“.
- Check “Run as a dry run” and click “Run Search/Replace“. The dry run will show you the potential changes.
- At this point, you should see some changes. If there are many changes to make, uncheck ‘Run as a dry run‘ and click ‘Run Search/Replace‘.
With this, you have successfully completed the WordPress migration from localhost to the server.
Get our best WordPress tips, tricks, and tutorials delivered straight to your inbox - Subscribe to our Monthly Email newsletter Today.
Before You Go
Ready to take your website online? Following one of the two methods mentioned above will teach you how to move WordPress from localhost to live server.
On the one hand, migrating your WordPress website using a plugin is easier and saves time; if you have a large website or there are any issues with the server environment, the migration process might fail. In those cases, manual migration might be the best option.
To make the most of your Elementor page builder WordPress and create your dream website, don’t forget to check out The Plus Addons for Elementor. Access extensive design and marketing tools with 120+ Elementor widgets for an efficient web design workflow.
Further Read: Want to install Elementor on Localhost? Check our step-by-step guide to install Elementor in localhost.