The Plus Blocks for Gutenberg offers a great suite of blocks for the WordPress editor, which you can use to create unique websites. It provides users with an opportunity to create sophisticated and visually stunning websites quickly and without the need to work with code.
Whenever you use any block from The Plus Blocks for Gutenberg, apart from getting unique features, you also get some standard options under the Advanced tab, which can be used to customise the blocks further.
This advanced tab includes options such as custom CSS, on scroll animation, and display rules. So here, we’ll see all the typical options you get under the advanced tab.
Requirement – The advanced tab is a part of The Plus Blocks for Gutenberg, make sure its installed & activated to enjoy all its powers.
Note: Some of the options are only available with the PRO version of The Plus Blocks for Gutenberg.
Once you add any block from The Plus Blocks for Gutenberg to the page, simply go to the Advanced tab and find these common options for all its blocks.
Note: Wherever you see a desktop icon beside an option, you can adjust that option for mobile and tablet.
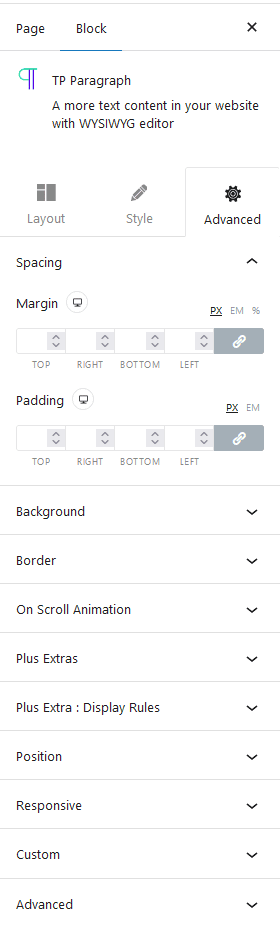
Spacing
From this tab, you can adjust the padding and margin of the specific block. You’ll also get the option to adjust the values for responsive devices. The values can be added in px, em or % unit. You can add the values at once for the Top, Right, Bottom, and Left or add them individually by clicking on the link button.
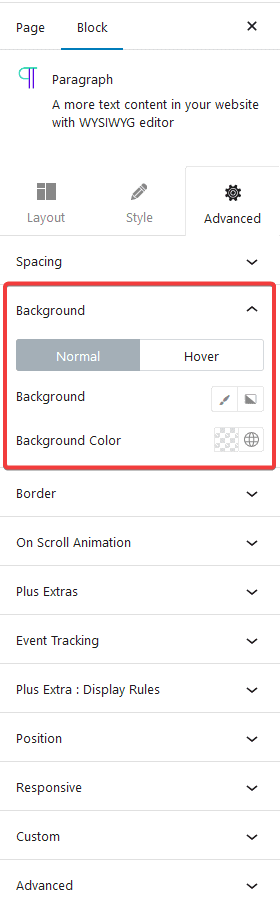
How to Add Background Color to any WordPress Block?
Do you want to add a background color to your WordPress block?
From the background tab, you can easily add background color to your WordPress block. From here, you can add an overall background color (solid or gradient) to the block for both normal and hover states.
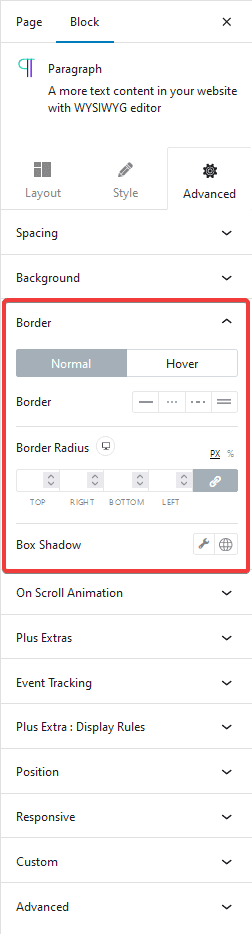
How to Add Border to any WordPress Block?
Are you looking to add a border to your WordPress block?
Whether you want to highlight important sections or give your content a stylish edge, adding borders will allow you to achieve that.
From this tab, you can add different types of borders, border radius and box shadow on your block for both normal and hover states.
How to Add On Scroll Animation to any WordPress Block?
Highlight your content by adding smooth scroll animation to your WordPress block.
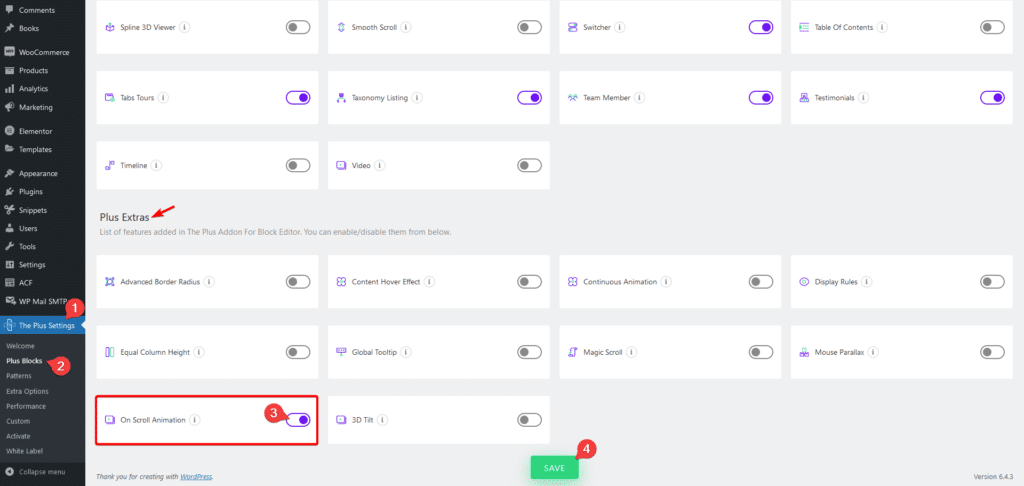
How to Activate the On Scroll Animation?
Go to
- The Plus Settings → Plus Blocks
- Scroll down to Plus Extras and look for the extension turn on the toggle then click Save.
How to Use the On Scroll Animation?
The On Scroll Animation tab allows you to add various beautiful on scroll animations to your block, so when users scroll to that particular block, it will appear with a smooth animation.
You can add separate animations for both In and Out states for responsive devices. You can also adjust the animation direction, duration, delay and easing type.
You can add the following animations
- Fading
- Sliding
- Zooming
- Rotating
- Flippers
- Lightspeed
- Attention seekers (for Animation In only)
- Specials
How to Add Magic Scroll Effect to any WordPress Block?
Adding a magic scroll effect to your WordPress block can help you capture your visitor’s attention. By adding magic scroll animation, you can add different types of custom animation to any WordPress block.
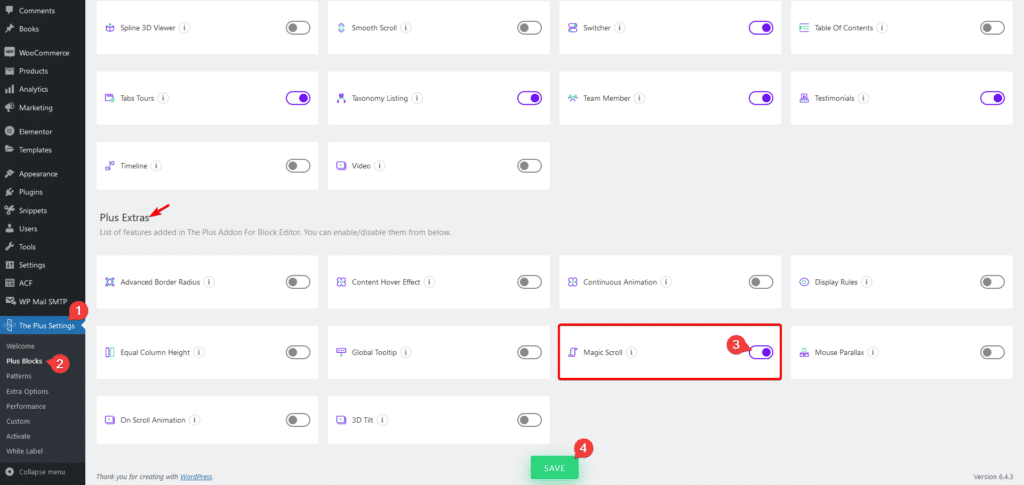
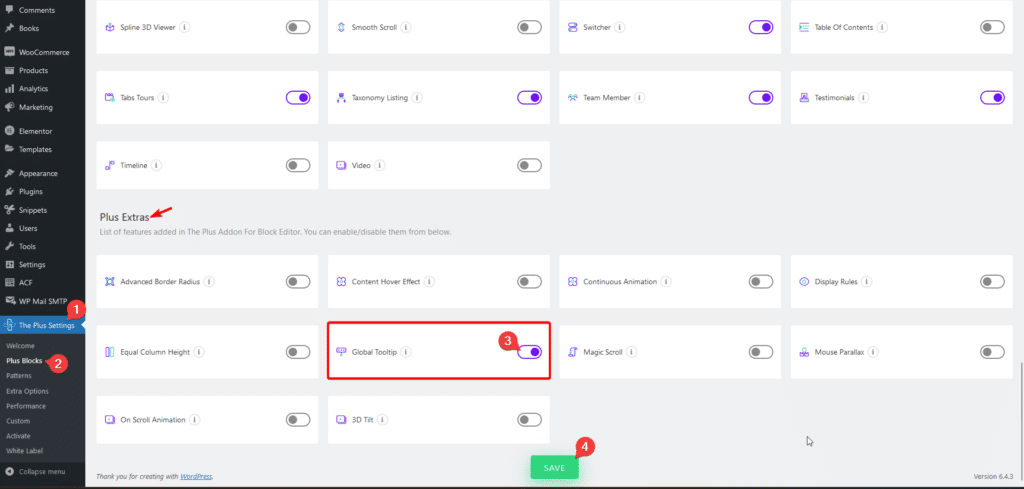
How to Activate Magic Scroll?
Go to
- The Plus Settings → Plus Blocks
- Scroll down to Plus Extras and look for the extension turn on the toggle then click Save.
How to Use the Magic Scroll Effect?
This is a very powerful option to add some amazing custom scrolling effects, once you turn on the Magic Scroll toggle from the Plus Extras tab, you’ll find a list of options –
Note: The Magic Scroll effect will not show properly in the backend. You have to check the frontend to see the actual result.
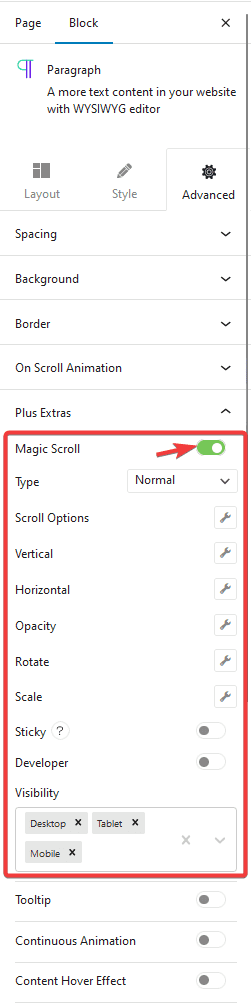
Type – Here, you’ll find two options –
- Normal – For creating normal scroll animation on a single block.
- Advanced – For creating complex scroll animation with steps mainly for container type blocks. You’ll find all the options mentioned below for each step separately.
Scroll Options – This is the most important section to enable the scroll animation. Click on the wrench icon, it will open a popup, here, you’ll find three options –
- Trigger – This will specify where the animation will trigger from.
- Duration – It will set the duration of the animation, i.e. where the animation will end.
- Offset – The position where the animation will start from.
Vertical – Once you have set your values in the Scrolling Options, from here, you can add a vertical scrolling animation. Here you’ll have to specify the start and end point of the animation. You can also reverse the animation by turning on the Reverse toggle.
Horizontal – To add a horizontal scrolling effect, you can use this option. You’ll find the same options as in the Vertical scrolling option.
Opacity – With this option, you can add an opacity effect on scroll. Settings are the same as in the Vertical scrolling option.
Rotate – You can add different rotate animation effects on scroll from here. You’ll have to choose the rotation position from the Position dropdown then you can set the start and end animation points for the x-axis, y-axis and z-axis separately. You can use the Reverse toggle to reverse the animation as well.
Scale – From here, you can add a scaling effect on scroll. You can individually set the start and end animation points for the x-axis, y-axis and z-axis. Use the Reverse toggle to reverse the animation.
Sticky – Turning this option on will make your block sticky. This will work in accordance with the values you’ve set in the Scroll Options.
Developer – To get the desired result with the scroll magic animation, you’ll have to do some trial and error, this option can help you in this process. When you turn on the toggle, you’ll see three different colored labels on the screen (frontend and backend). They represent the values you’ve set in the Scroll Options. This will help you in finetuning your animation.
You can also add a custom name for the labels in the Trigger Name field. This is useful for creating complex scroll animations.
Visibility – From here, you can easily choose the responsive devices where this scrolling animation will work.
Note: You can use multiple scrolling effects together.
How to Add Tooltip to any WordPress Block?
Adding tooltips on a WordPress block is a fantastic way to provide additional context, explanations, or helpful hints to your content, enhancing the user experience and keeping your visitors engaged.
How to Activate the Global Tooltip?
Go to
- The Plus Settings → Plus Blocks
- Scroll down to Plus Extras and look for the extension turn on the toggle then click Save.
How to Use the Global Tooltip?
To use the global tooltip enable the Tooltip toggle from the Plus Extras tab. From here, you can add a tooltip to your block. Once you turn on the toggle, you have to choose the content type from the Content Type dropdown. Here you’ll find two options –
Content – In this option, you can directly write the content in the editor.
Reusable Block – With this option, you can show different types of content in the tooltip with the help of reusable blocks.
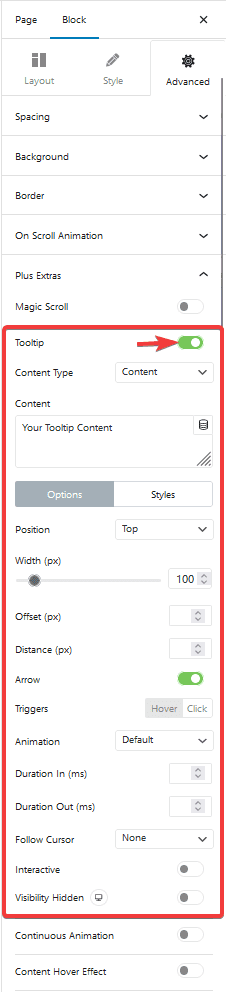
From the Options tab, you can manage the tooltip position, width, offset, distance, animation, trigger type, responsive visibility and more.
From the Styles tab, you can style the tooltip.

How to Add Continuous Animation to any WordPress Block?
Do you want to capture the attention of your users by adding continuous animation to any WordPress block? Adding continuous animation can bring life and creativity to your website.
How to Activate the Continuous Animation?
Go to
- The Plus Settings → Plus Blocks
- Scroll down to Plus Extras and look for the extension turn on the toggle then click Save.
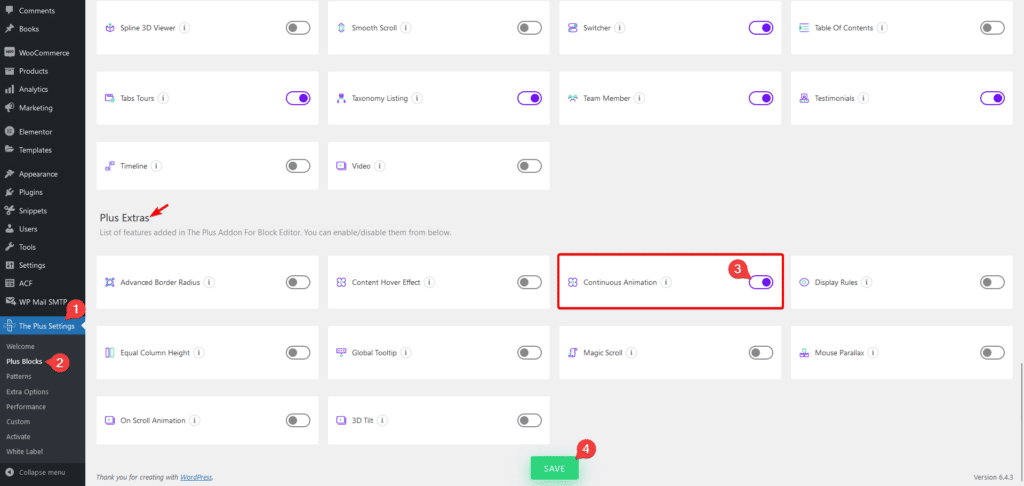
How to Use the Continuous Animation?
By enabling the Continuous Animation toggle from the Plus Extras tab, you can add continuous animation on your block. You can add different types of continuous animation.
You can also make it play on hover by turning on the Hover Animation toggle. The animation duration can be adjusted from the Duration Time(second) section.

How to Add Hover Effect to any WordPress Block?
By adding interactive hover effects to a WordPress block, you can transform static content into engaging elements that respond to user interaction.
Whether you want to highlight links, showcase images, or create attention-grabbing call-to-action buttons, adding hover effects is a powerful option.
How to Activate the Content Hover Effect?
Go to
- The Plus Settings → Plus Blocks
- Scroll down to Plus Extras and look for the extension turn on the toggle then click Save.
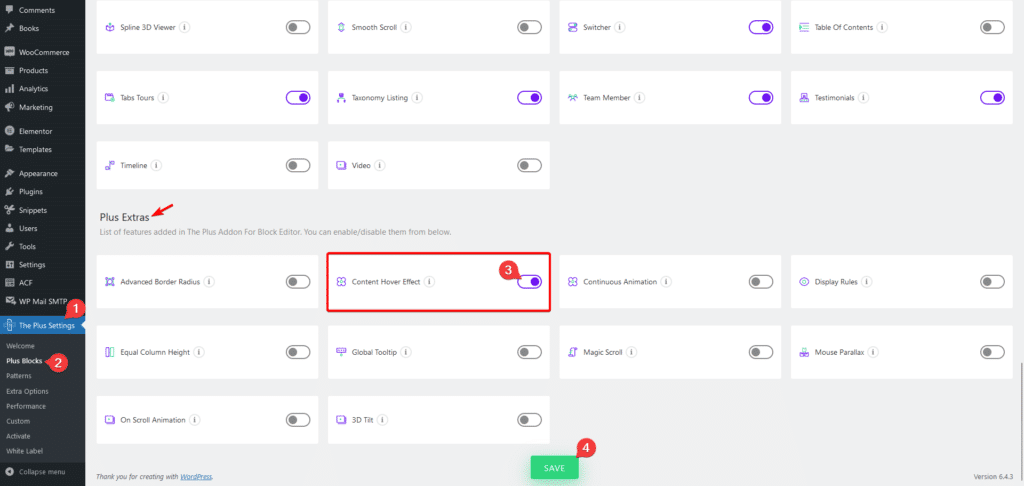
How to Use the Content Hover Effect?
To use the global tooltip enable the Content Hover Effect toggle from the Plus Extras tab. From here, you can add some cool hover animation effects to your block.
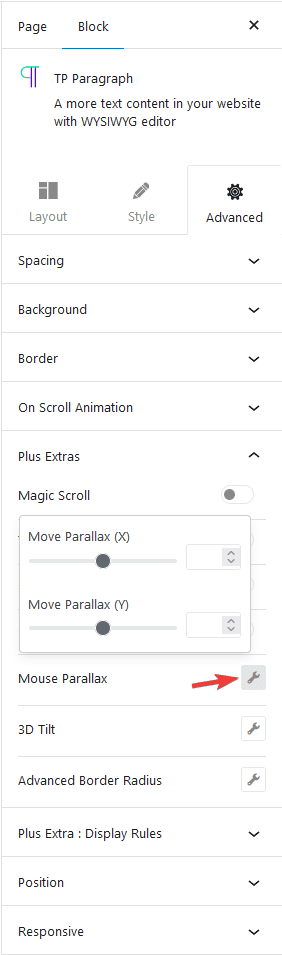
How to Add Mouse Parallax to any WordPress Block?
By adding mouse parallax to a WordPress block, your content will come alive as users move their mouse, creating a mesmerizing visual experience.
How to Activate the Mouse Parallax?
Go to
- The Plus Settings → Plus Blocks
- Scroll down to Plus Extras and look for the extension turn on the toggle then click Save.
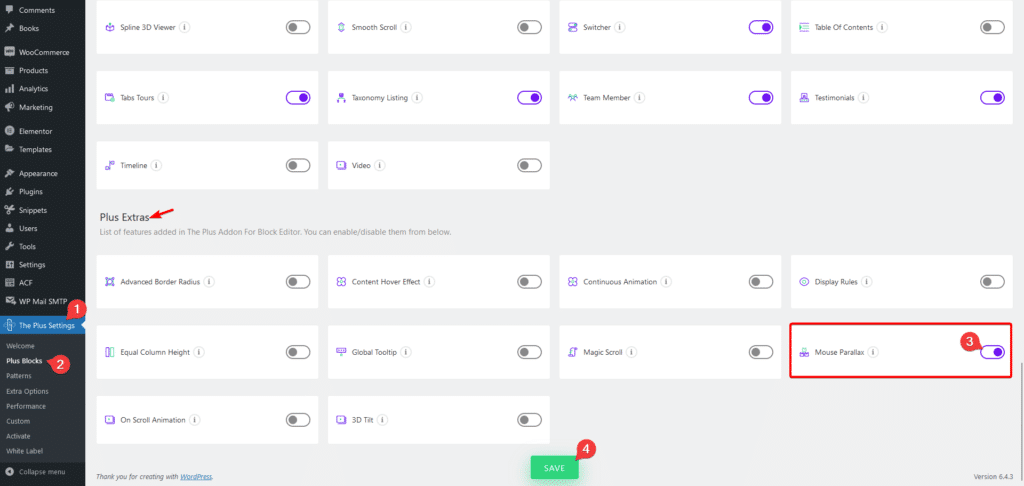
How to Use the Mouse Parallax Effect?
You’ll see the Mouse Parallax option under the Plus Extras tab. Using this option, you can add a subtle mouse hover parallax effect on your block.
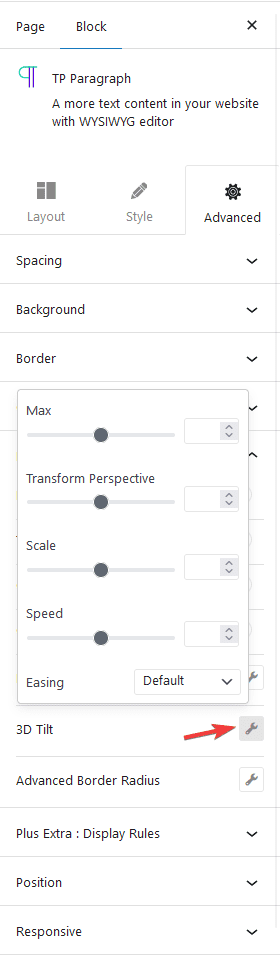
How to Add a 3D Tilt Effect to any WordPress Block?
Are you looking to add a 3d tilt effect to your WordPress block? Adding a 3d tilt effect allows you to highlight your content in a visually appealing manner.
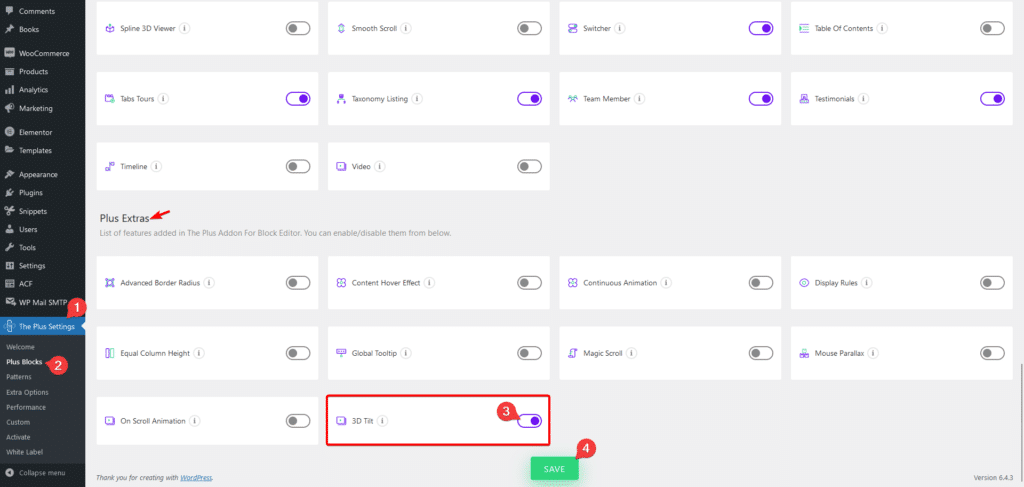
How to Activate the 3D Tilt?
Go to
- The Plus Settings → Plus Blocks
- Scroll down to Plus Extras and look for the extension turn on the toggle then click Save.
How to Use the 3D Tilt Effect?
You’ll see the 3D Tilt option under the Plus Extras tab. From here, you can add a 3d tilt effect on your block. Play with the settings to get the perfect animation effect.
How to Add Advanced Custom Border Radius to any WordPress Block?
Do you want to add custom background shapes to your WordPress block by adding a custom border radius? By using border radius you can add unique shapes to your images.
How to Activate the Advanced Border Radius?
Go to
- The Plus Settings → Plus Blocks
- Scroll down to Plus Extras and look for the extension turn on the toggle then click Save.
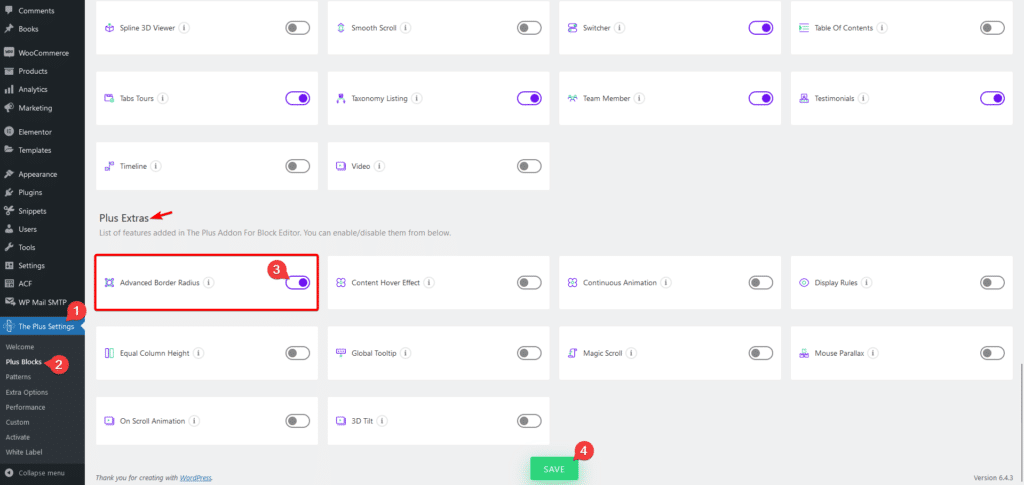
How to Use the Advanced Border Radius?
You’ll see the Advanced Border Radius option under the Plus Extras tab. From here, you can add unique background shapes to your block with the help of border radius.
From the Select Area dropdown, you have to choose where you want to add the shape to, here you’ll find two options –
Background – This will apply the border radius to the block background.
Custom – With this option, you can target any specific element within the block using a unique CSS class.
Note: Make sure you have some background color or border in your block or the element you are targeting.
Then you’ll find some predefined shapes that you can use or add your own shape using your border radius code. You can add different shapes for normal and hover states to create a beautiful transition effect on mouse hover.

How to Add Event Tracking to any WordPress Block?
Do you want to add event tracking to a WordPress block?
By incorporating event tracking, you’ll gain valuable insights into user interactions, clicks, and conversions, allowing you to make data-driven decisions and optimize your website’s performance.
From the Event Tracking tab, you can enable Facebook event tracking and Google event tracking.
Plus Extra: Display Rules
If you want to set different display rules for your block, you can do that from this section. Using the options you can create simple to very complex display rules. These display rules can be used on all sorts of websites like membership, e-commerce etc.
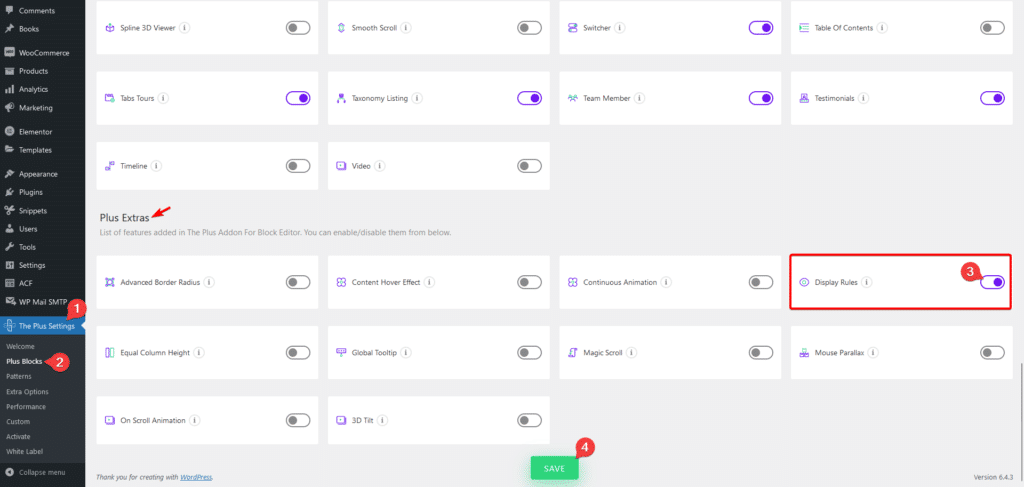
How to Activate the Display Rules?
Go to
- The Plus Settings → Plus Blocks
- Scroll down to Plus Extras and look for the extension turn on the toggle then click Save.
How to Use the Display Rules?
To set a display rule on a block, turn on the Display Rules toggle under Plus Extra: Display Rules tab.
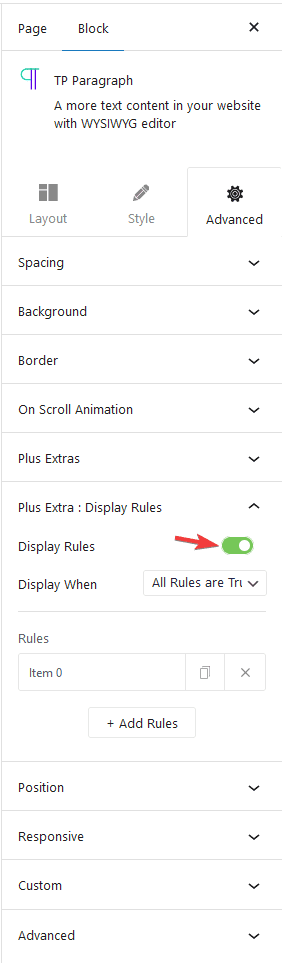
Then you have to choose when the display conditions are applied from the Display When dropdown. Here you’ll find two options –
All Rules are True – In this option, whichever rules you’ve set in the Rules section all has to be true for the display rules to work.
Any one Rule is True – In this option, anyone rule has to be true for the display rules to work.
Then in the Rules section, you have to set the actual display condition. You can have one or multiple conditions/rules.
To set the rule click on the Item 0 tab. You’ll find different options to set your display condition in the Rule dropdown.
Visitor: This sets display rules based on the different status of a visitor.
- Login Status (Free) – For user login status.
- User Role (Pro) – For different user roles.
- Operating System (Pro) – For users operating system.
- Browser (Pro) – For different browsers.
Date & Time: This sets display rules based on date and time.
- Current Date (Pro) – For a specific date.
- Time of Day (Pro) – For a particular time of the day.
- Day of Week (Pro) – For a specific day of the week.
Single: This sets display rules for single page templates.
- Page (Pro) – For different pages of the site.
- Post (Pro) – For different posts on the site.
- Static Page (Pro) – For different static pages like Home Page, Blog Page, 404 Page etc.
- Post Type (Pro) – For different post types like Pages, Posts etc.
- Term (Pro) – For different taxonomies like Category, Tags etc.
Archive: This sets display rules for archive templates.
- Taxonomy (Pro) – For different taxonomies like Category, Tags etc. of an archive template.
- Post Type Archive (Pro) – For different post types like Pages, Posts etc. of an archive template.
- Date Archive (Pro) – For different date archive templates.
- Author Archive (Pro) – For different author archive templates.
- Term (Pro) – For different taxonomies like Category, Tags etc. of an archive template.
Then you can make the status true or false by choosing Is or Not from the dropdown below.
You’ll get relevant dropdown options based on the selected option in the Rule dropdown. Select the appropriate option to set the condition.
You can add multiple rules by clicking on the +Add Rules button.
How to Set Custom Position to any WordPress Block?
Do you want to set a custom position to your WordPress block? With the ability to precisely control the placement of your content, you can create unique and visually appealing layouts that align with your design vision.
From the Position dropdown under the Position tab, you can manage the position of the block. From here you can mainly set the position to absolute or fixed for different devices.
You can also manage the block width, Z-index, overflow and you can add different CSS filters to your block for both normal and hover states.
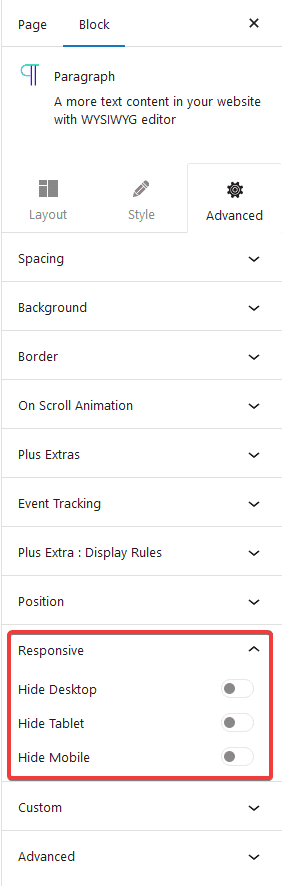
How to Hide Content in Responsive Screens in WordPress?
Do you want to hide some content in different responsive screens in WordPress? By hiding content strategically, you can maintain a clean and clutter-free design, focusing on what matters most to your visitors.
From the Responsive tab, you can easily hide a block on desktop, tablet and mobile.
How to Add Custom CSS Code to any WordPress Block?
Do you want to add a unique style to your WordPress block using custom CSS? This can open up the possibilities for unique layout designs beyond the basic options.
To add your custom CSS click on the Custom tab. You can add a custom class to your block in the Custom Class(es) field.
Note: You can add multiple classes by using comma(,).
If you want, you can also add an id to the block from the Custom ID field.
Note: Custom Class(es) and Custom ID are optional, but you can use them to target the block more specifically in CSS.
In the Custom CSS field, you have to add your custom CSS, you can target a block directly by using its unique class, but to make the style specific to that block only, you have to use {{PLUS_BLOCK}} before the class.

Let’s see how to use it.
For example, we are using the Paragraph block from The Plus Blocks for Gutenberg on the page. Now we want to add a background to the paragraph section of one block with CSS.
First, we must find the unique class containing the paragraph using Inspect Element of the browser.
We have found the class name called “pro-paragraph-inner“.
Now if we directly target this class, the CSS rules will apply to all other paragraph blocks on the page. To make the CSS rule specific to the block, we have to use {{PLUS_BLOCK}} before followed by the class name.
Like this:
{{PLUS_BLOCK}} .pro-paragraph-inner{
background:pink;
padding:20px;
}
Note: If you use the Custom Class(es) or Custom ID you have to add your class or id name right after {{PLUS_BLOCK}} without any space.
Note: You can make your CSS unique for a block using the Custom Class(es) or Custom ID, but make sure not to use the same class or id name on other blocks.