Are you looking to set display conditions based on custom fields on your WordPress site? Custom fields allow you to add additional information on posts, pages, products or custom post types. By setting display conditions based on the value of custom fields, you can create highly personalized experiences for your users.
The Display Rules extension from The Plus Blocks for Gutenberg allows you to set display conditions based on different custom fields.
To check the complete feature overview documentation of The Plus Blocks for Gutenberg Display Rules extension, click here.
Requirement – This extension is a part of The Plus Blocks for Gutenberg, make sure it’s installed & activated to enjoy all its powers.
For creating the custom fields, you have to use the free Advanced Custom Fields (ACF).
Note: Here, we are using blocks from The Plus Blocks for Gutenberg.
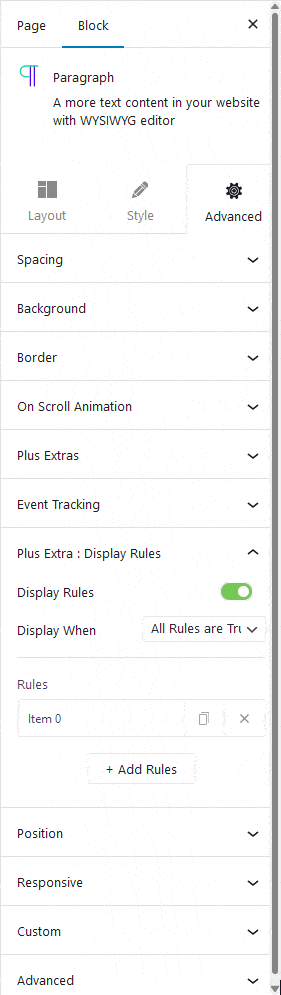
To add display conditions based on custom fields of the Advanced Custom Fields, add any block from The Plus Blocks for Gutenberg on the page.
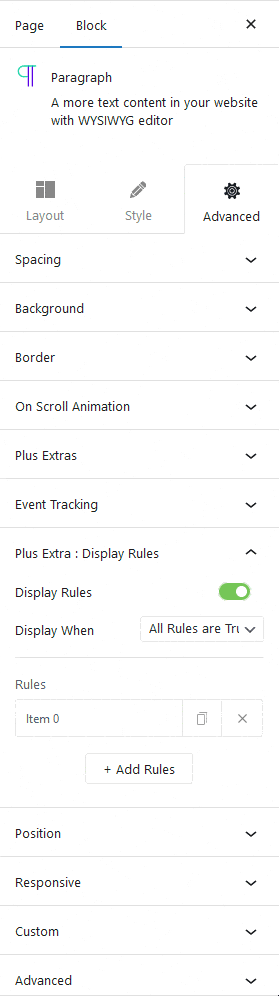
1. Go to Advanced > Plus Extras : Display Rules.
2. Turn on the Display Rules toggle.
3. After selecting the appropriate option from the Display When dropdown, go to the Rules section. Here you have to set the actual display condition. You can have one or multiple conditions/rules.
4. Then click on the Item 0 tab. In the Rule dropdown, you’ll find different options under the ACF label.
How to Set WordPress Display Condition Based on ACF Text Fields?
With this option, you can show or hide content based on the values of different ACF text fields such as text, number, range, email, url, password and text area.
Suppose we have created a custom field group called Additional Information for our posts. Here we have a Text field called Name with the value “Sam”.
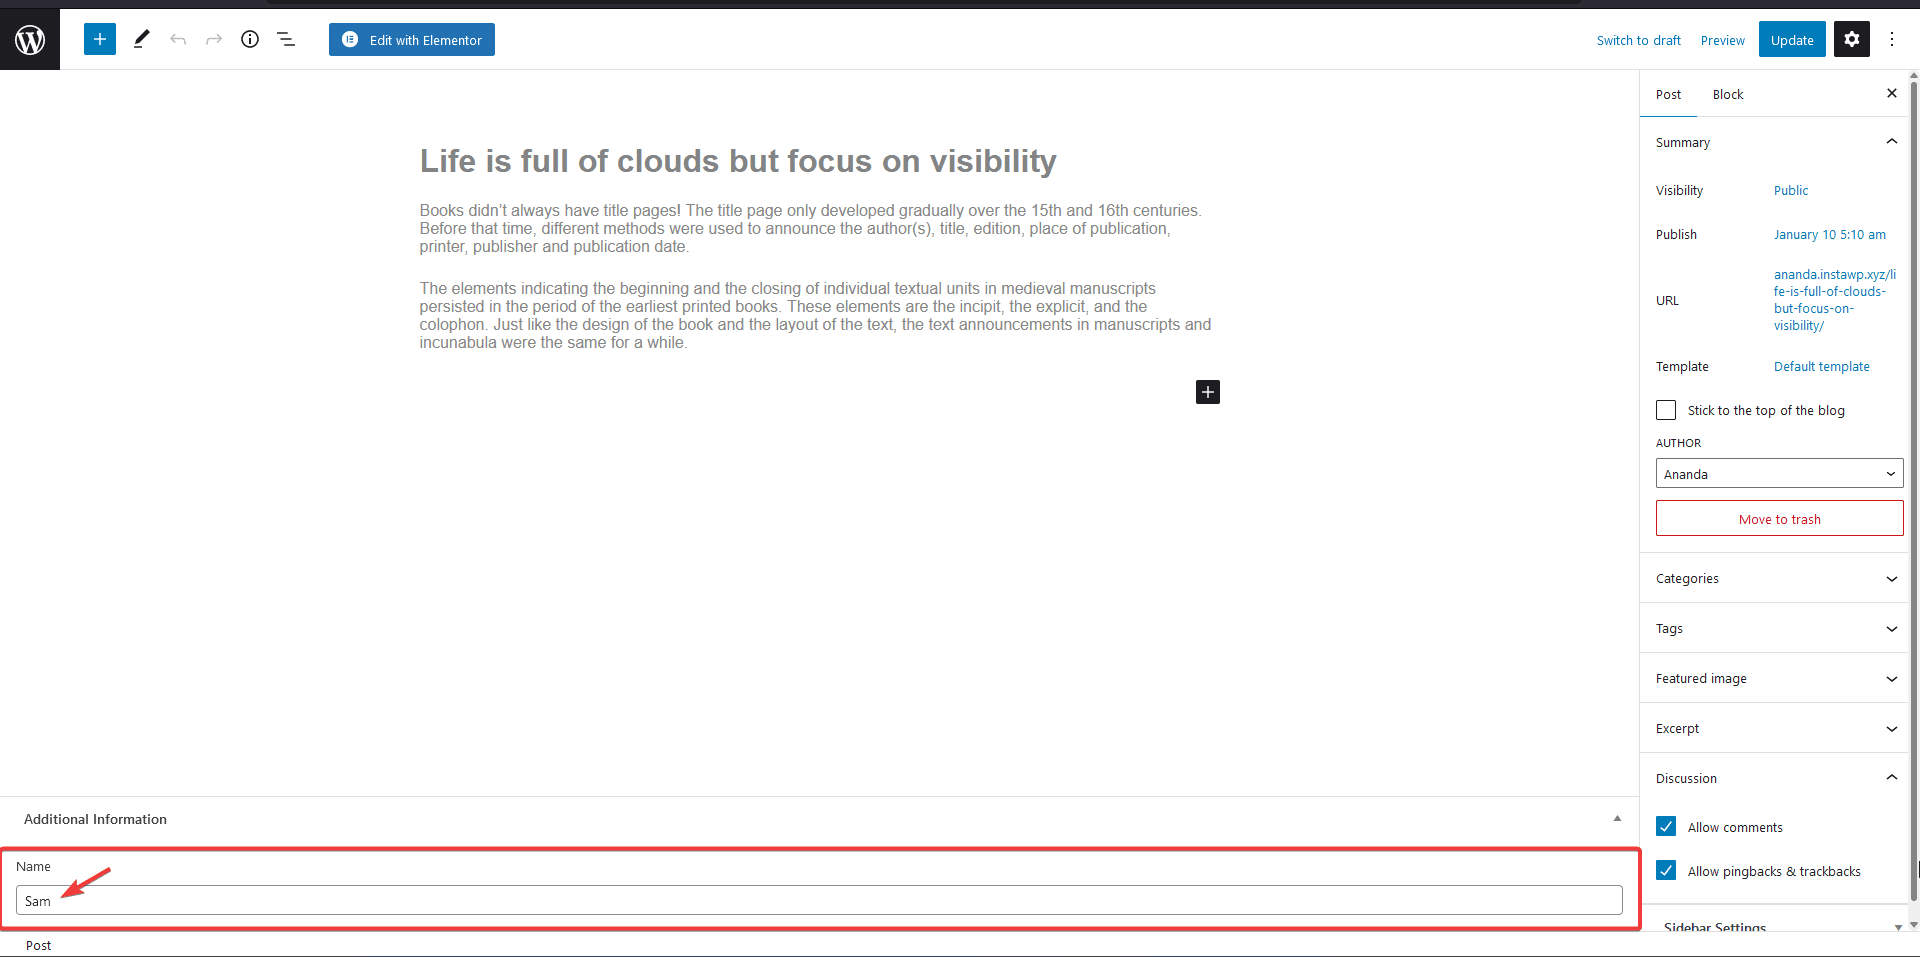
Now to set the display condition based on the value of that text field, select the block on the page.
1. Choose ACF : Text Fields from the first dropdown under the Item 0 tab.
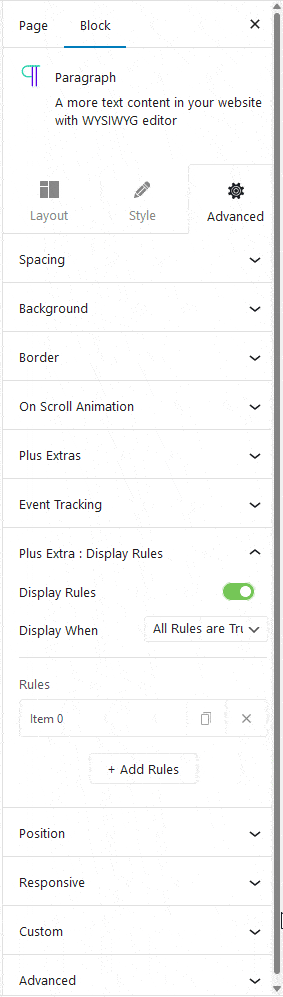
2. Then in the second dropdown, you have two options –
Is – This will make the statement true.
Not – This will make the statement false.
3. Then in the third dropdown, select the field label.
4. In the last field, you have to add the same text field value that you’ve entered in the AFC field.
Depending on your choice in the second field (Is or Not), your content will be visible or hidden.
Following this process, you can set display conditions based on the values of other ACF text fields.
How to Set WordPress Display Condition Based on ACF Selection?
With this option, you can set display conditions based on the values of different ACF selection fields such as select, radio button and checkbox.
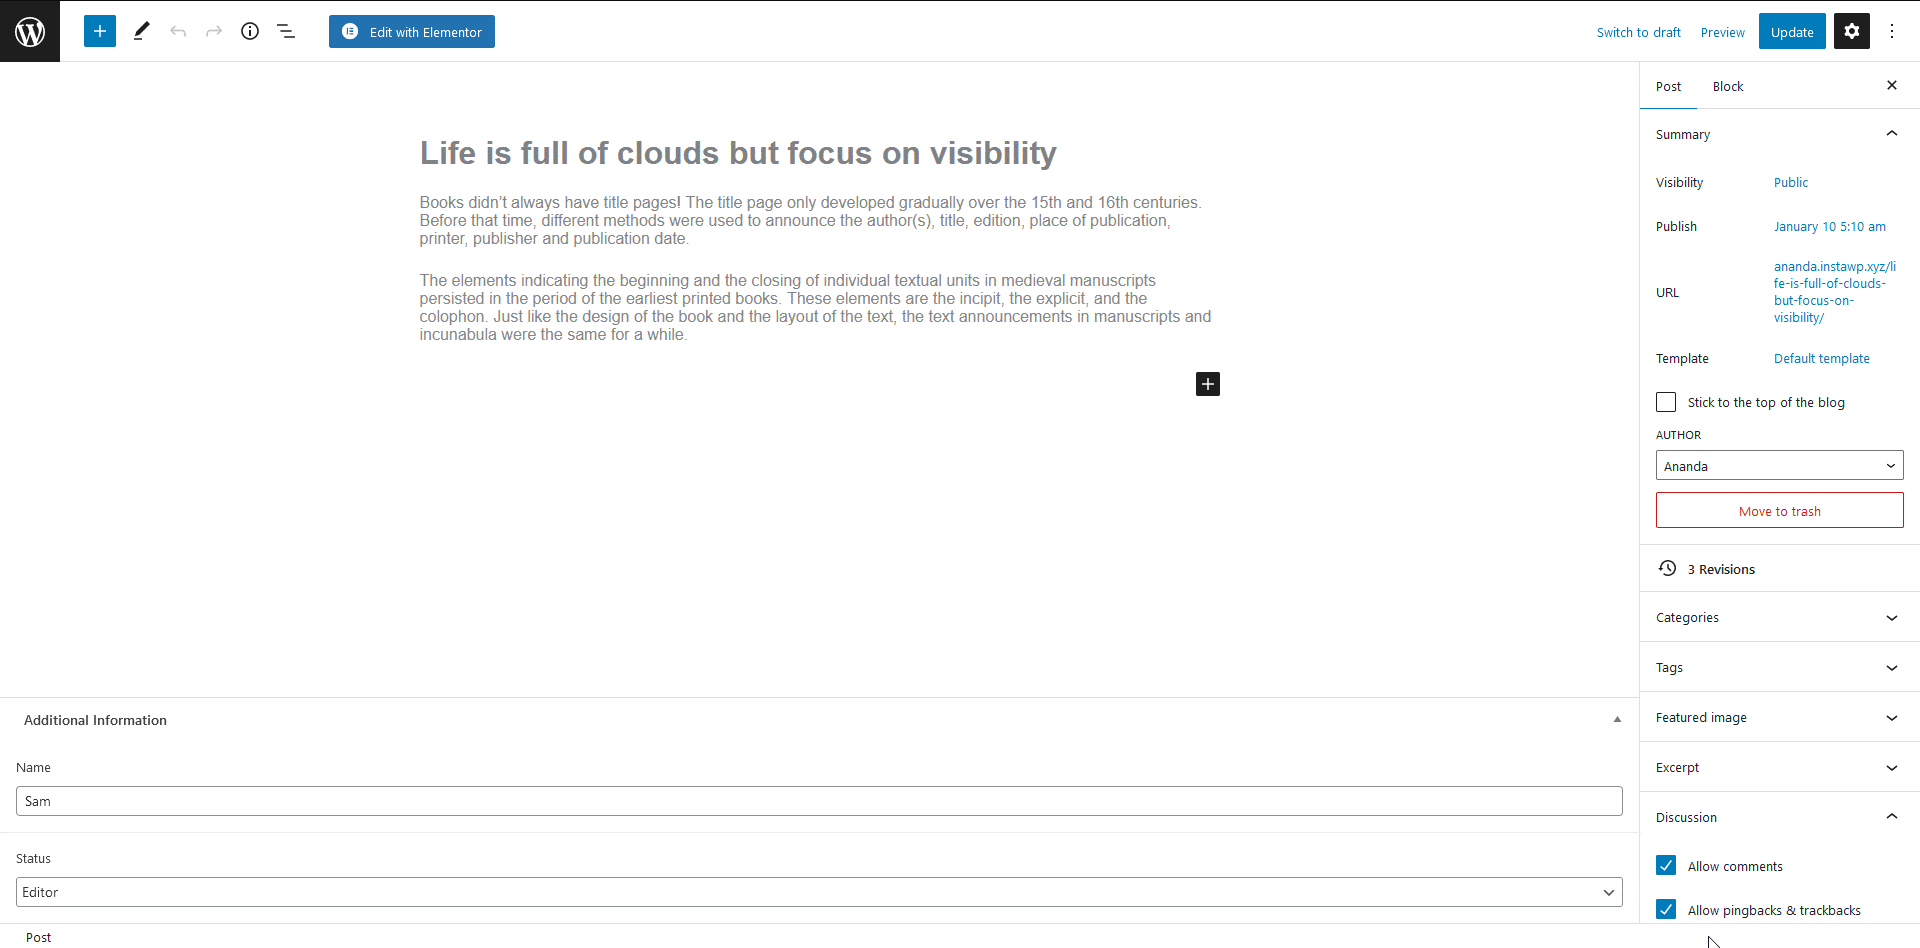
Following the previous example, we’ve added a Status dropdown menu within the Additional Information section, and we’ve chosen Editor as the selected value.
Now to set the display condition based on the value of that select field, select the block on the page.
1. Choose ACF : Selection from the first dropdown under the Item 0 tab.
2. Then in the second dropdown, you have two options –
Is – This will make the statement true.
Not – This will make the statement false.
3. Then in the third dropdown, select the field label.
4. In the last field, you have to add the same field value that you’ve entered in the AFC field.
Note: You can add multiple values here, this is ideal for the Checkbox field.
Depending on your choice in the second field (Is or Not) your content will be visible or hidden.
Following this process, you can set display conditions based on the values of other ACF selection fields.
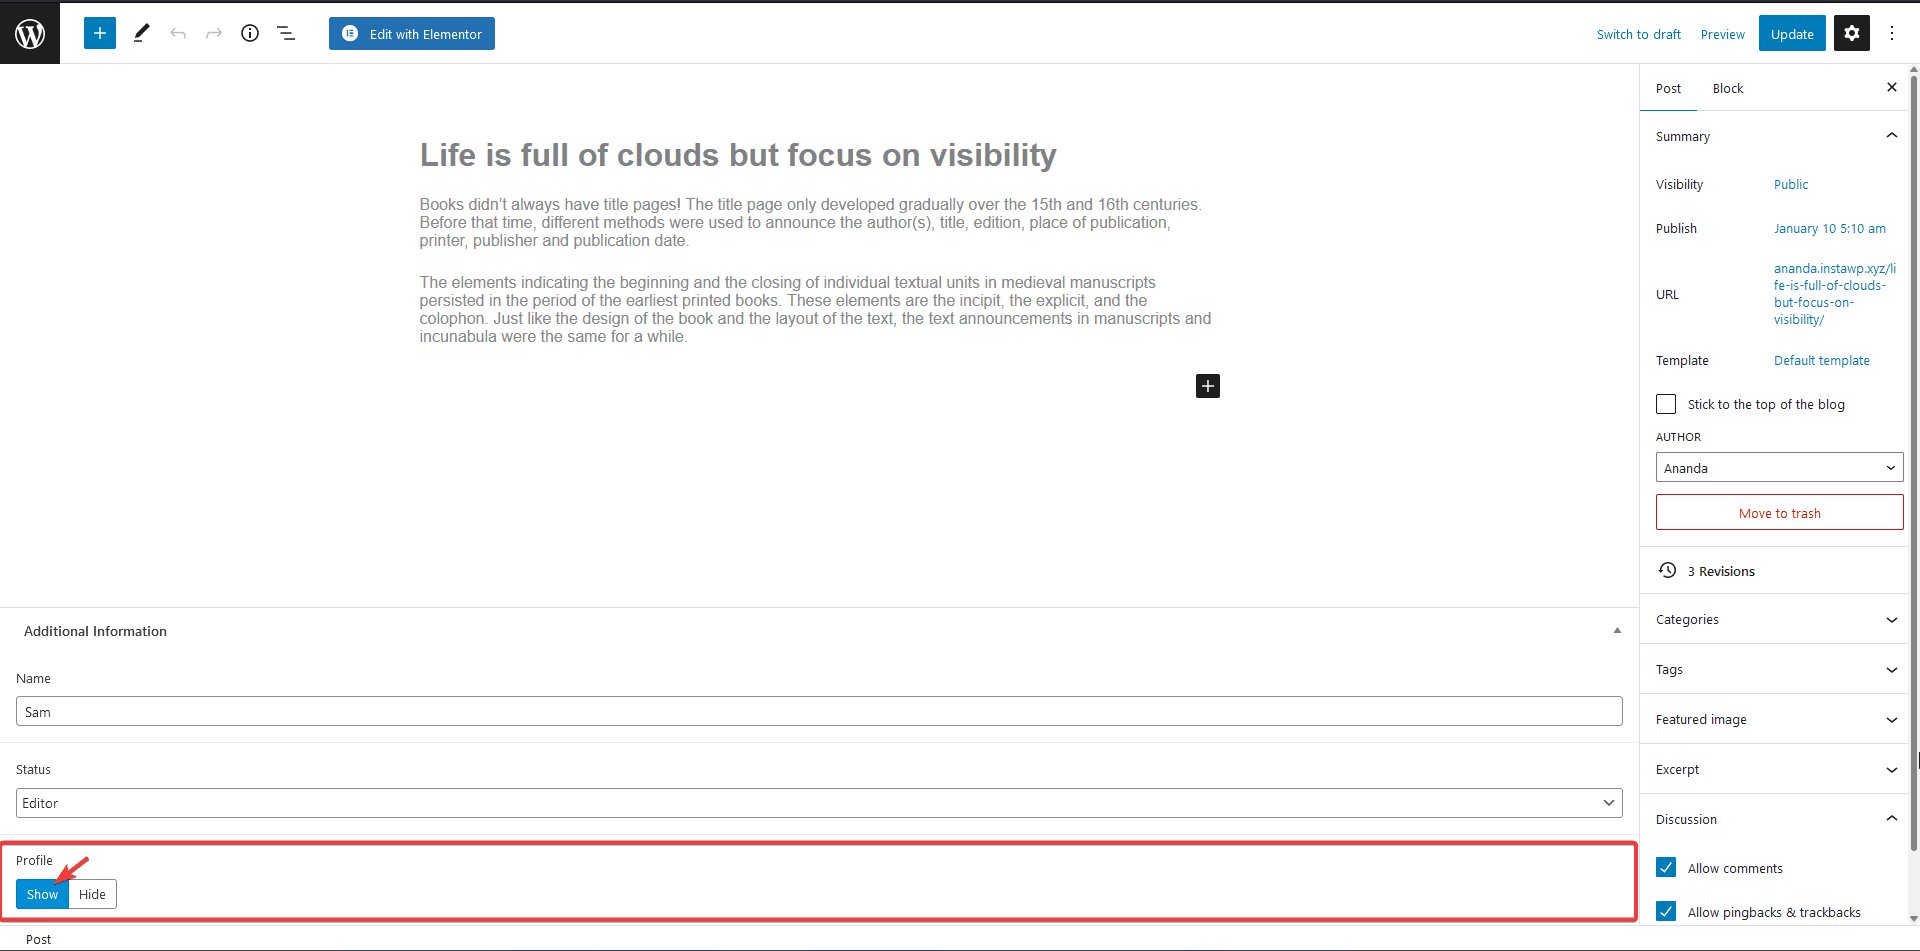
How to Set WordPress Display Condition Based on ACF Button Group?
This option allows you to set display conditions based on the values of ACF buttons.
Building on our example, we’ve included a Profile in the Additional Information area, and it has two buttons Show and Hide. We’ve selected the Show button.
Now to set the display condition based on the value of that button, select the block on the page.
1. Choose ACF : Button Group from the first dropdown under the Item 0 tab.

2. Then in the second dropdown, you have two options –
Is – This will make the statement true.
Not – This will make the statement false.
3. Then in the third dropdown, select the field label.
4. In the last field, you have to add the button value.
Note: You can add multiple values as well.
Depending on your choice in the second field (Is or Not) your content will be visible or hidden.
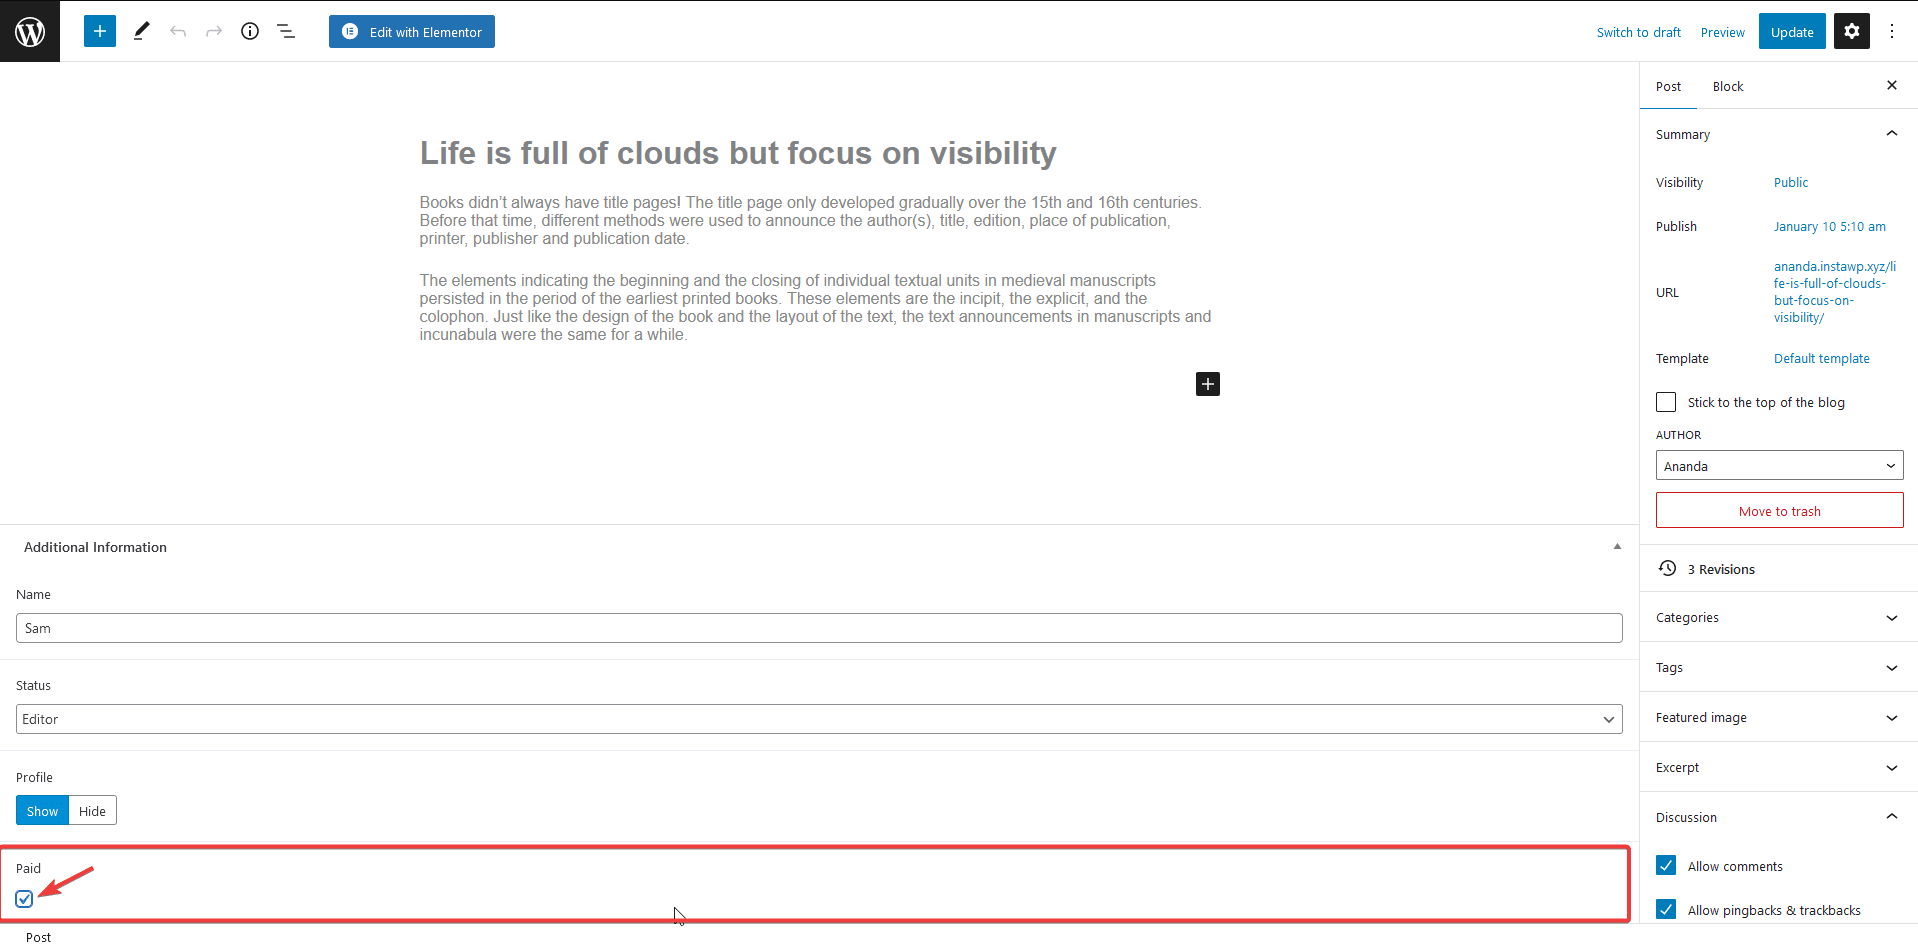
How to Set WordPress Display Condition Based on ACF Boolean?
This option allows you to set display conditions based on the ACF boolean value. A boolean field can only have a True or False value.
Continuing our example above, we have added a boolean field named Paid to mark the status of the post.
Now to set the display condition based on the boolean value, select the block on the page.
1. Choose ACF : Boolean from the first dropdown under the Item 0 tab.
2. Then in the second dropdown, you have two options –
Is – This will make the statement true.
Not – This will make the statement false.
3. Then in the third dropdown, select the field label.
4. In the last dropdown, select True or False as per your requirement.
Depending on your choice in the second field (Is or Not) your content will be visible or hidden.
How to Set Elementor Display Condition Based on ACF Date / Time?
Using this feature, you can control when certain content appears on your website by specifying a particular date and time with the help of ACF Date fields.
In our example, we’ve created a section named Date within the Additional Information part, and we’ve chosen a specific date and time for it.
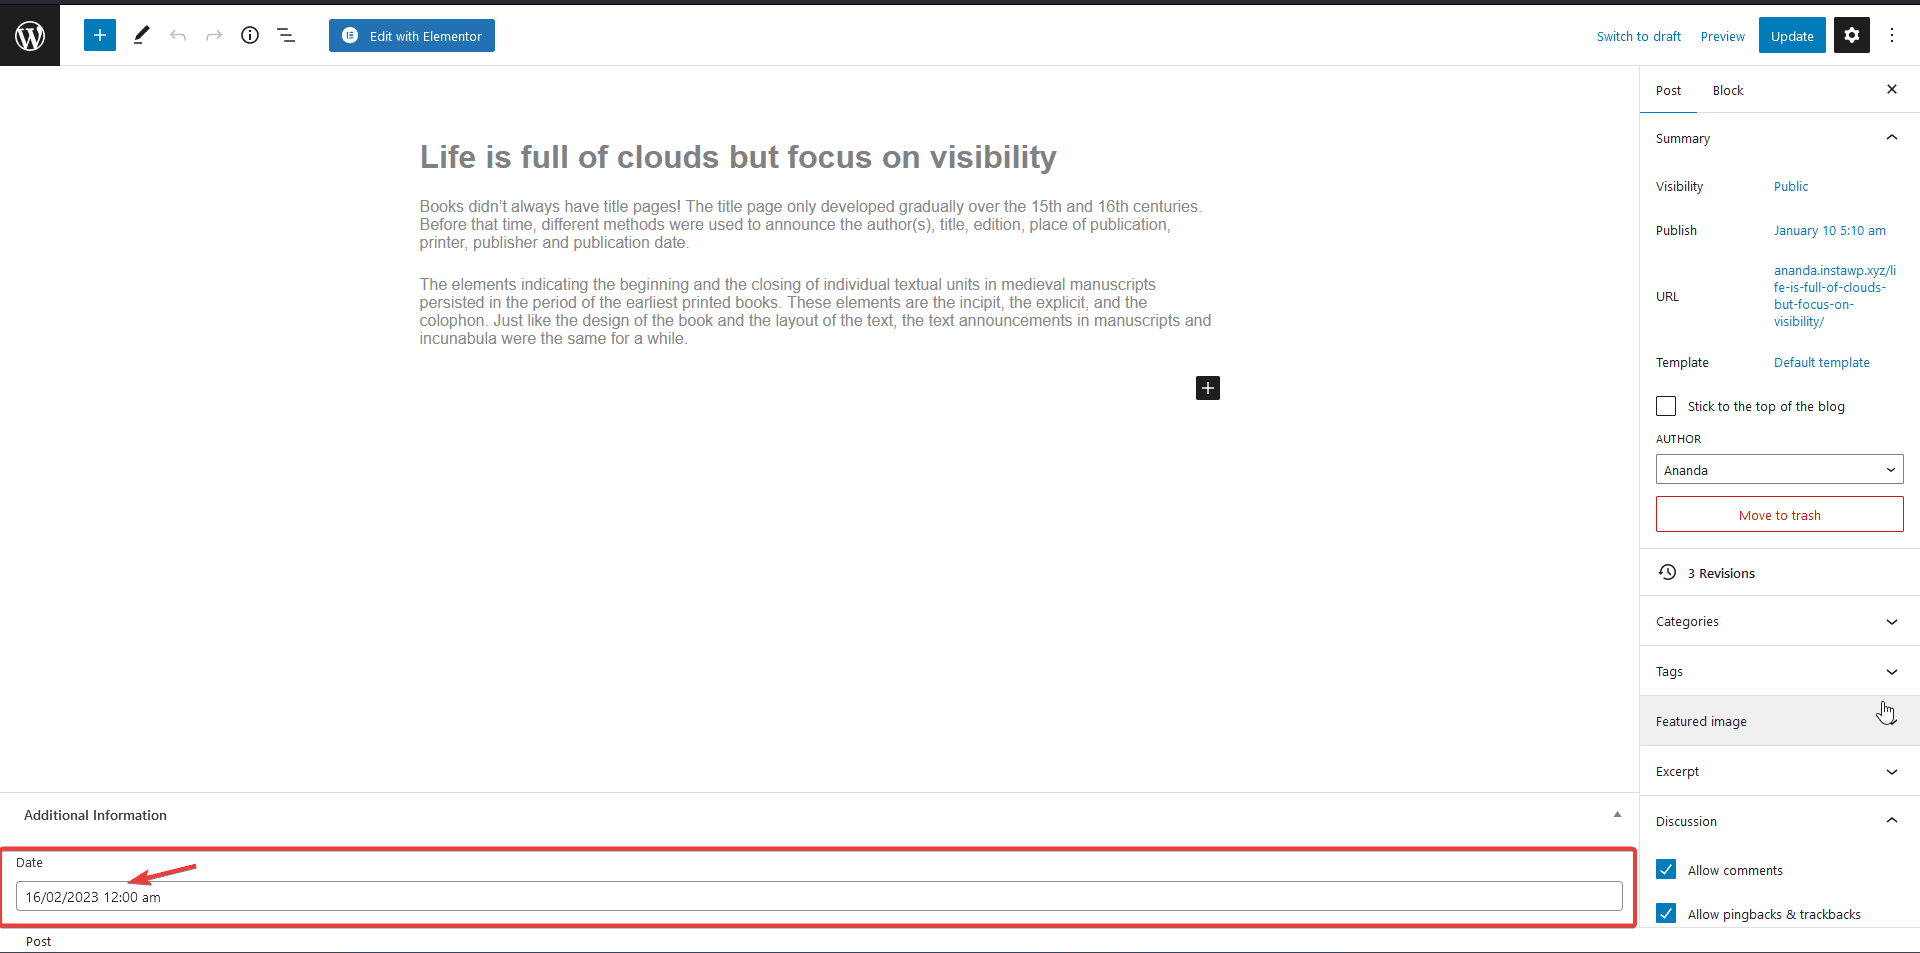
Now to set a display condition based on that date value, select the block on the page
1. Choose ACF : Date / Time from the first dropdown under the Item 0 tab.
2. Then in the second dropdown, you have two options –
Is – This will make the statement true.
Not – This will make the statement false.
3. Then in the third dropdown, select the field label.
4. In the Before Date / Time section, choose an earlier date and time from what you have set in the ACF field.
Note: Depending on the ACF settings you can work with date only as well.
Depending on your choice in the second field (Is or Not) your content will be visible or hidden after that specific date.
Also, read How to Set WordPress Display Conditions Based on Archive Page Content.