Creating a custom loop skin using inline editing for blog posts in WordPress provides numerous benefits for enhancing the design and presentation of your content. With this approach, you can have full control over the appearance of your blog posts, allowing you to create unique and visually appealing layouts.
To achieve this, you can leverage the power of the Post Listing block from The Plus Blocks for Gutenberg. This block empowers you to customise the design of individual post items within your blog loop. By using inline editing, you can effortlessly modify the post title, featured image, meta information, and other elements directly from the block editor.
To check the complete feature overview documentation of The Plus Blocks for Gutenberg Post Listing block, click here.
Requirement – This block is a part of The Plus Blocks for Gutenberg, make sure its installed & activated to enjoy all its powers.
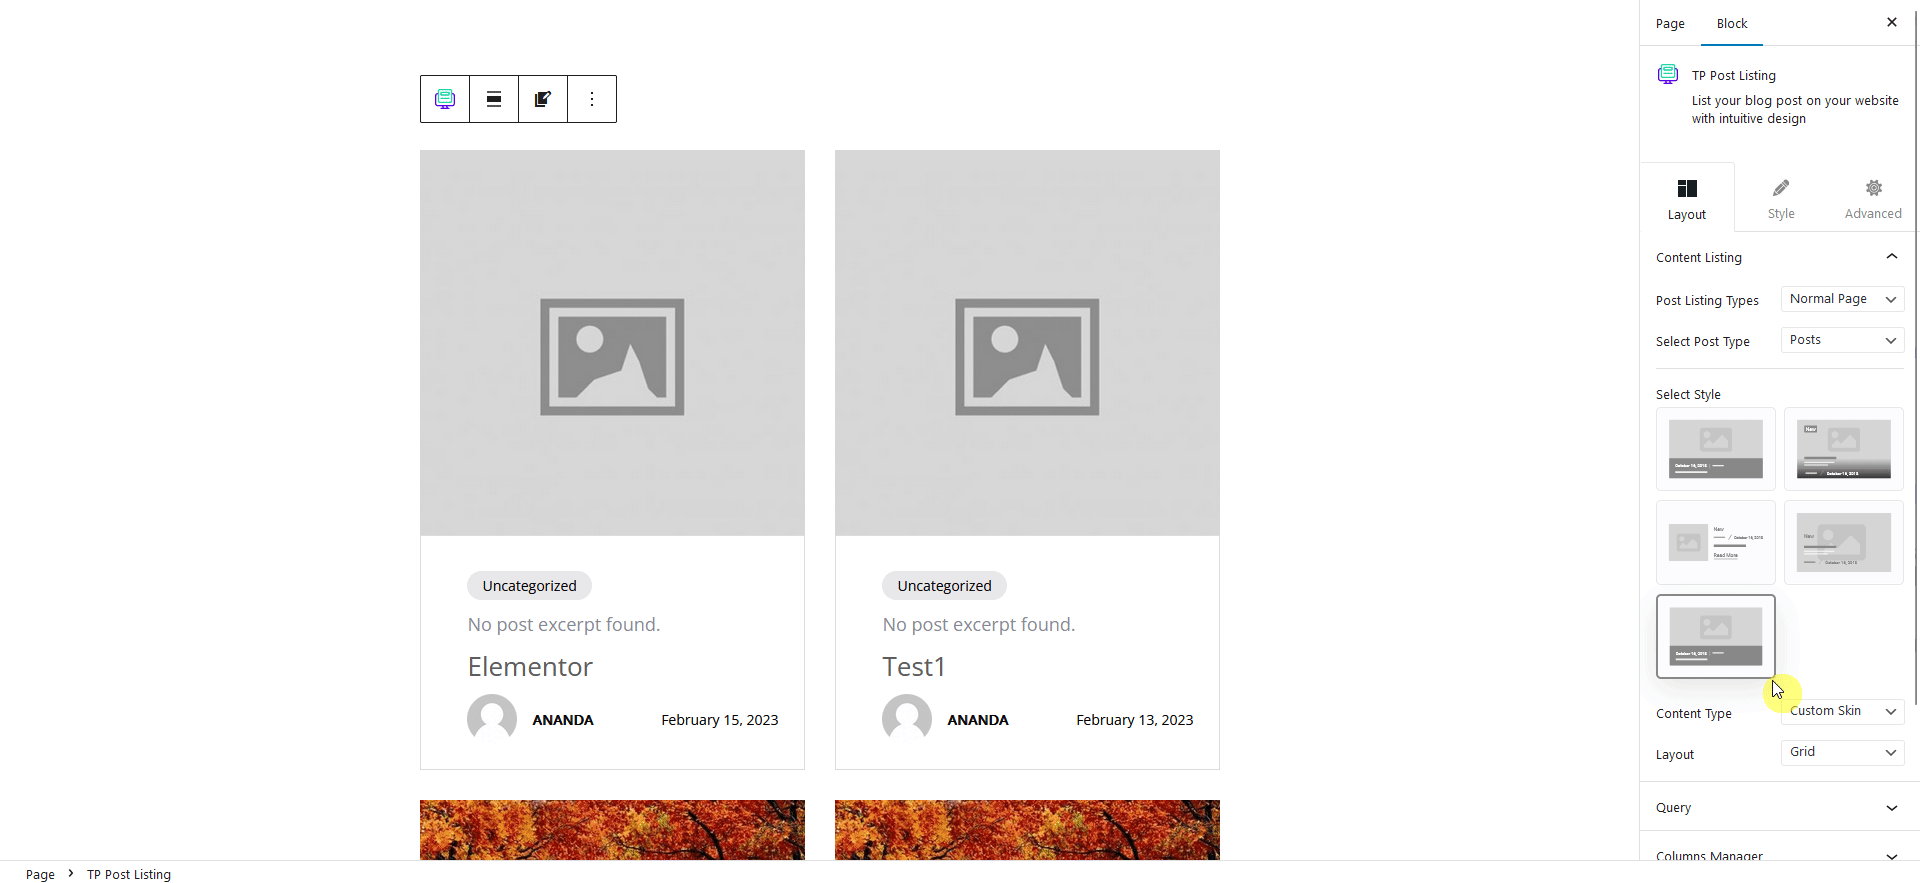
To use an inline editor for your custom loop skin, add the Post Listing block on the page or template.
Then select the appropriate listing type and post type.
From the Select Style section, choose Custom, and select Custom Skin from the Content Type dropdown.
You’ll see a listing on the page, then click on the Edit Layout icon in the Post Listing block, it will show a single item of the loop which you can edit directly in the editor.
You can select individual blocks to edit its settings, rearrange blocks with the post item, you can also add new blocks as well.
You can even show custom fields using the dynamic field options of The Plus Blocks for Gutenberg (Pro) blocks.
If you wish to use ACF following is the list of The Plus Blocks for Gutenberg blocks where you can use ACF to add custom fields.
PRO
1) TP Accodion
2) TP Advance Typo
3) TP Advance Button
4) TP Animated Services Box
5) TP Image
6) TP CTA Banner
7) TP Flipbox
8) TP Heading Animation
9) TP Pricing Table
10) TP Procees Step
Free
1) Tp Button
2) Tp Blockquote
3) TP Pro Paragraph
4) Tp Heading Title
5) TP Infobox
5) TP Message Box
6) Tp post Image
7) Tp Post Title
8) Tp Post Meta
9) Tp Post Author
10) TP Post Content
11) TP Pricing List
Note: When you add custom field data, it can show the same value for all items in the backend but it will work properly in the frontend.
Once you are done with editing the item, click on the tick icon to apply the changes, you can click on the cross icon to discard the changes.
Now your post listing items will have your custom design.
Following this process, you can create custom loop skin with inline editing for custom post type as well.
Also, check How to Create Custom Loop Skin for Blog Post in WordPress.