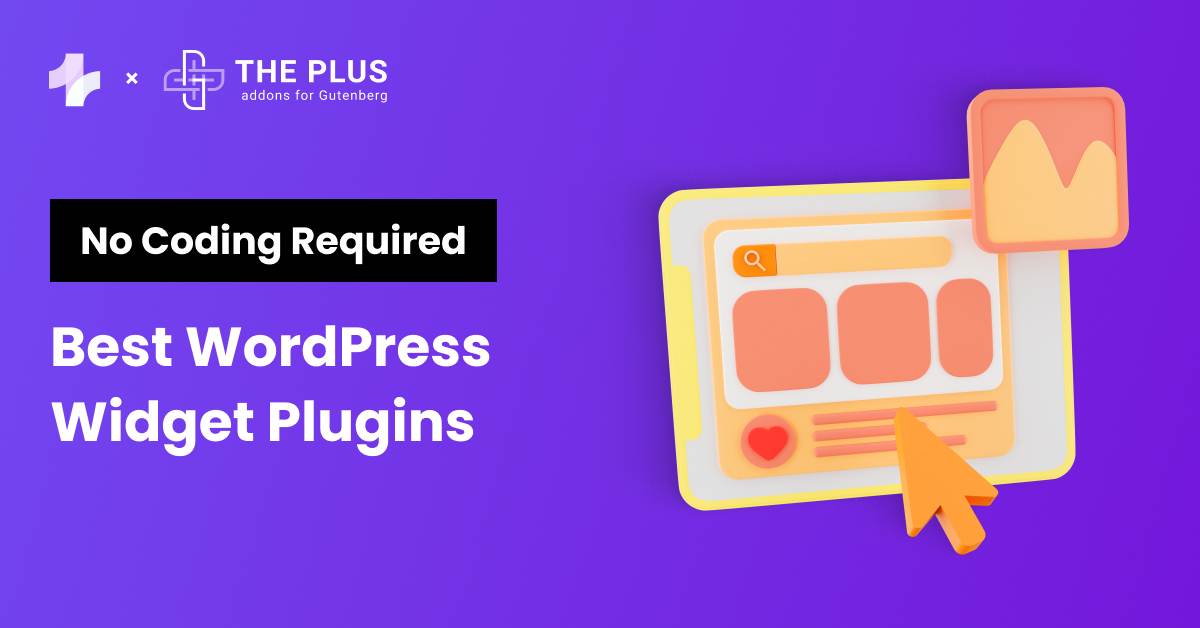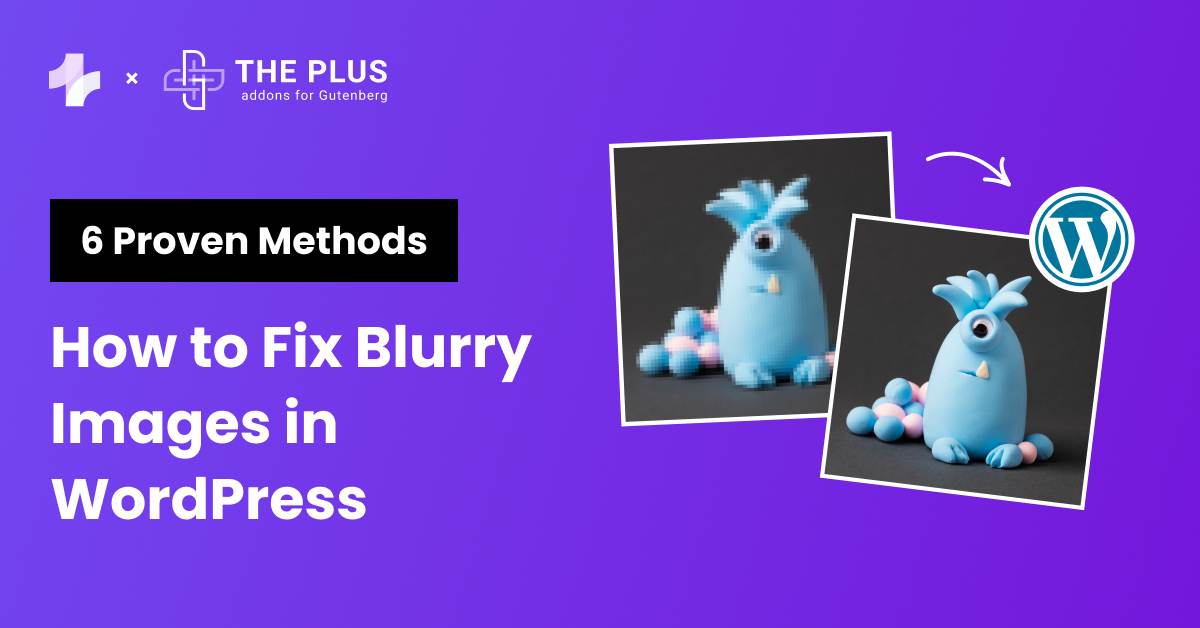
Are you struggling with blurry images on your WordPress website? The need to fix blurry images in WordPress is a common challenge that can significantly impact the visual appeal and user experience of your site.
Blurry images can also result in a poor user experience. Fortunately, there are several methods to fix this problem.
In this article, we’ll learn how to fix blurry images in WordPress with 6 working methods.
Stay ahead of the curve with our exclusive insights and analysis on the latest WordPress trends and techniques - subscribe to our newsletter today.
Why High-Quality Images are Important on WordPress Websites?
High-quality images play an important role in making your website more engaging and visually appealing.
However, if your images are blurry, it can have a negative impact on your website’s overall appearance and user experience.
Blurry or low quality images can make your website look unprofessional and can cause your visitors to lose interest in your content.
Images lack the necessary detail to appear sharp and clear, resulting in a pixelated or blurry appearance.
This can happen when you upload an image that is smaller than the size that it is displayed.
To resolve this issue and ensure your images are crisp and clear, consider implementing the following methods.
How to Fix Blurry Images in WordPress [6 Proven Methods]
Method 1: Upload the High Resolution Image on WordPress
It’s always advisable to upload high-resolution images to ensure the best quality on your website.
For instance, if you upload an image at 50×50 pixels and then insert it into your page content at 500×500 pixels or set it as a featured image, the small 50×50 image will appear grainy and pixelated when expanded well beyond its original size.
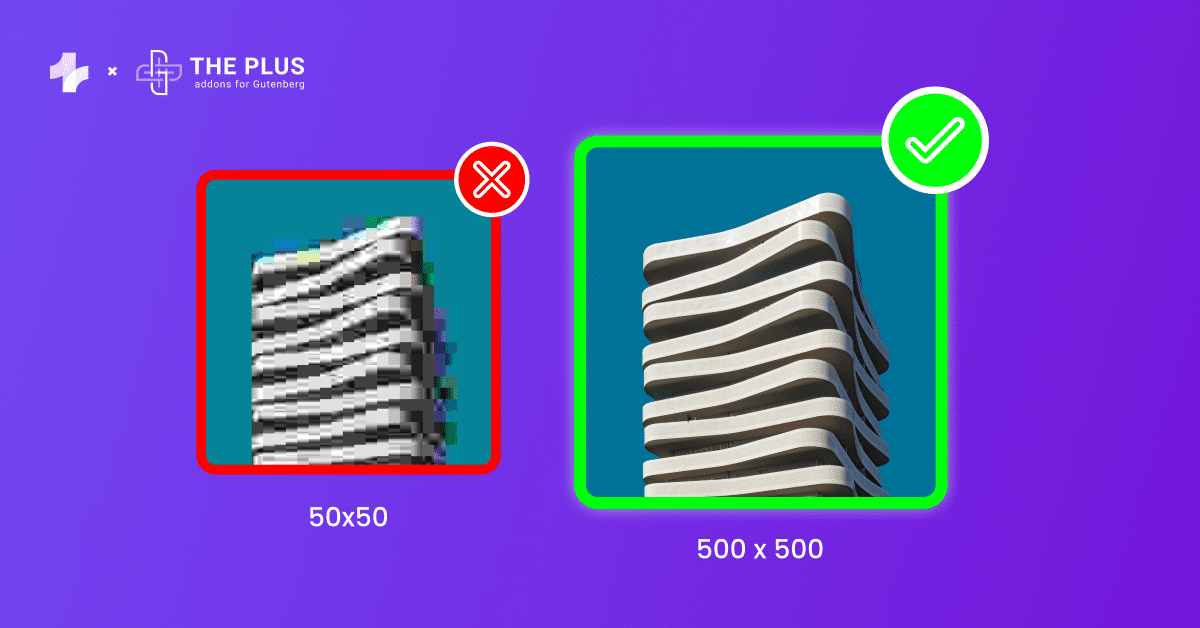
To maintain image clarity and prevent stretched or blurry images, it’s crucial to upload appropriately sized images for web display.
The recommended minimum image dimensions for web usage typically range from 800×800 pixels to 1200×1200 pixels, ensuring a clear and sharp appearance across various devices and screen sizes.
This guideline applies to images intended for use as thumbnails, within grid galleries, standard page content, sidebars, and throughout your site.
Moreover, it’s important to strike a balance when it comes to image file sizes.
Continuously adding oversized, high-definition images of 5-6 MB each can lead to heavy and slow-loading web pages.
Therefore, aiming for a good range of image sizes, typically between 200 KB to 1 MB, is advisable.
However, it’s essential to consider the specific requirements of your images and website.
For instance, a photographer’s website may necessitate high-quality images, while a simple business landing page can work well with a middle ground in terms of image quality and size.
Read Further: Top 20 Scroll Image Sequence Animation Inspirations
Method 2: Choosing the Right Image File Format
When it comes to image file formats, JPEG is widely used for photographs and complex images due to its ability to maintain high quality with relatively small file sizes.
On the other hand, PNG is preferred for images that require transparency or for graphics with text, line art, and logos, as it supports lossless compression.
Meanwhile, GIF is commonly used for simple animations or images with a limited color palette.
- PNG: This lossless format retains the highest quality and clarity by preserving complete image data, though resulting file sizes are larger compared to JPEG.
- JPEG: JPEG utilizes both lossy and lossless compression methods. Users can adjust quality levels, balancing smaller file sizes versus retention of defining visual elements, sharpness, and color depth.
- GIF: Employing a limited 256-color palette, the GIF format focuses solely on lossless compression optimal for flat, simple computer-generated graphics and icons. GIF is the go-to choice where basic animation is needed.
Choosing the right file format is essential for optimizing image quality and ensuring efficient page loading.
By understanding the characteristics of each format, you can make informed decisions to enhance the visual appeal and performance of your WordPress website.
Method 3: Use The Correct Image Thumbnail Size
Using the correct image thumbnail size can significantly impact the clarity of your images.
When inserting images into your WordPress posts or pages, it’s important to select the appropriate image size.
You can choose the correct thumbnail size by selecting it from the image block settings.
For example with The Plus Blocks for Gutenberg, which provides a powerful image gallery block,
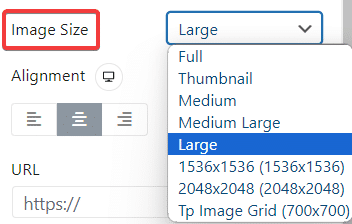
In the block settings of the image, look for the “Image Size” option and click on it to access the dropdown menu with different size options such as thumbnail, medium, large, and full size.
This allows you to tailor the image size to best suit the layout and design of your website, ensuring that your images appear clear and visually appealing.
In the block settings of the image, look for the Image Size and click on it to see the dropdown menu with different size options such as thumbnail, medium, large, and full size.
When facing blurry images, especially after uploading high-quality images, it’s crucial to review your image plugin thumbnail settings and ensure the correct thumbnail size is configured in the theme or specific plugin settings.
Selecting the appropriate size that best fits the area where you want to display the image, such as “Full Size,” can help prevent blurriness, particularly if the original image is high-resolution.
Most image plugin comes with thumbnail settings make sure to set this to the right size for the best output
Read Further: How to Generate AI Images in WordPress
Method 4: Regenerate Your Image Thumbnails
Regenerating image thumbnails is a process that involves creating new image sizes for the images you have uploaded to your WordPress site.
This is necessary when you change your theme or switch to a new plugin that requires different image sizes.
It can also be helpful when encountering blurry images on your WordPress site.
When you upload an image to WordPress, it automatically generates multiple sizes of that image based on your media settings and the sizes required by your theme.
If these settings are changed or if the theme has specific size requirements, the existing thumbnails may no longer align with the new settings, leading to blurry or distorted images.
Regenerating image thumbnails resolves this issue by creating new image sizes that are in line with the current settings, ensuring that your images appear sharp and clear throughout your website.
This process can be particularly beneficial after making changes to your WordPress site’s image settings, theme, or plugins, ultimately enhancing the visual appeal and quality of your images.
How to Regenerate Thumbnail on WordPress?
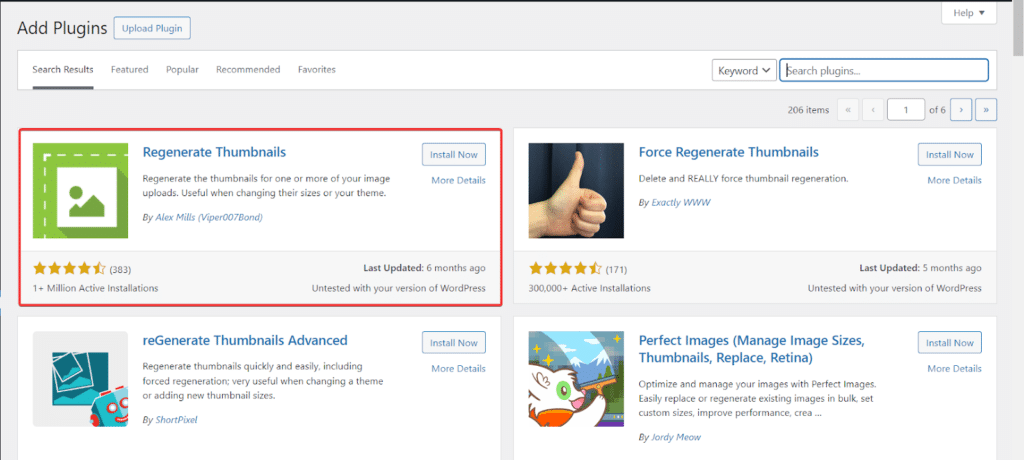
Step 1. Install and activate the Regenerate Thumbnails plugin on your WordPress website.
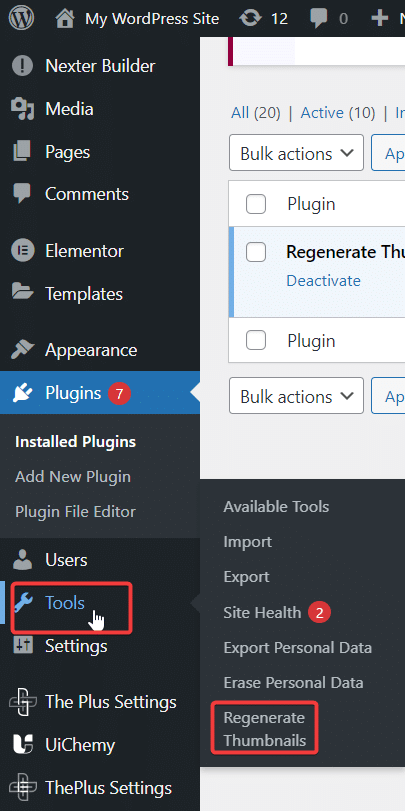
Step 2. After activating the plugin, Click on Tools and then select Regenerate Thumbnails.
Step 3. After that, in Regenerate Thumbnails select the checkbox shown in the image below and Click on Regenerate Thumbnail For All Attachments.
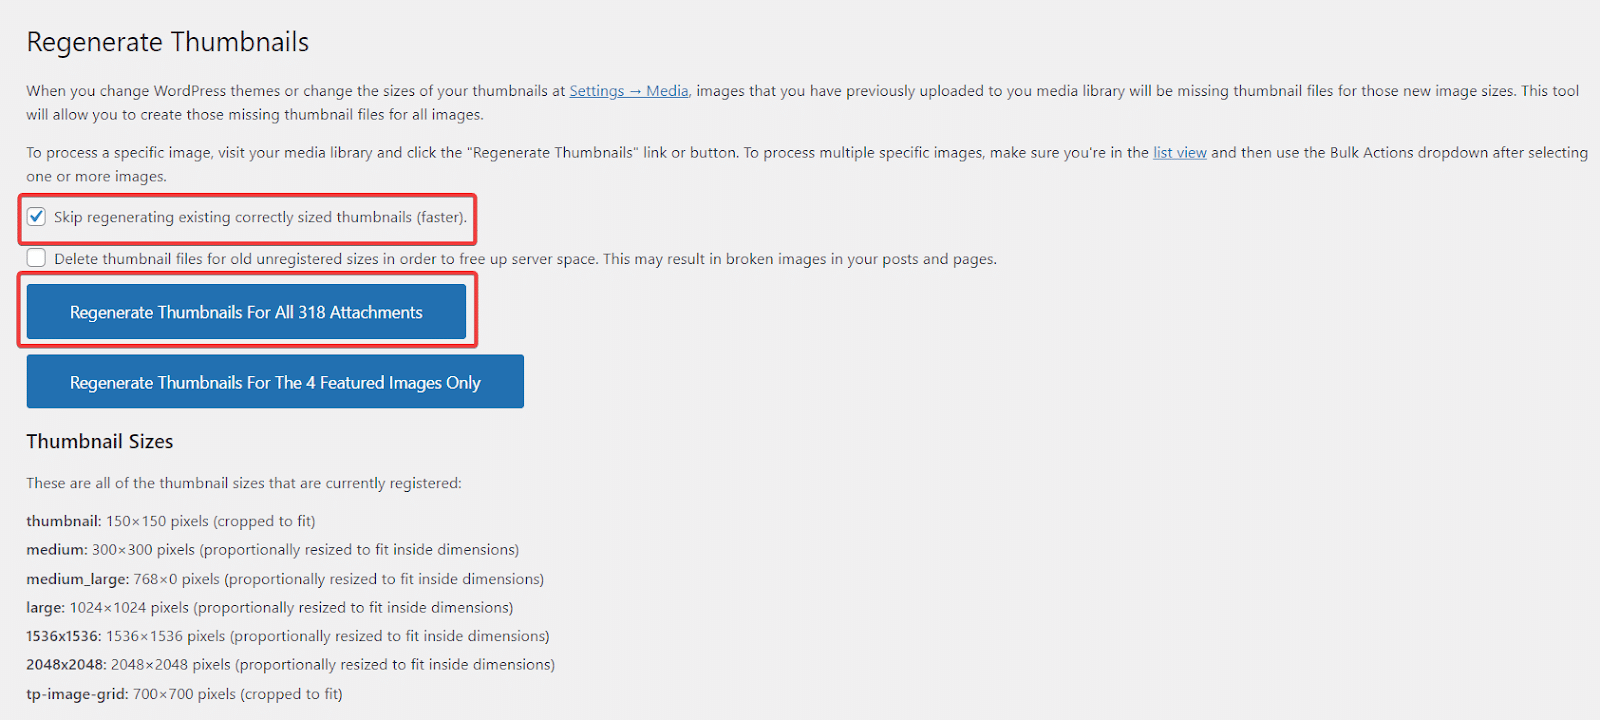
Step 4. After clicking, it will take some time, depending on the number of images and pictures on your website.
After regenerating thumbnails, You need to set your image optimization level to the lowest which helps in maintaining image quality by reducing the amount of compression applied to the images.
Method 5: Set The Lowest Image Optimization Level
If you are utilizing an Image Optimization plugin for your WordPress site, it’s important to consider the optimization level settings.
Opting for the lowest optimization level can be crucial, as higher levels of compression may lead to overly aggressive optimization, resulting in poor image quality and potential blurriness.
By adjusting the settings to the lowest optimization level, you can mitigate the risk of over-compression, ensuring that your images maintain their visual integrity and clarity.
There are mainly two types of compression levels: Lossy and Lossless.
- Lossy: Lossy compression reduces the file size by permanently removing some of the image data. This can result in a smaller file size, but it also means that some details in the image may be lost.
- Lossless: Lossless compression also makes files smaller, but keeps all the original details. It’s slower and doesn’t save as much space as Lossy, but the quality stays the same.
This approach allows for a balance between file size reduction and image quality, ultimately contributing to an optimal viewing experience for your website visitors.
Therefore, it’s advisable to review and adjust the optimization level settings within your Image Optimization plugin to best align with your quality and performance requirements.
Suggested Reading: Learn How to Create a WordPress Image Gallery Using Gutenberg
Method 6: Turn off the Image Optimization Plugin
After following all the steps mentioned above if the images are still blurry or pixelated it might be due to the image optimization plugin you’re using.
Some plugins can overly compress images, leading to a loss in the quality of your images.
Turning off the plugin prevents any additional compression that may be applied by the plugin, ensuring images remain clear and sharp.
To Turn off the image optimization plugin follow these steps:
Step 1. Go to the Plugins section in your WordPress Dashboard and Select Installed Plugins.
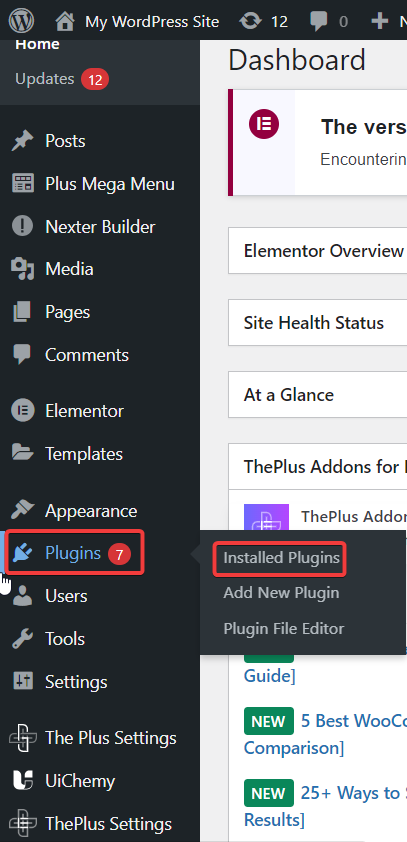
Step 2. Find the image optimization plugin you’re using and click on the Deactivate button below it.
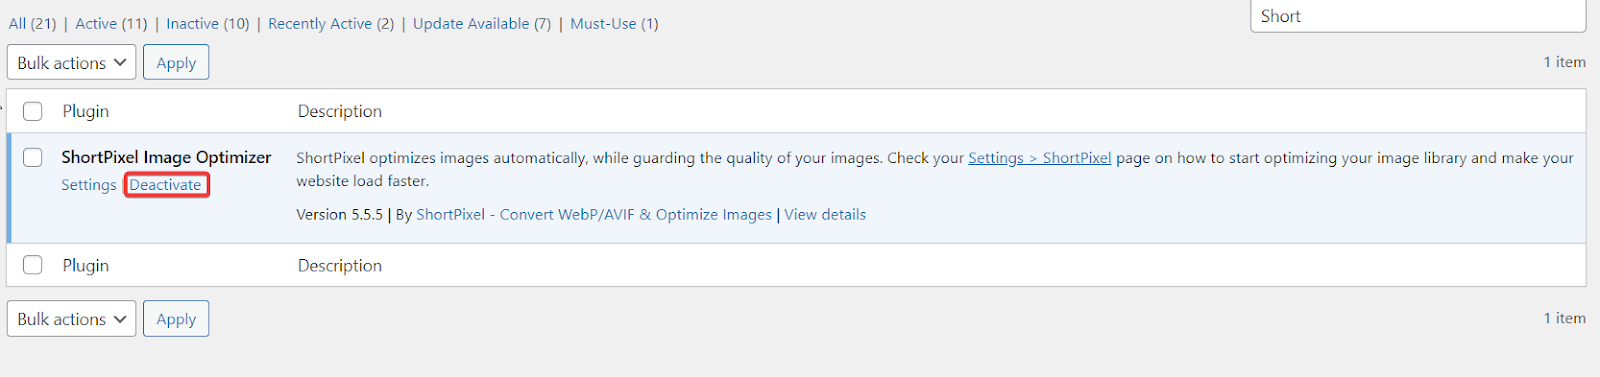
Step 3. After deactivating the plugin, check your website to see if the images are no longer blurry. If they appear clear, the issue was likely caused by the image optimization plugin you are using.
If disabling the image optimization plugin fixes the problem, it doesn’t mean you should avoid using image optimization plugins altogether. Instead, consider trying a different plugin that offers a lower level of compression.
Read Further: 6 Best Photo Image Gallery WordPress Plugins
Get our best WordPress tips, tricks, and tutorials delivered straight to your inbox - Subscribe to our Monthly Email newsletter Today.
Wrapping up
Fixing pixelated or blurry images in your WordPress website is crucial for providing a quality viewing experience and keeping visitors engaged.
Sharp, crisp images make blogs and websites look more professional and convey information clearly.
Here is a recap of some of the best ways to fix blurry images on WordPress.
- Use the High-Resolution Image.
- Choose the Right Image File Format.
- Use The Correct Image Size in Block Settings
- Use the Regenerate Thumbnail plugin.
- Set The Lowest Image Optimization Level.
- Turn off the Image Optimization Plugin.
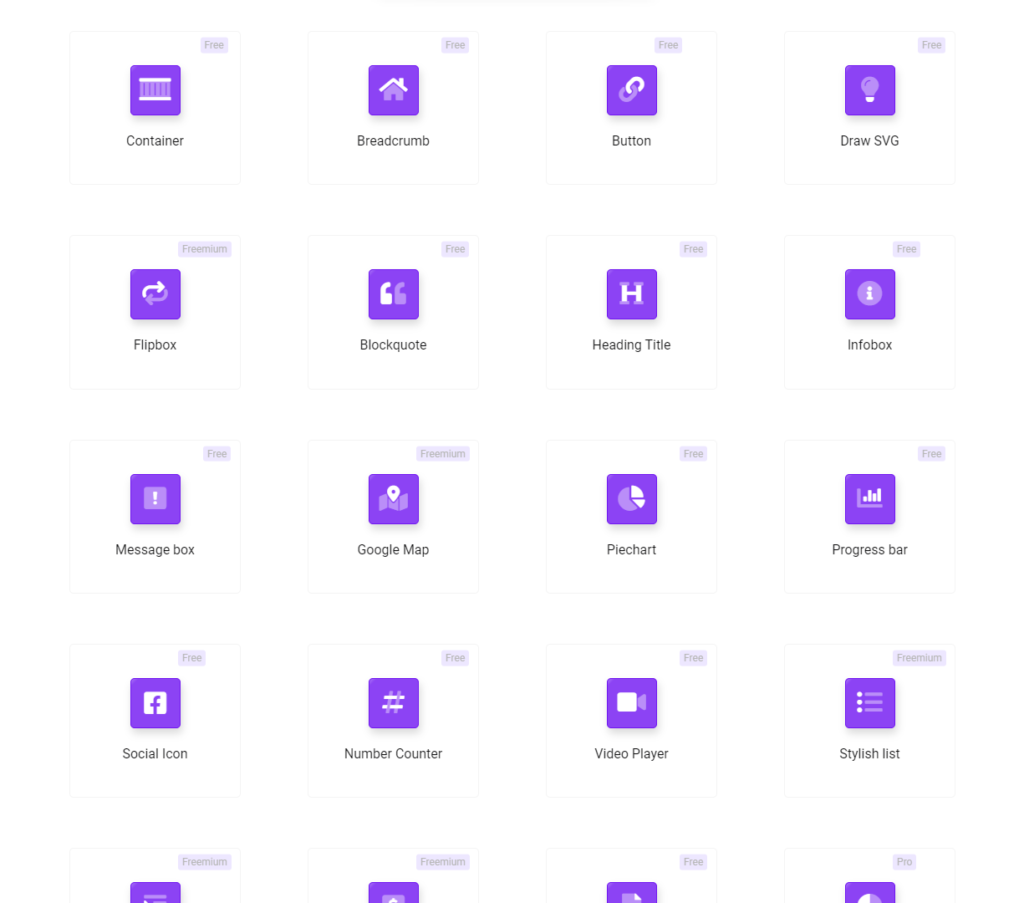
If you are a WordPress user, you can check out the Collection of 85+ Gutenberg Blocks, from The Plus Blocks of Gutenberg.
It offers a wide range of options to create engaging and interactive content, whether you need to add stunning image galleries, eye-catching sliders, or interactive call-to-action buttons.
These blocks are designed to be easy to use, allowing you to create professional-looking designs without any coding knowledge.
FAQs on How to Fix Blurry Images In WordPress
Why are my WordPress images blurry?
Your images in WordPress may appear blurry due to Low resolution, Incorrect image format, Improper image block size, Image optimization, Theme or plugin issues.
How to fix blurry images from the media library in WordPress?
To fix blurry images from the media library in WordPress, You can consider these steps Check Image Size, Use the Correct Image Format, Adjust Image Settings, Use the Regenerate Thumbnails Plugin, Disable Image Optimization Plugins, and Clear Cache.
How to prevent WordPress from compressing uploaded images?
WordPress compresses uploaded images for better website performance, but this can lead to blurry images. To avoid this, plugins like WP Smush or EWWW Image Optimizer can be used to optimize images without losing quality.
What can be the reason for featured images appearing blurry in WordPress?
If your WordPress-featured images are blurry, several factors could be at play. Improper image sizing for your website or excessive compression during upload are common issues. To resolve this, consider uploading higher-resolution images or using an image optimization plugin for clearer images.
How can we upload high-resolution photos to WordPress without losing quality?
For high-resolution WordPress photos, ensure they’re properly sized. Use an image optimization plugin for compression. A CDN can speed up your site and image loading without quality loss.
What causes WooCommerce product images to display as blurry and how can it be corrected?
To avoid blurry WooCommerce product images, ensure they’re properly sized and optimized for the web. Use a plugin like Regenerate Thumbnails to resize images to fit your site’s dimensions and improve image quality.
Is there a method to fix blurry images when using Elementor in WordPress?
If images appear blurry in Elementor on WordPress, improper sizing or excessive compression may be the cause. To resolve, ensure images are appropriately sized and consider using an image optimization plugin. Uploading higher-resolution images can also improve quality.