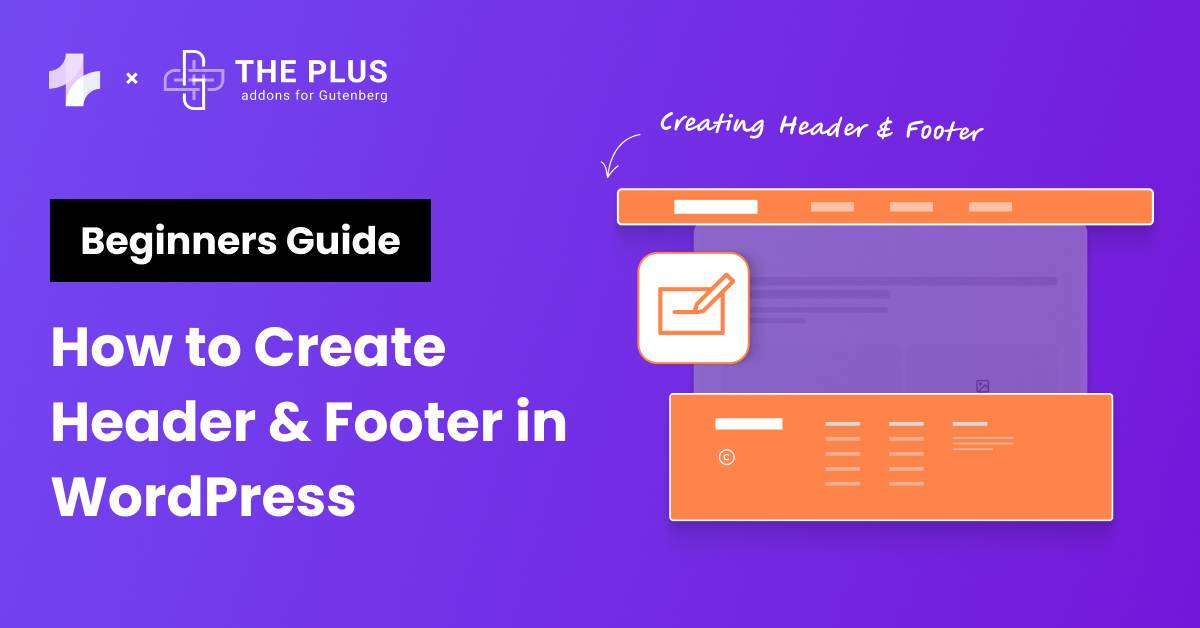
If you want a website that captures visitors’ attention, don’t forget to create a header & footer in WordPress!
Headers and footers are a vital part of your website’s design as they allow for seamless navigation and reinforce your brand’s identity. A well-designed header introduces your site to visitors; it often contains a menu that allows them to navigate to the section of their choice.
A footer, on the other hand, closes the interaction on a strong note. A footer is where you would add important links, contact information, and social media icons to help visitors interact with your brand further.
Crafting a WordPress header and footer and customizing them can be daunting as the options available may often seem confusing.
Also, ensuring that your header and footer are responsive and look good on all screen types can be a challenge.
In this article, we take you by the hand and guide you through the easiest method to create well-designed and engaging custom headers and footers in WordPress.
Stay ahead of the curve with our exclusive insights and analysis on the latest WordPress trends and techniques - subscribe to our newsletter today.
What is a Header in WordPress?
A Header in WordPress is the top section of your website that typically appears on every page. It is the face of your site and is the first thing visitors see when they arrive. It sets the tone and expectations for what’s to come.
This element often contains your site’s title or logo, navigation menu, search bar, and other essential widgets that guide users through your content.
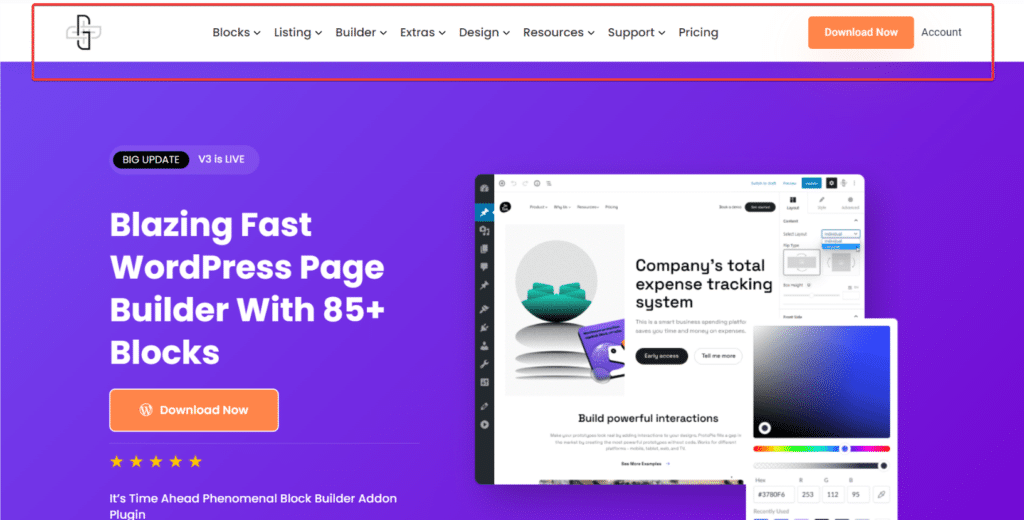
Here’s the Header of The Plus Blocks for Gutenberg website:
Understanding how to build a header in WordPress is fundamental to crafting a successful online presence. When you customize your WordPress header, you’re improving the usability and effectiveness of your website.
Here’s why a header is so important for your WordPress site:
- First Impressions Matter: It’s the initial point of engagement with your visitors, making it critical for establishing a positive first impression.
- Navigation: A well-organized header makes your site more user-friendly and allows visitors to navigate and find the information they’re looking for easily.
- Brand Identity: It’s a prime location to reinforce your brand, using your logo, brand colors, and typography to make your site memorable.
- Functionality: Incorporating elements like search bars, contact information, and social media icons in the header enhances the overall functionality of your site.
What is a Footer in WordPress?
A footer in WordPress is the section at the bottom of your website that also appears on every page. It’s the bookend to your site’s content, offering a last touchpoint before a visitor leaves your page.
Footers typically include information like contact details, copyright notices, links to privacy policies or terms of service, social media icons, and sometimes a back-to-top button.

This area might not get the initial spotlight like the header, but it plays a crucial role in your site’s functionality and user experience. When you create header & footer in WordPress, you ensure a cohesive and comprehensive user journey from start to finish.
Here’s why a footer is so important for your WordPress site:
- Essential Information: It conveniently houses important links and information. This makes it easy for visitors to find what they need without scrolling back to the top.
- Navigation: A well-structured footer can improve site navigation, guiding visitors to other parts of your site, such as FAQs, contact pages, or popular posts.
- Credibility and Trust: Including copyright information, privacy policies, and terms of service in the footer can enhance the credibility and trustworthiness of your site.
- Engagement: Footers are great places to encourage further engagement, whether through newsletter sign-up forms, social media links, or recent blog posts.
What Will You Need to Create a WordPress Header & Footer?
To create and customize WordPress headers and footers, you need the right tools.
While the standard Gutenberg editor has a few design options, it doesn’t offer advanced customization features that will make your site stand out.
Here, we will use two plugins that add functionality to your WordPress editor.
First, we need the Nexter Theme, which allows you to customize the theme of your site and offers diverse designs to choose from and edit.
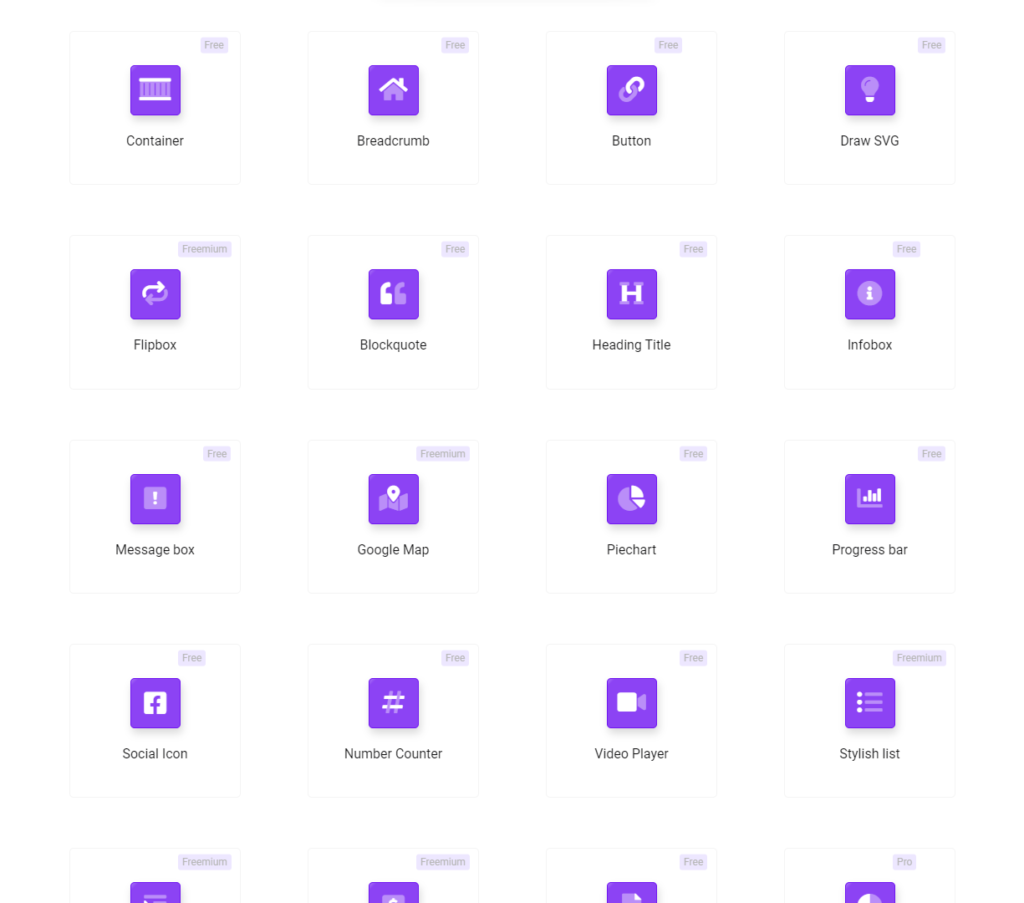
Second, to add advanced widgets and customize the header in WordPress, you will need The Plus Blocks for Gutenberg plugin, which comes with 85+ unique blocks.
1. Install Nexter
Let’s begin by installing the Nexter Theme. Navigate to your Wordpress Dashboard and select Appearances > Themes.
Now click Add New Theme and type “Nexter” in the search bar. Once you’ve located Nexter, click the Install button.
When the theme is installed, you will be able to Activate it.
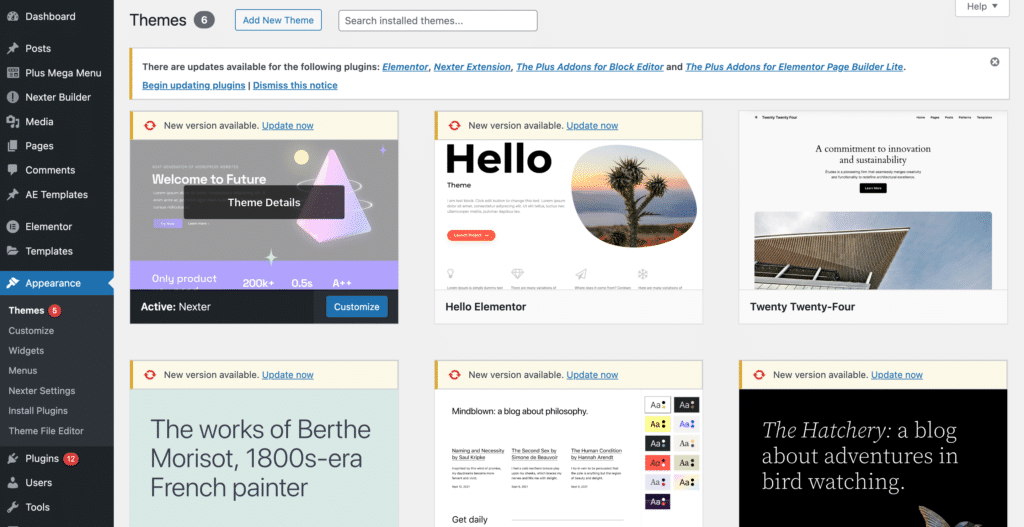
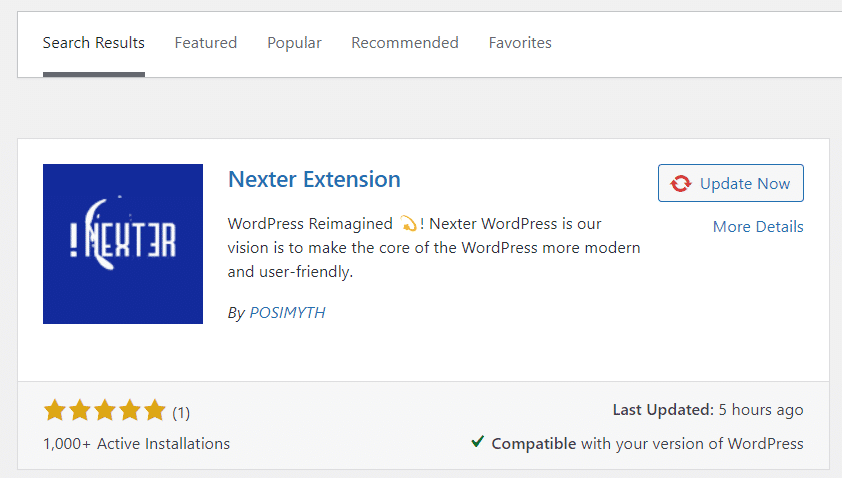
To ensure enhanced functioning of the Nexter theme, you also need to download the Nexter Extension Plugin.
From your WordPress Dashboard, navigate to Plugins > Add New Plugin. In the search bar, type “Nexter Extension“. When you find the plugin, install and activate it.
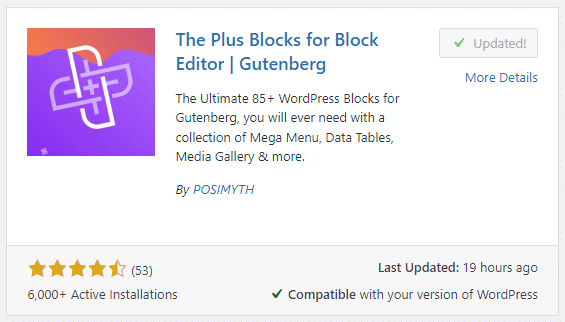
2. Install The Plus Blocks for Gutenberg
While the Nexter theme provides the basic design foundation for your header and footer, to add advanced blocks to your website, you’ll need The Plus Blocks for Gutenberg.
To install it, head to your WordPress dashboard and navigate to Plugins > Add New Plugin. Use the search bar to look for “The Plus Blocks.” Find the plugin, install and activate it.
Looking for the best WordPress themes? Here’s how to choose a WordPress theme.
How to Create WordPress Header (or WordPress Footer) with Nexter & The Plus Blocks
Step 1: Create a Header Template
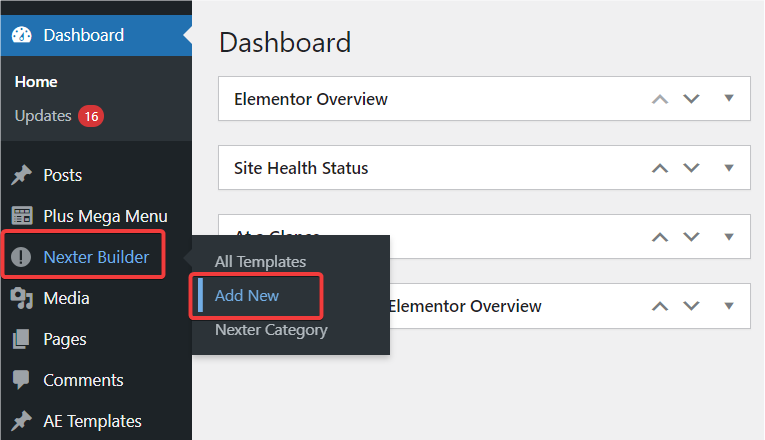
The step to create a header in WordPress is to use the Nexter theme to build a header template. For this, go to your WordPress dashboard.
Now, navigate to Nexter Builder > Add New.
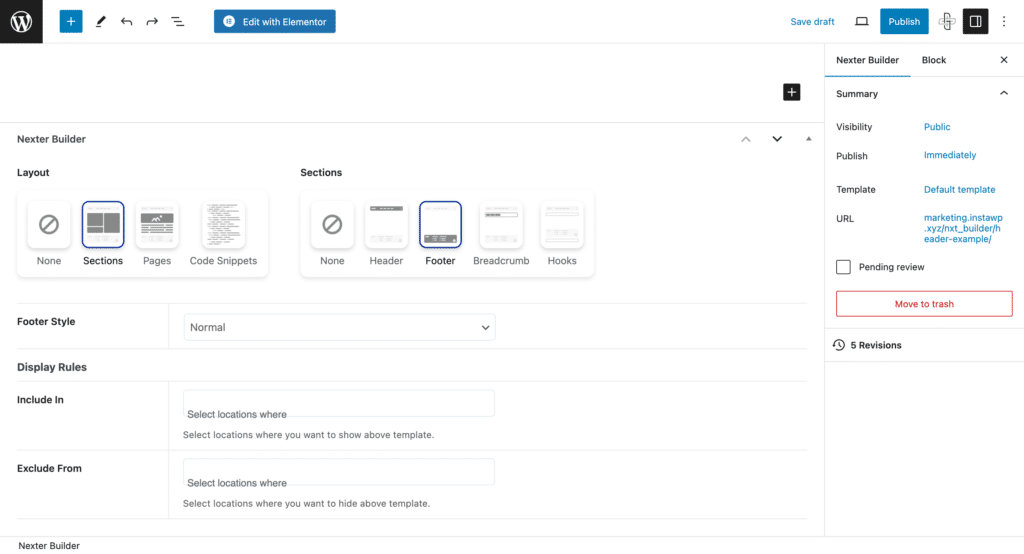
This will now open the Nexter builder. From the layout options, select Section, and from the Sections options, select Header.
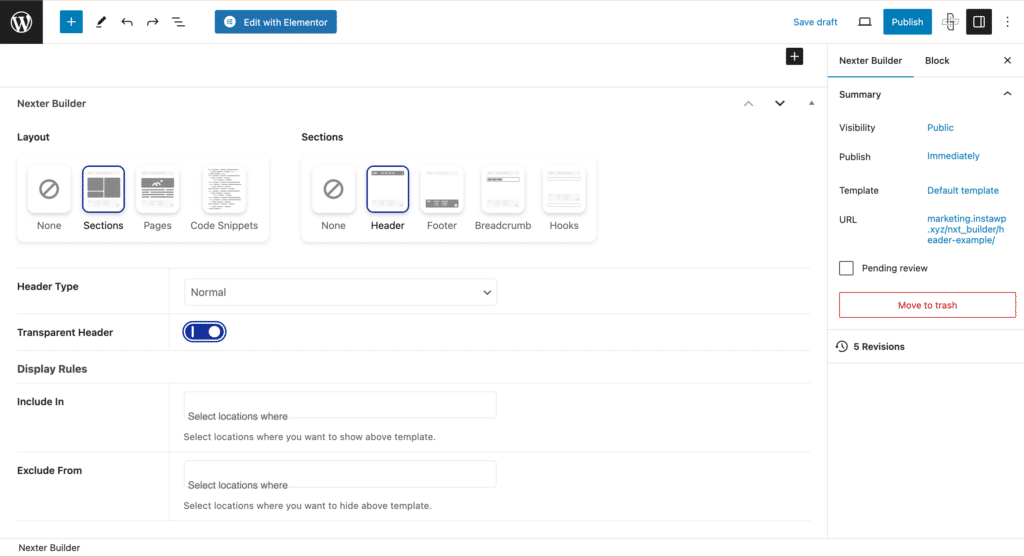
This will allow you to build a custom header for your Website. Now, also select the header type. Here, you have three options,
- Normal – stays at the top of your web page and disappears when you scroll down.
- Sticky – The header sticks to the top of the screen and appears when visitors scroll down.
- Normal+Sticky – The header will be visible from the start and will stay on the screen as you scroll down.
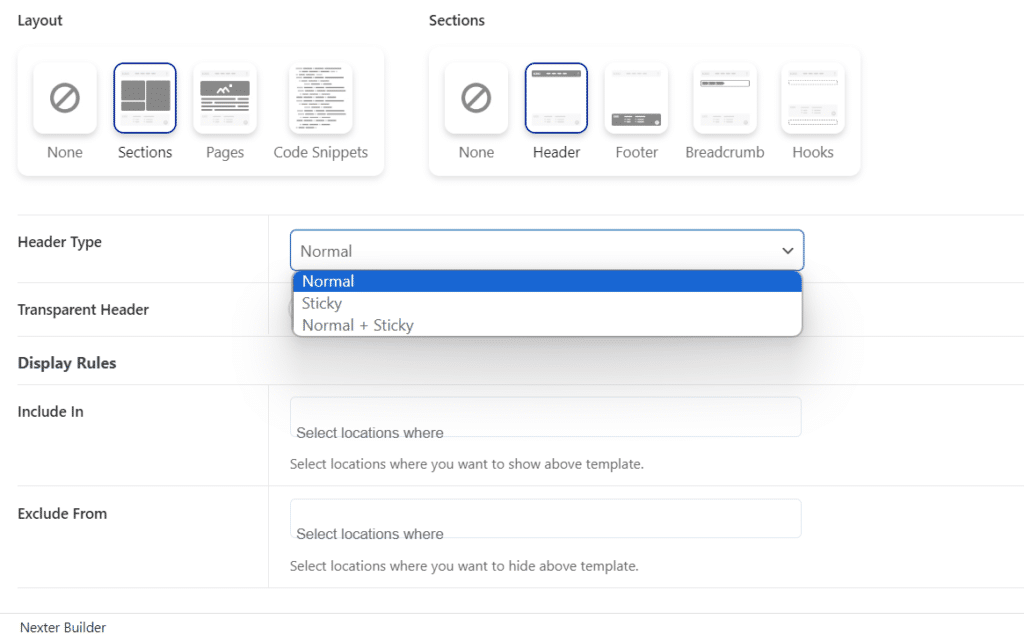
You can also customize Display Rules and select locations on your site that you want to include or exclude your header from.
Step 2: Design the Header
Now, we can use the Gutenberg editor and The Plus Blocks for Gutenberg to add widgets to the header. You can use the widgets that are part of The Plus Blocks Header Builder.
For our header here, we will be adding the Site Logo, Navigation Menu, and the CTA banner widgets from the Header Builder.
First, click “+” and add the column block. You can select the ratio of the sizes for your columns.
In the first column, let’s add the site logo for branding purposes. Search for the “Site Logo” widget from the Plus Blocks for Gutenberg and click on it to add it.
Now, in the block settings, Upload the logo. You can use the advanced settings to customize the layout, background, borders, and more.
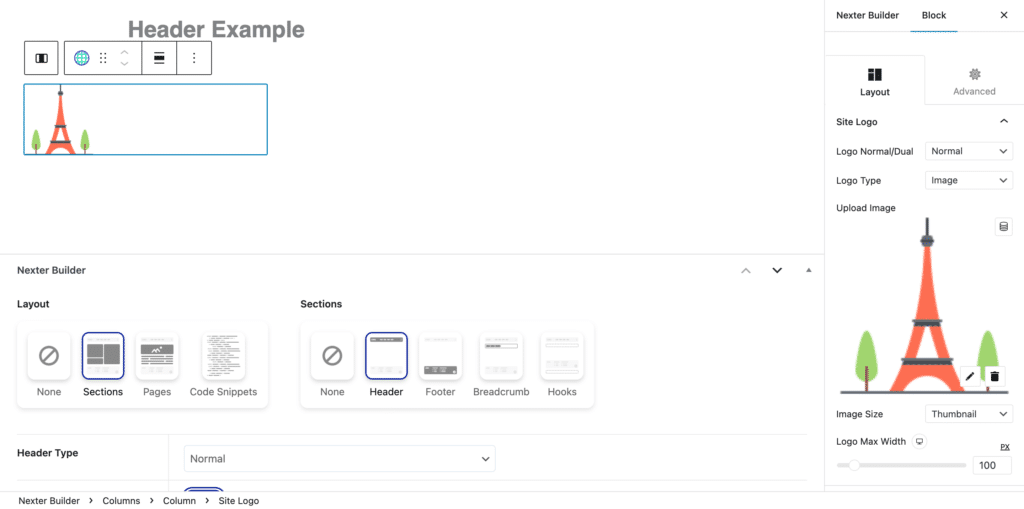
With the Plus Extra: Display Rules, you can also ensure your design is responsive across various devices.
The next step is to add a menu to the header. You can use advanced widgets from The Plus Blocks, such as the Navigation Menu or the Mega Menu.
To add a Navigation Menu to your second column, click the “+” icon. Now select search for and select “Navigation Menu” from the list of blocks and click on it.
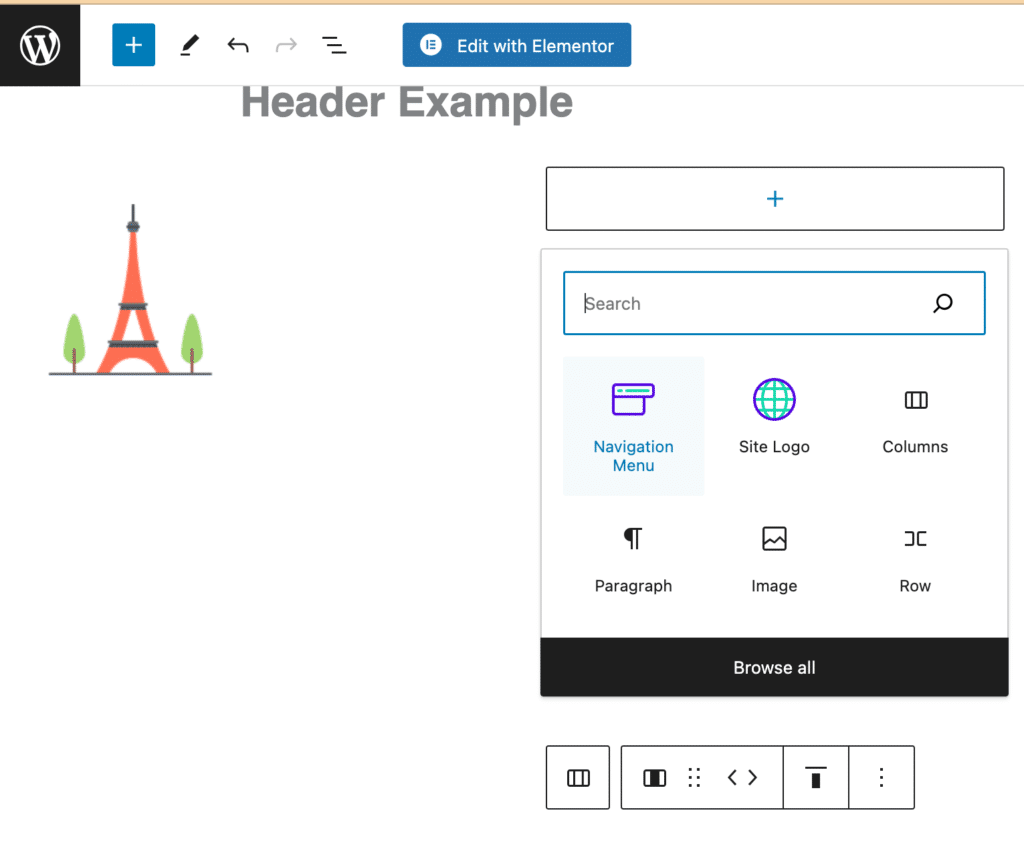
In the settings menu, select the menu that you want to display on your website.
You can also add a responsive mobile menu and customize design options like text colors, backgrounds, and more to ensure a cohesive design.
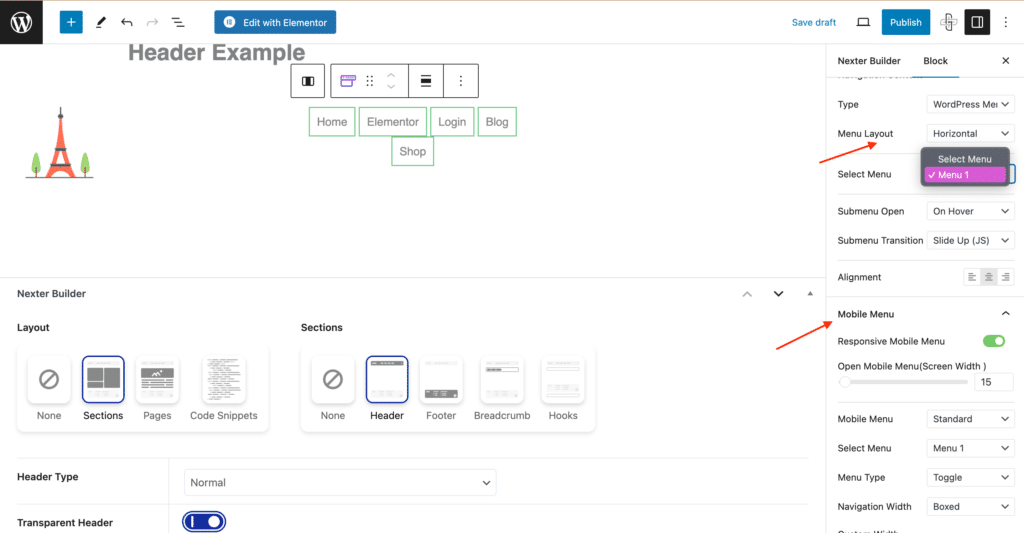
After designing your menu, check if it meets your requirements using the Preview option. Make any changes you need to make now.
To create a mega menu, change the menu type to manual in the settings.
This will allow you to customize the appearance of your mega menu, including colors, fonts, dropdown animations, and more, to match your site’s design.
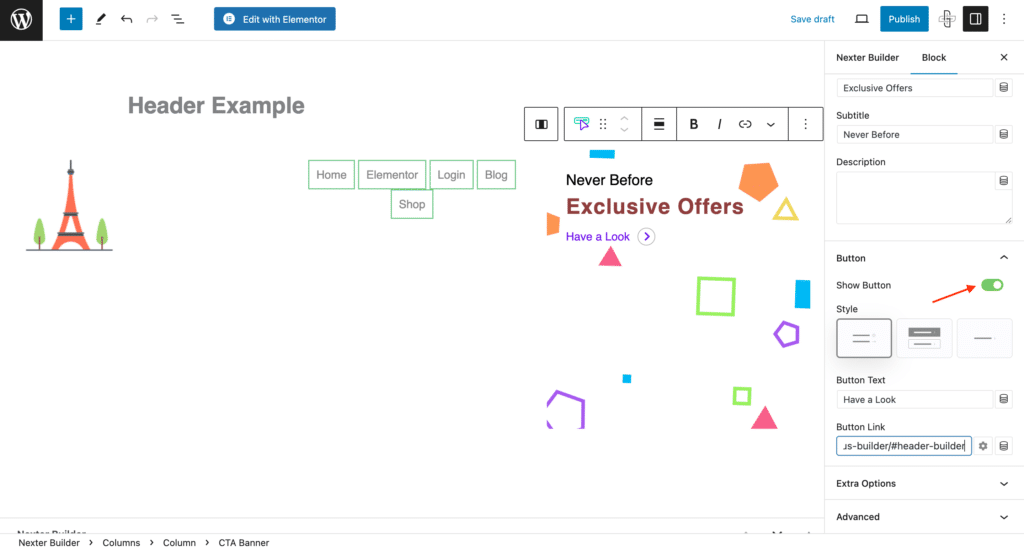
To add a CTA Banner widget to your header, click the “+” button, search for the widget, and add it.
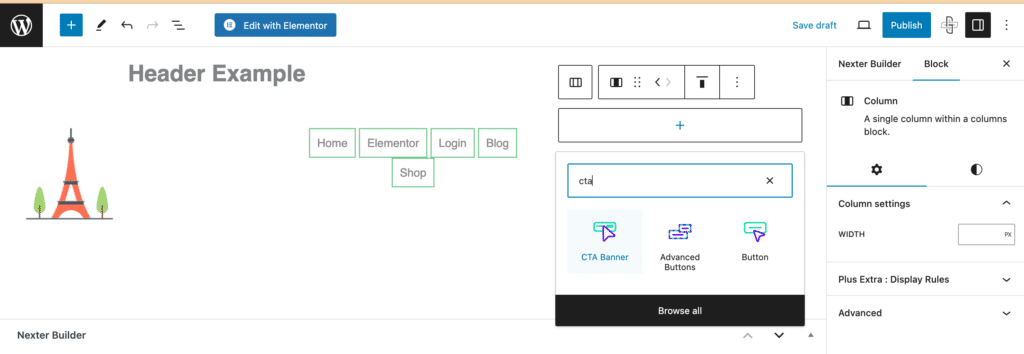
Now you can customize the banner style, the title, the subtitle, and the description on the banner. You can also add a background image and change text colors and styles.
Make the banner clickable by activating the button option and adding a link that the CTA should take visitors to.
Having trouble with your WordPress menu? Here are 5 easy methods to fix the WordPress Can’t Add Page to Menu issue.
Step 3: Publish your Header
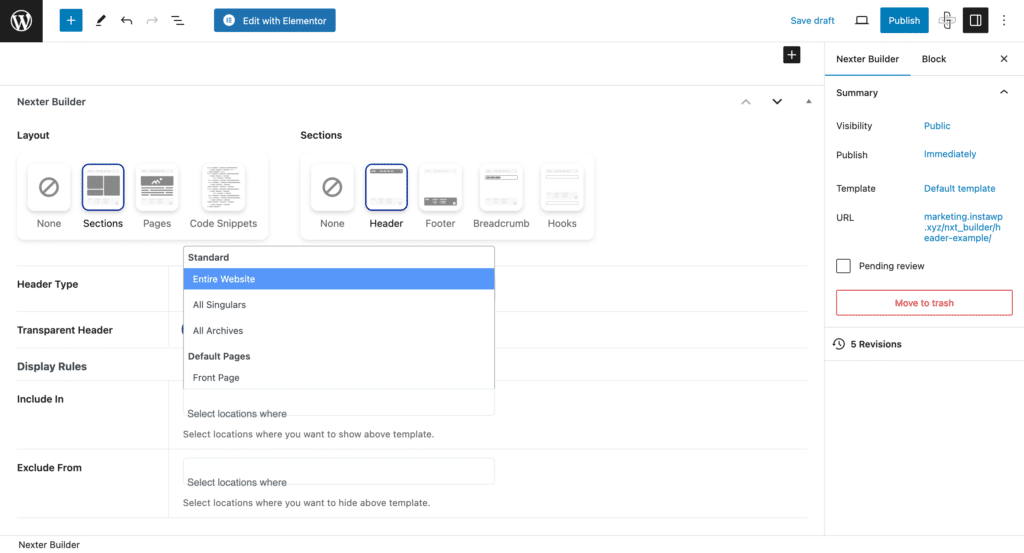
Once you are satisfied with the header you’ve designed, you can Publish it. Before you publish, ensure that your new header is set as the Global header on your website.
To do this, scroll down to the Nexter Theme Builder. Under the “Include In” option, select “Entire Website”.
This will ensure that the header appears on all the pages of your website.
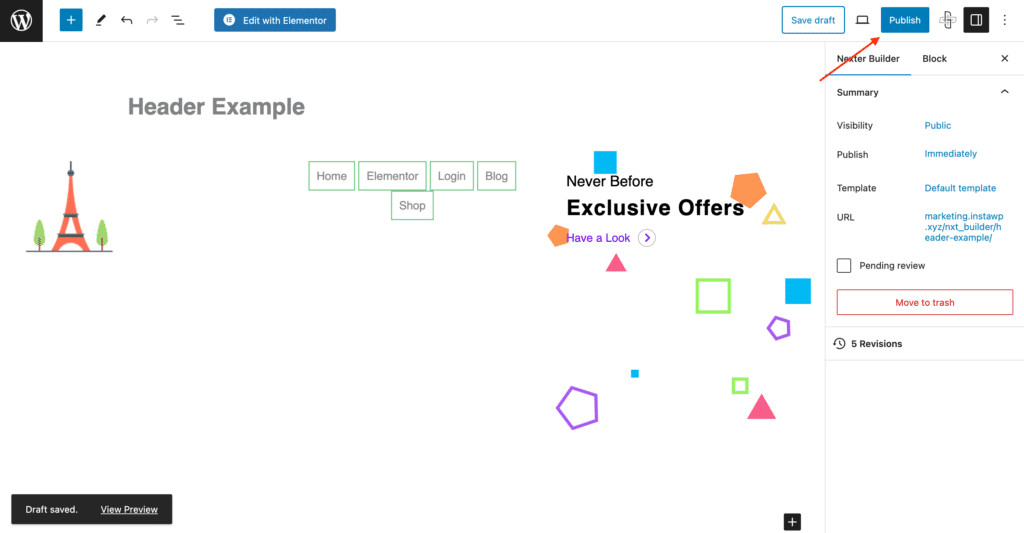
Now, simply click the Publish button at the top of your screen. Your new header will now appear on your website.
A good landing page needs more than a header. Here’s how to create high-converting landing pages with Gutenberg.
Step 4: Design a Footer
To design a footer for your website, follow the same steps as above.
However, in the Nexter Theme Builder, select Footer under Sections. In the footer section, you can use widgets such as Social Icons and Social Feeds from The Plus Blocks for Gutenberg.
You can also add a MailChimp widget to allow visitors to get in touch with you through a contact form.
Further Read: New to the Gutenberg editor? Here’s a Beginners Guide to WordPress Block Editor to help you get a headstart.
Wrapping Up
Headers and footers enhance the look and the usability of your website.
With tools from Nexter Theme Builder and The Plus Blocks for Gutenberg at your disposal, you can create an attractive and well-designed WordPress custom header and footer in just a few simple steps.
The Plus Blocks for Gutenberg is an important addition to every web designer’s toolkit. Apart from the header and footer blocks, The Plus Blocks for Gutenberg come with 85+ customizable blocks that enhance the functionality of the Gutenberg editor.
These blocks are created with responsive design principles, customizability, and easy WordPress integration in mind.
Try The Plus Blocks for Gutenberg today and step up your WordPress website design game!
Get our best WordPress tips, tricks, and tutorials delivered straight to your inbox - Subscribe to our Monthly Email newsletter Today.
FAQs on Creating Header & Footer in WordPress
Can the header and footer be Customized?
Yes, you can customize both the header and footer in WordPress to match your website’s style and requirements. Utilizing themes and plugins like the Nexter theme and The Plus Blocks for Gutenberg enhances customization, as they allow for unique designs and advanced functionality.
Are there any recommended plugins for designing and customizing headers in WordPress?
For designing and customizing headers in WordPress, pairing The Plus Blocks for Gutenberg with the Nexter theme comes highly recommended. This combination offers a powerful, user-friendly platform for creating unique and engaging headers that stand out.
What are the best practices for creating a responsive header in WordPress?
When creating a responsive header in WordPress, it’s essential to focus on adaptability and user experience across all devices. Employ flexible layouts and test on various screen sizes when you change the header in WordPress to maintain functionality and aesthetic appeal.
Is it possible to have different headers for different pages on a WordPress site?
Yes, you can change the WordPress header for different pages to better match the content or user journey. Using a theme like Nexter, you can easily assign unique headers to individual pages, enhancing the user experience and site navigation.
Are there any WordPress themes that offer built-in options for customizing headers and footers?
Yes, some themes, like Nexter, offer built-in options for WordPress header customization. It provides intuitive tools to adjust your site’s header and footer, streamlining the design process and enabling you to craft a more cohesive look across your website.