Page loading animations can significantly enhance the user experience on your WordPress website by providing visual feedback during loading times. A preloader animation, a small graphic or animation displayed while a website loads, assures visitors that the site is actively loading, rather than frozen or broken.
To add a page loading animation in WordPress, custom code or additional plugins are often necessary. However, The Preloader Block from The Plus Blocks for Gutenberg offers an intuitive and user-friendly solution. It allows you to add beautiful and customisable page loading animations to your WordPress site without the need for complex coding or additional plugins. With The Preloader Block, you can choose from a variety of animation styles and customise them to match your website’s branding and style.
Required Setup
- Make sure the default WordPress Block editor is active.
- You need to have The Plus Blocks for Gutenberg plugin installed and activated.
- This is a Premium block, and you need the PRO version of The Plus Blocks for Gutenberg.
- Make sure the Preloader block is activated, to verify this visit Plus Settings → and Search for Pre Loader and activate.
Learn via Video Tutorial:
How to Activate the Preloader Block?
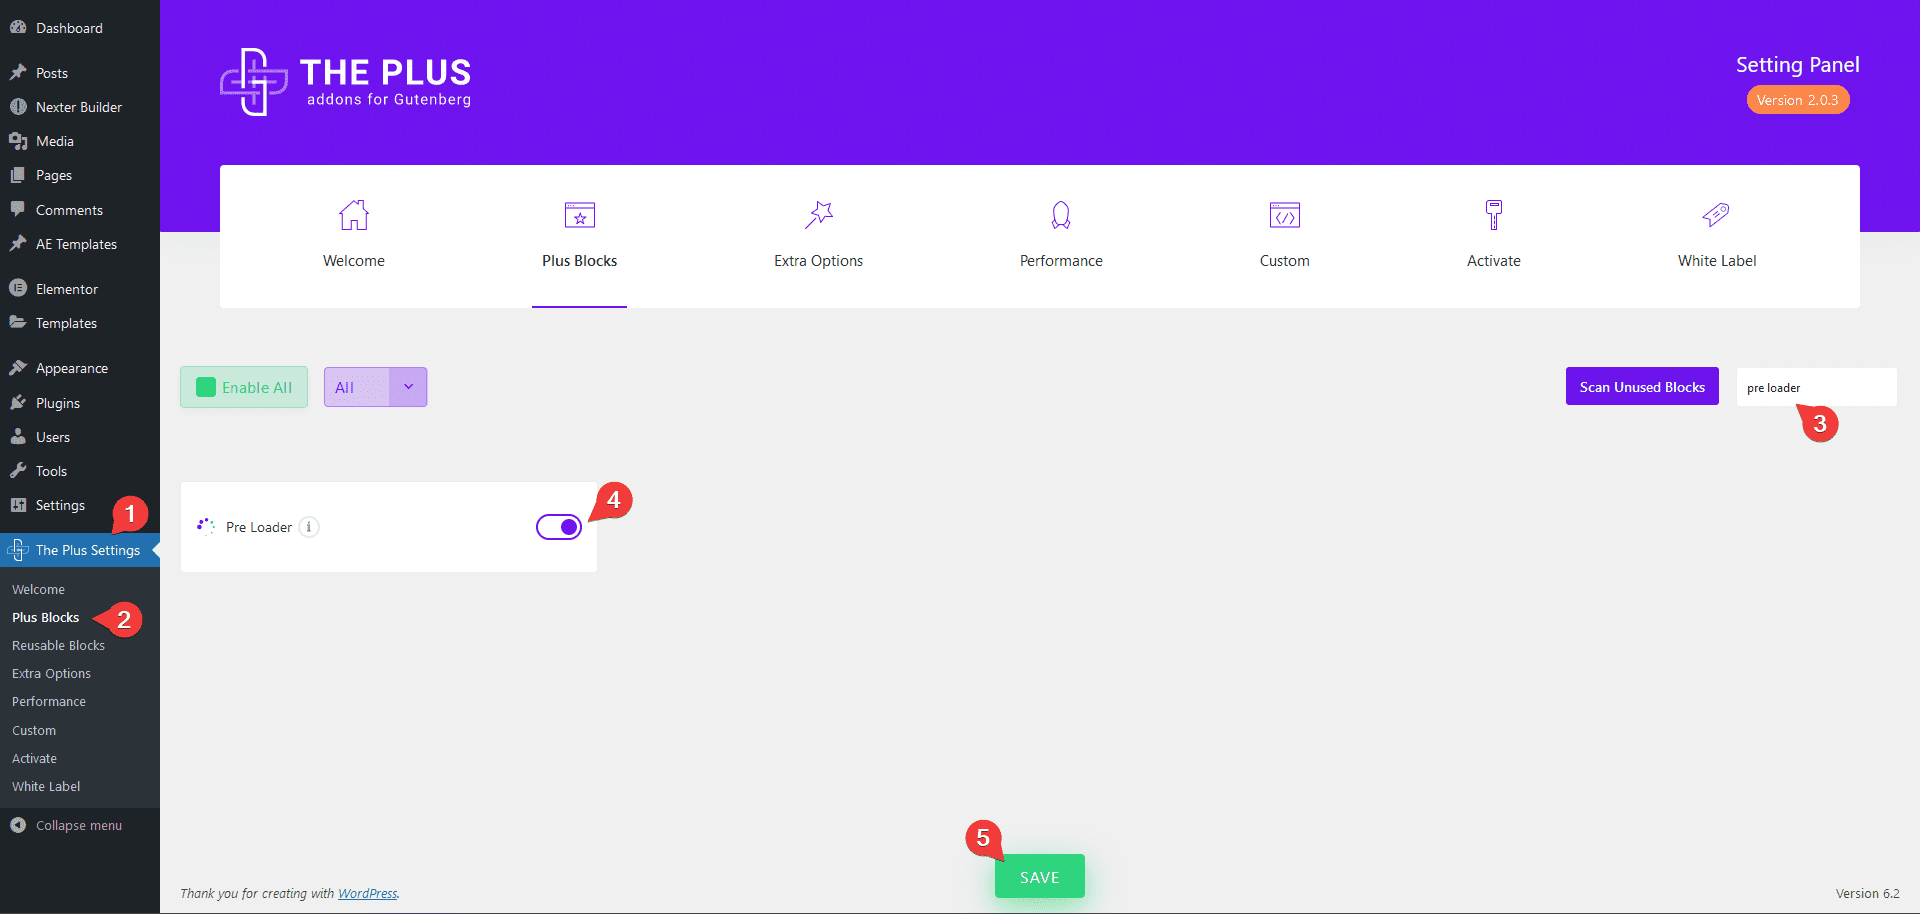
Go to
- The Plus Settings → Plus blocks
- Search for the block name and turn on the toggle then click Save.
Key Features
- Image Preloader – You can use an image as a preloader.
- Icon Preloader – You can use an icon as a preloader.
- Text Preloader – You can use custom text as a preloader.
- Lottie Preloader – You can use Lottie file animation as a preloader.
- Custom Preloader – You can use custom CSS and HTML to create a preloader.
- Shortcode Preloader – You can use shortcode based preloader.
- Multiple Predefined Loaders – You can select from multiple predefined loading animations.
- Multiple Preloaders – You can use multiple preloaders on a page together.
- Exclude Content – You can easily exclude content that will load before the preloader.
- Page Loading Transition – You can add beautiful page transitions.
- Set Minimum or Maximum Load Time – You can easily set a minimum or maximum load time for the preloader.
How to Add the Preloader Block?
If you want to add page loading animation on the entire website, then you should add the Preloader block on common templates like Header or Footer.
You can easily do that with the free Nexter Theme’s theme builder feature. Where you can create header, footer and other templates.
Otherwise, you can add the Preloader block on individual pages or posts where you want to add the page loading animation.
Once you add the Preloader block in the template or page, in the Pre Loader tab, you’ll find an item under Layers.
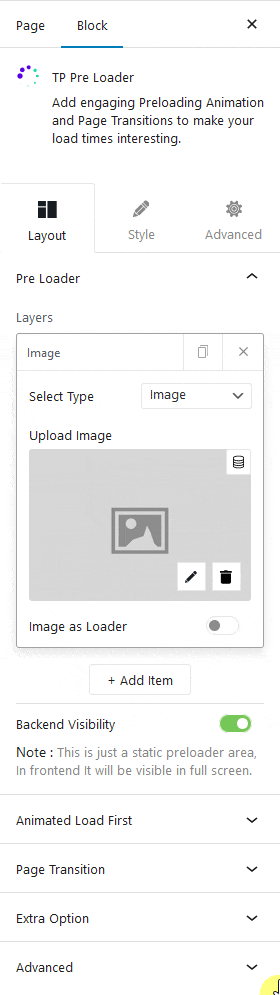
Open the item. Under the Select Type dropdown, you’ll find multiple options –
Image – To create an image preloader. Learn more.
Icon – To create an icon preloader. Learn more.
Text – To create a text preloader. Learn more.
Lottie – To create a Lottie File animation preloader. Learn more.
Predefined – With this, you can select from different predefined loading animations as preloaders.
Custom Code – To create a custom preloader. Learn more.
Shortcode – To create shortcode based preloader. Learn more.
Progress – With this, you can select from different progress bar loading animations as a preloader.
Based on your choice, you’ll find relevant options.
You can click on the + Add Item button to add multiple preloaders on the page. Learn the process.
Then you’ll see a Backend Visibility option, turn it on to see the preloader preview in static mode.
Note: Preview will not be available for some types of preloader.
Animated Load First
From this tab, you can select which elements will load before the preloader. Learn more.
Page Transition
From this tab, you can add beautiful page loading transition effects. Learn the process.
Extra Option
From this tab, you can set the minimum or maximum load time of the preloader. Under the Load Time dropdown, you’ll find three options –

Default – It will keep the load time to the default page load time
Minimum – In this option, you can set a minimum time (in seconds) for the loader to show, irrespective of the page load time. You can set the time in the Time field.
For example, if you set the time to 3 seconds, the page loading animation will show for 3 seconds even if your page takes 2 seconds to load.
Maximum – In this option, you can set a maximum time (in seconds) for the loader to show, irrespective of the page load time. You can set the time in the Time field.
For example, if you set the time to 2 seconds, the page loading animation will show for just 2 seconds even if your page takes 5 seconds to load.
How to Style the Preloader Block?
You’ll find most of the styling options for the Preloader block in the Style tab.
Image – If you are using the image preloader, you can style it from this tab. From here, you can manage image width, margin, border and box shadow. If you are using the Image as Loader option, then from the Image Loader section, you can manage opacity and CSS Filter for both normal and fill states.

Icon – If using an icon as a loader, you can manage the style from this tab. From here, you can manage the icon size, padding, margin, colour, background, border etc.
Text – If you are using text as a preloader, you can manage the style from this tab. You can manage the background, padding, margin, border etc.
Predefined – If you are using any predefined loading animation, then you can manage its padding and margin from here.
Progress Bar – This is for the progress type preloader, from here you can manage the progress bar width, height, colour, margin, border etc.
Box – From this tab, you can manage the preloader container box and page background style. You can manage the preloader container box width, padding, background, border etc. From the Whole Background section, you can style the whole page background.
Advanced – This is our global extension available for all our blocks. From here you can add a custom CSS class in the Additional CSS class(es) field. If you know CSS you can use this class to further finetune the style by using your own custom CSS.
Advanced options remain common for all our blocks, you can explore all it options from here.