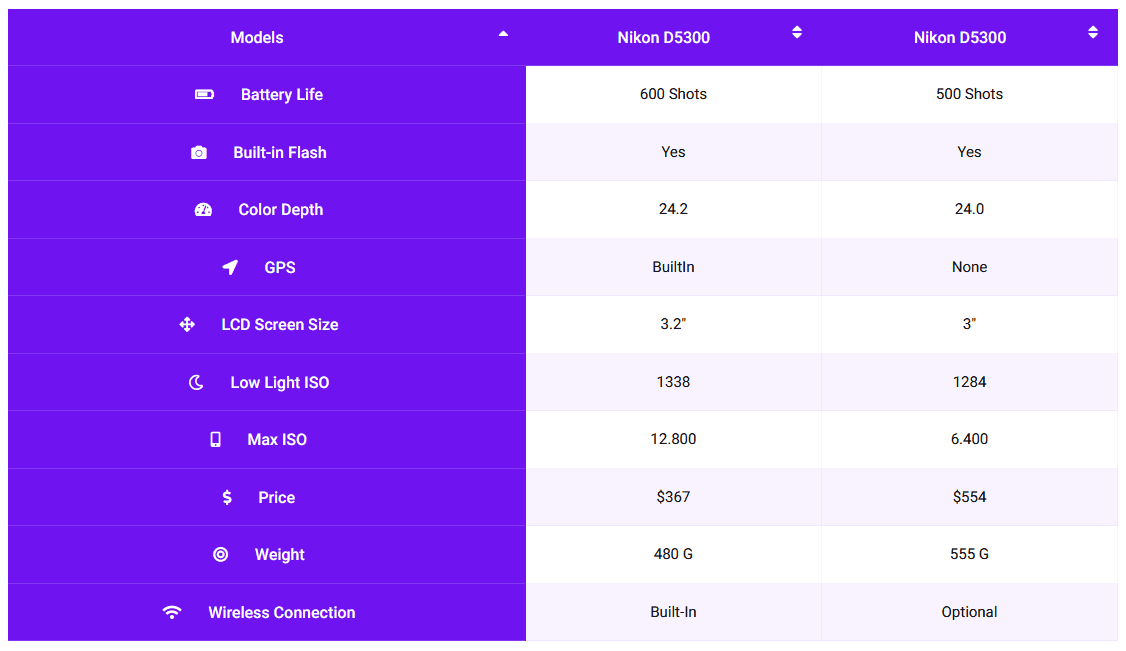
Comparison tables can be a great way to showcase and compare products, services, or features on your WordPress website. Whether you’re running an e-commerce site or a blog, a well-designed comparison table can help your visitors make informed decisions and improve their user experience.
With the help of the Data Table block from The Plus Blocks for Gutenberg, you can create comparison tables quickly and conveniently without having any coding knowledge.
To check the complete feature overview documentation of The Plus Blocks for Gutenberg Data Table block, click here.
Requirement – This block is a part of The Plus Blocks for Gutenberg, make sure its installed & activated to enjoy all its powers.
To do this, add the widget on the page, then follow the steps –
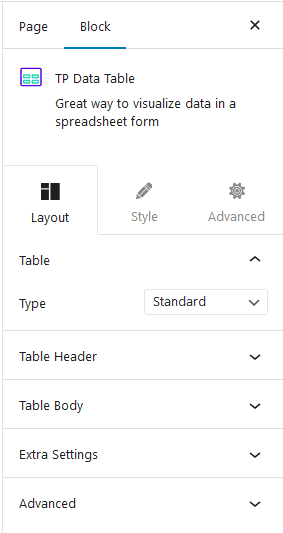
1. Choose Standard as the content source from the Type dropdown under the Table tab.
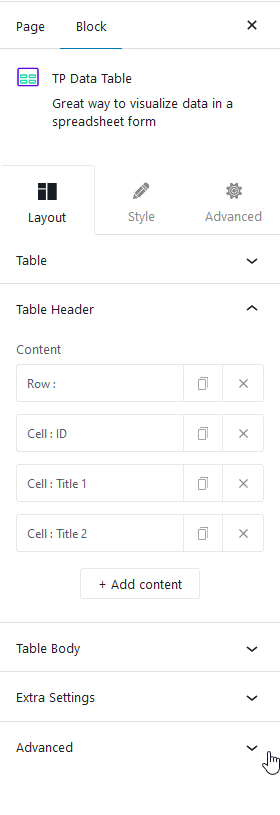
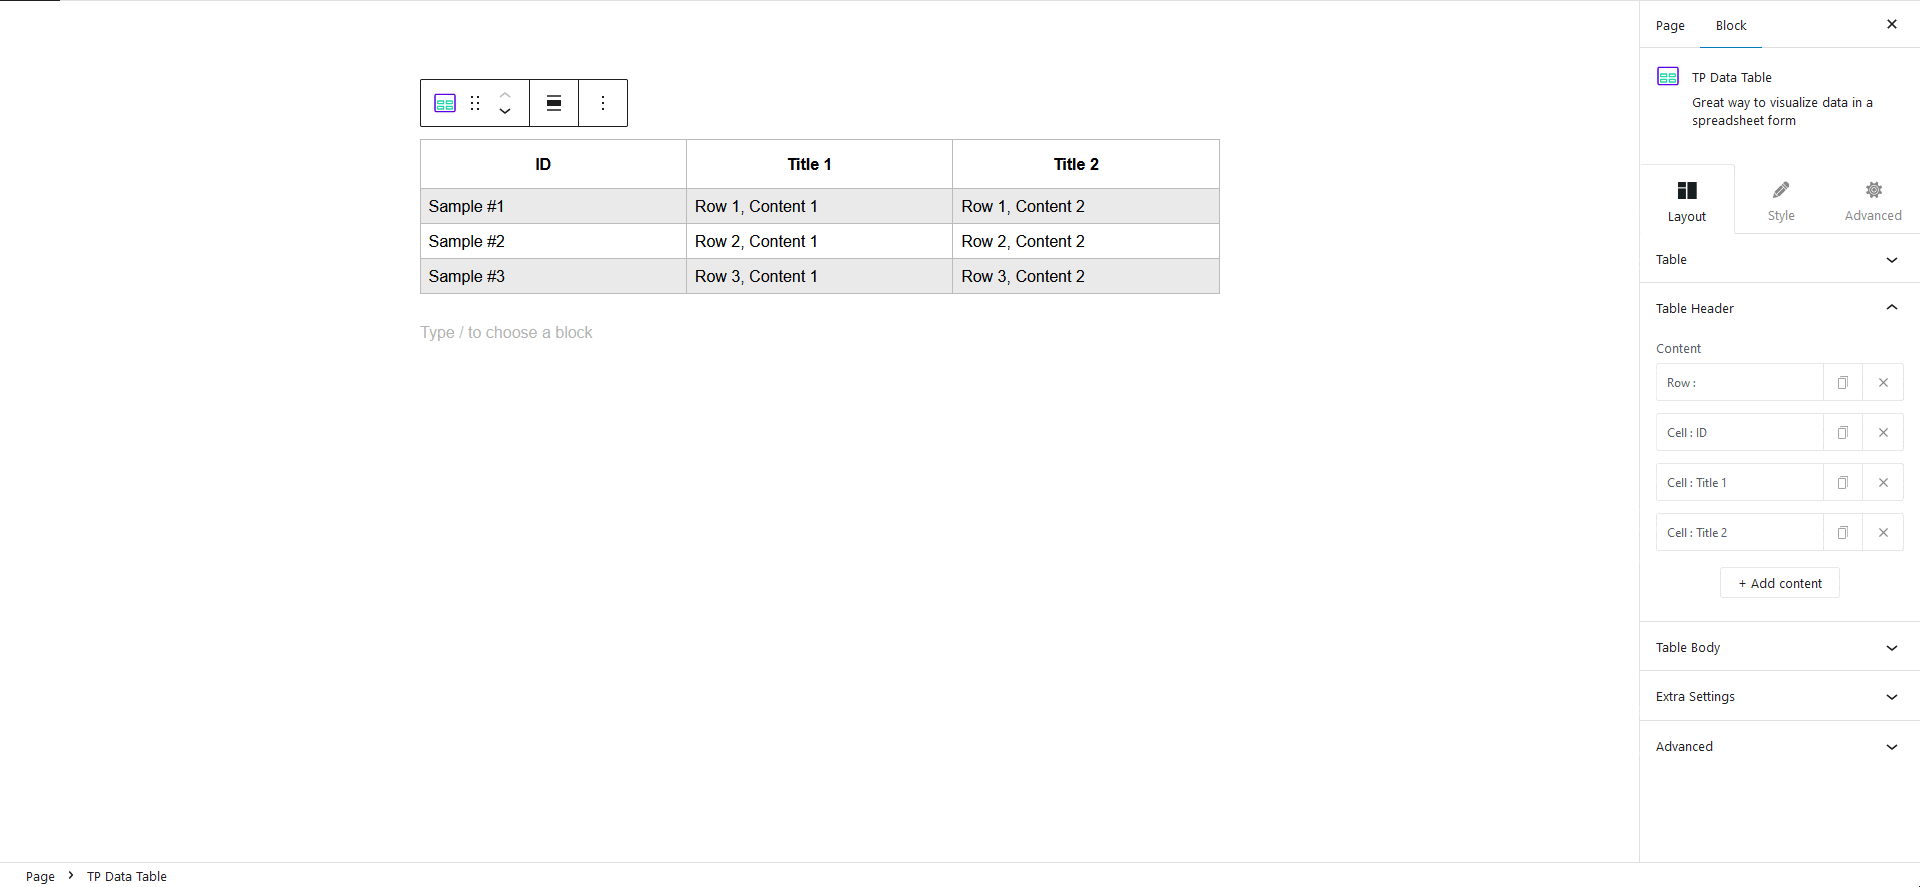
2. From the Table Header tab, you can add the table’s header. Once you open the tab, the first item you’ll see is a Row. It is the row of the table header.
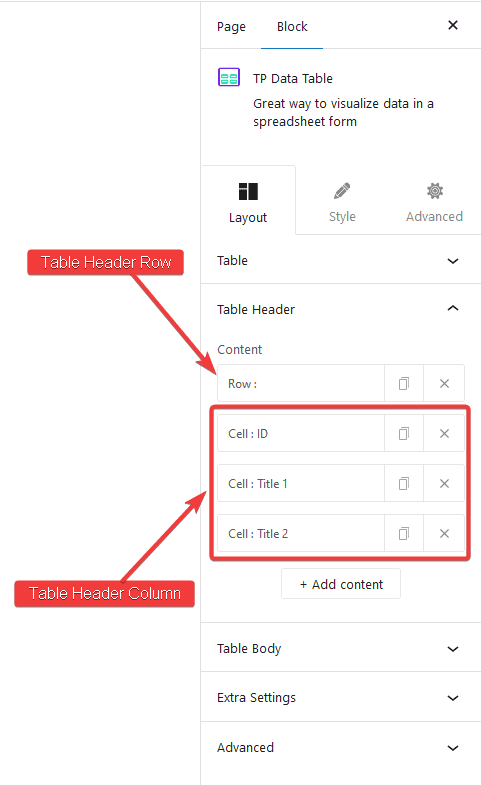
Note: To add a row in the table header or body, you have to initiate a row first.
Open the item, and select Start New Row from the Action dropdown.
3. To edit the header cell content, open the first Cell: ID item. You’ll see the Action dropdown is set to Cell Content because it is a content cell.
Then in the Content tab, you can add text content in the Text field.
From the Icon tab, you can add an image or icon to the table content.
Finally, from the Advanced tab, you can manage the Column Span (colspan), Row Span (rowspan), column width, individual cell colour and background colour.
Note: The column width set here will apply to all the cells of that particular column.
You can follow the same process to edit the other table header cells.
Click the + Add content button to add more cells to the table header.
Note: You can add a row as well but ideally, a table header should have only one row.
4. Go to the Table Body tab to add or edit the table body content.
Similar to the Table Header, it will have a row first. Make sure the Action dropdown is set to Start New Row.
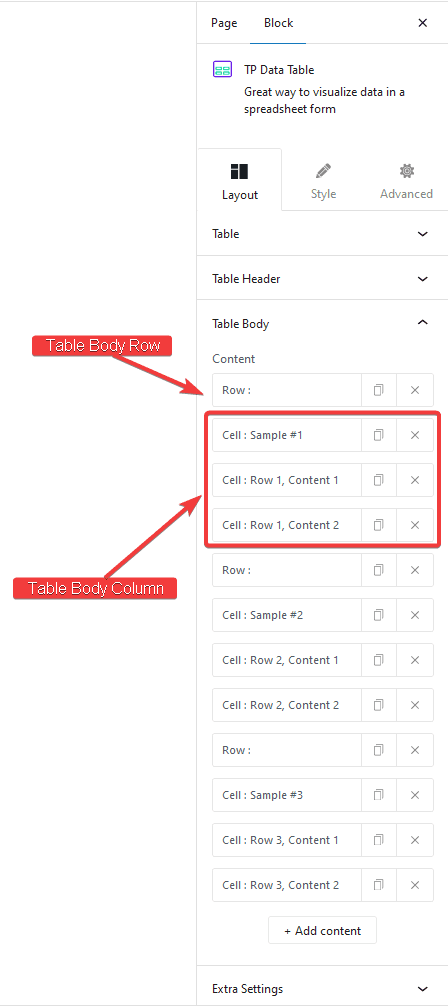
5. Open the first item, and make sure the Action dropdown is set to Cell Content.
From the Content tab, you can add the content for the cell in the Text field.
From the Icon tab, you can add an image or icon to the table content.
Then from the Advanced tab, you can manage the content alignment, Column Span (colspan), Row Span (rowspan).
We’ll highlight the first column of the comparison table to make it stand out. To do that, select Yes from the Mark this cell as a Table Heading? dropdown.
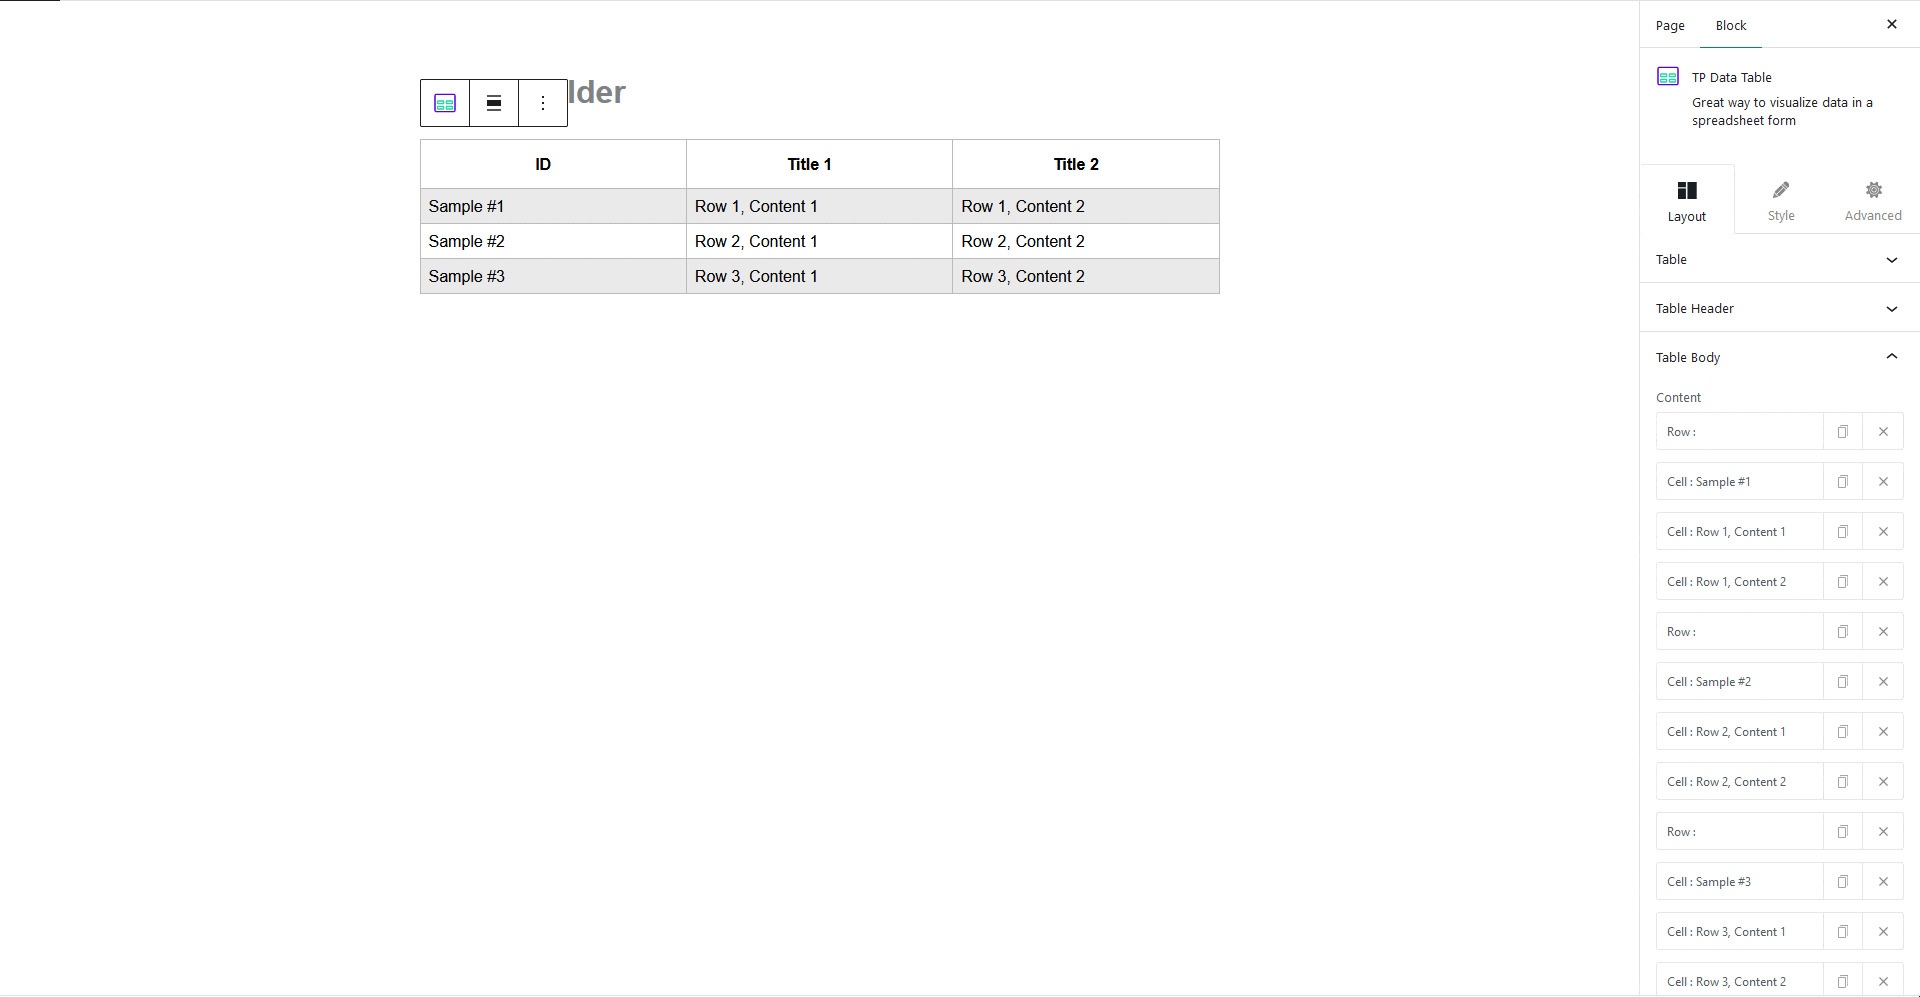
You can follow the same process to edit other cells in the row. But make sure to select No from the Mark this cell as a Table Heading? dropdown.
This will make the first column focused.
You can repeat steps 4 and 5 to create the entire comparison table.
Click the + Add Item button to add more rows and cells in the table body.
Note: To add a row in the table header or body, you have to initiate a row first.
Note: Make sure the number of columns in the table header and body is the same.
Also, check How to Make Data Tables Mobile Responsive in WordPress.